In the case of water containing chloride (chlorine or sea water)
the risk of corrosion increases in stagnant water conditions
(also with an increase in temperature and decrease of pH
value). In these cases, if the pump remains inactive for long
periods, it must be emptied completely.
For good measure, as for temporary operation with dirty liquids,
run the pump briefly with clean water to remove deposits.
When the pump remains inactive it must be emptied
completely if there is a risk of freezing (fig.4).
Before starting the motor again fill the pump completely with
liquid (see section 6.2.) and make sure the shaft is not jammed
by encrustation, sticking of the faces of the mechanical seal or
other causes. In the event that the shaft cannot be moved by
hand, the pump has to be dismantled and cleaned.
Disconnect electrical power before any servicing
operation and make sure the pump cannot be
accidentally switched on.
8. Dismantling
Before dismantling, close the gate valves in the suction and
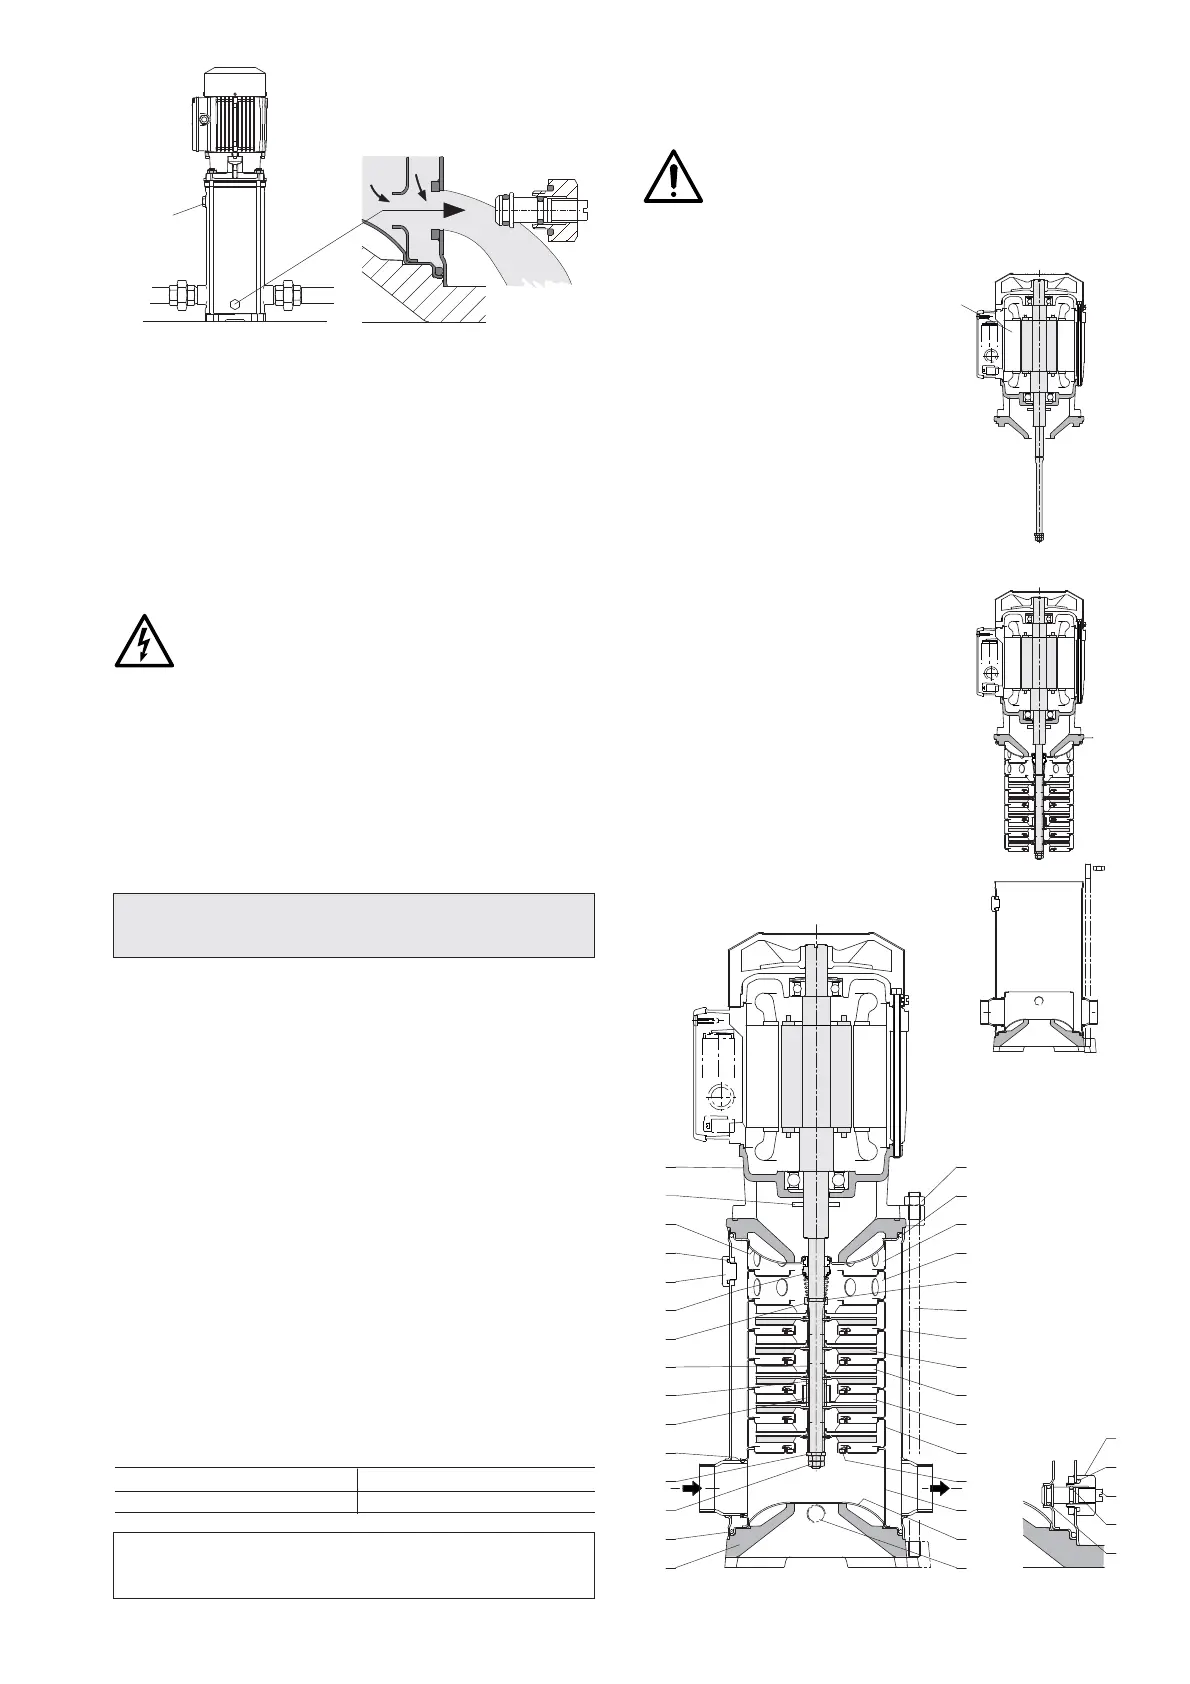
delivery pipes and empty the pump casing (fig. 4).
For dismantling and re-assembly refer to the section drawing.
By removing the nuts (61.04) from the tiebolts (61.02) the motor
can be taken out complete (99.00), with all internal parts of the
pump without removing the pump casing (external jacket 14.02)
from the pipeline.
8.1 Replacing the mechanical seal
Make sure the spring of the new mechanical seal is set with
the direction of the winding suitable for the direction of rotation
of the shaft: i.e. clockwise when seen from the stationary ring.
Make sure that all parts with which the mechanical seal comes into
contact are perfectly clean and free from any burr or cutting edges.
The seal rings in EPDM (Ethylene-Propylene) must never
come into contact with oil or grease. To facilitate the mounting
of the mechanical seal, lubricate the shaft, the seating of the
stationary part and the seal rings with clean water or any other
lubricant compatible with the material in which the seal rings
are made.
Use every precaution so as not to damage the seal surfaces
with blows or angular impact.
9. Remounting
To remount the components follow the dismantling procedure in
inverse order (see section 8.).
When inserting the complete motor (99.00) with the internal
parts of the pump into the external jacket (14.02), make sure
that the first stage casing (25.01) in the suction casing (16.00)
and the stage casing with bearing (25.03) in the first stage ca-
sing (25.01) are correctly inserted.
Check the state of the o-rings (14.20) and replace them of they
are damaged. Make sure that the o-rings (14.20) are correctly in-
serted on their
seats on the pump casing (14.00) and upper cover
(34.02). Lubricate
the seal rings with clean water or any other com-
patible lubricant.
9.1. Tightening torque
impeller nuts (28.04) nuts (61.04) on tie-bolts
8 Nm 50 Nm
ATTENTION: the nuts (61.04) on the tie-bolts (61.02) must be
uniformly tightened with alternated crossover tightening pro-
cedure in diametrically opposite positions.
10. Spare parts
When ordering spare parts please quote their designation, position
number in the cross section drawing and rated data from the
pump name plate (type, date and serial number).
Any pumps that require inspection/repair must be
drained and carefully cleaned inside and outside
before dispatch/submission.
7
.