Fasten your Cambox
Preparation
Before glueing, it is recommended to place the fastener under your visor
in order to memorize its future position.!
Remove meticulously the paper protection of the velcro in such a way
that your fingers do not touch the adhesive part.
The velcro fastener needs to be stored during at least 4 hours in a temperate and non moist
atmosphere to ensure maximum grip of the glue.!
!
Maker sure that the velcro fastener support is in good condition and that there is no foreign
matter that could hinder the fastening of your camera. In that case, plan the replacement of
the velcro by a new one.
8
Stick the velcro fastener
Place the velcro fastener under the visor and press strongly on all the
surface in order to ensure a good fastening
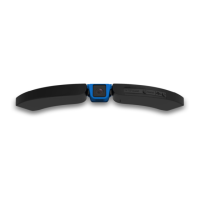
Attach your Cambox
Present the Cambox horizontally in front of
its velcro support.
Apply a pressure on the 3 Cambox points
as depicted in order to ensure a good
fastening between the 2 velcro strips.
Remove my Cambox
Grab the strap on the edge of the Cambox
wing and pull the strap upwards while doing
a circular movement towards the center of
the Cambox
Once the first wing is detached from its
velcro support, accompany the unfastening
process of the Cambox by applying the
same vertical and circular effort.
Remove the central part and apply the
vertical and circular effort towards the
extremity of the Cambox to complete the
removing operation
IMPORTANT !!
The wings of the Cambox can only be folded vertically (up to down). Make sure not to fold
them from front to back to prevent damages to the shell of your Cambox.