18
INSTALLATION
INSTALLATION
#415-R1
8-15-18 - JR
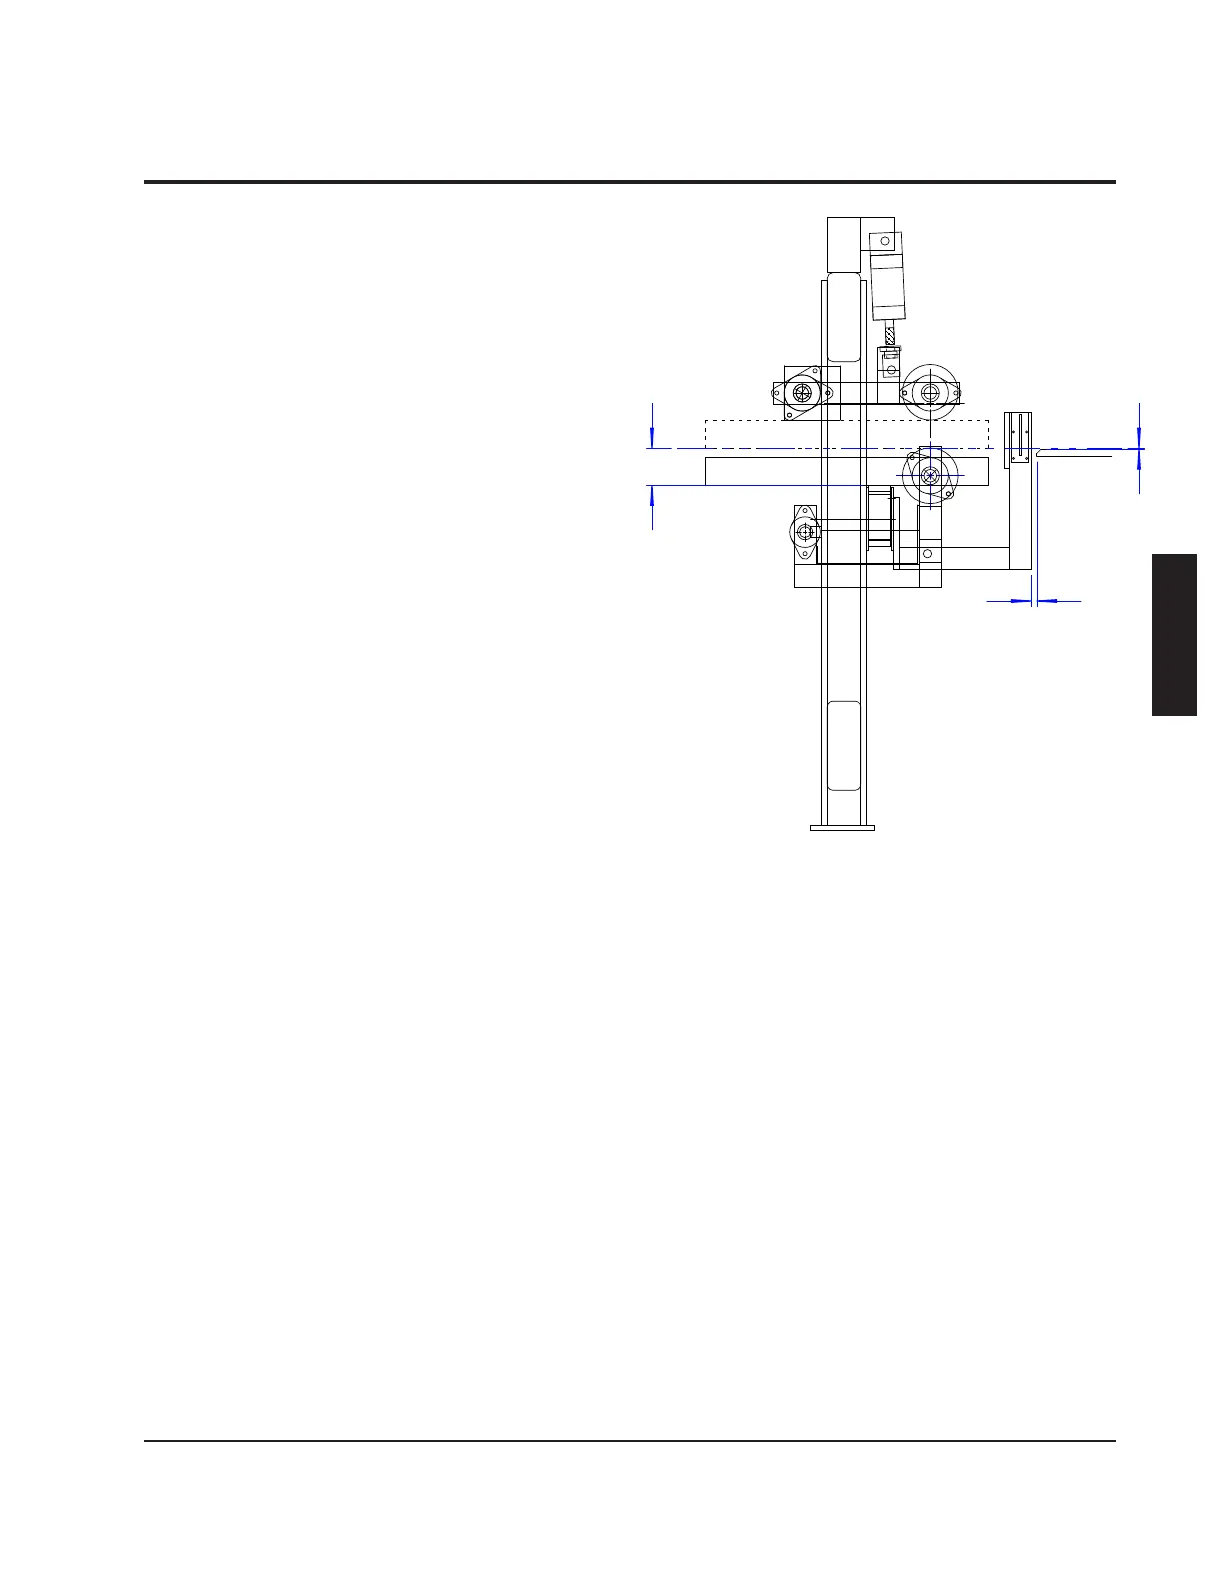
Final Positioning
Position the machine in front of the rip
saw so that the polyurethane rollers are
approximately centered on the track of the
saw. Leave approximately 1/2" between
the brackets for the light curtain and the
infeed end of the rip saw. Check that the
saw has been leveled properly. Place shims
(provided) under the Opti-Rip feet such that
the bottom of the board will feed 1/8" above
the saw feed chain. If you swap the hoses
on the lower pinch rolls cylinder temporarily,
you can raise the lower rollers without
electrical power on the machine. Note that
the board will be raised off of the belts by 3
3/8" before it is fed into the saw. Make sure
the polyurethane rollers are perfectly square
with the feed of the saw. If the ripsaw has
any kind of fence on its infeed, this should
rst be removed.
Position the Laser Stand
Position the laser stand so that the back of
the box enclosing the operator controls is 9
3/4" from the rst belt track.
Lag the Machine to the Floor
Lag the legs and Laser Stand to the oor.
Lag the saw to the oor as well.
Install the Lasers
Mount the lasers on the laser rack. Plug
each laser into a power supply. Lasers will
be aligned later. Moving lasers should be
positioned toward the top of the laser rack
and xed lasers should be positioned near
the bottom where they can be easily reached
by the operator.
1/8"
1/2"
3 3/8"
 Loading...