❍
❍
❍
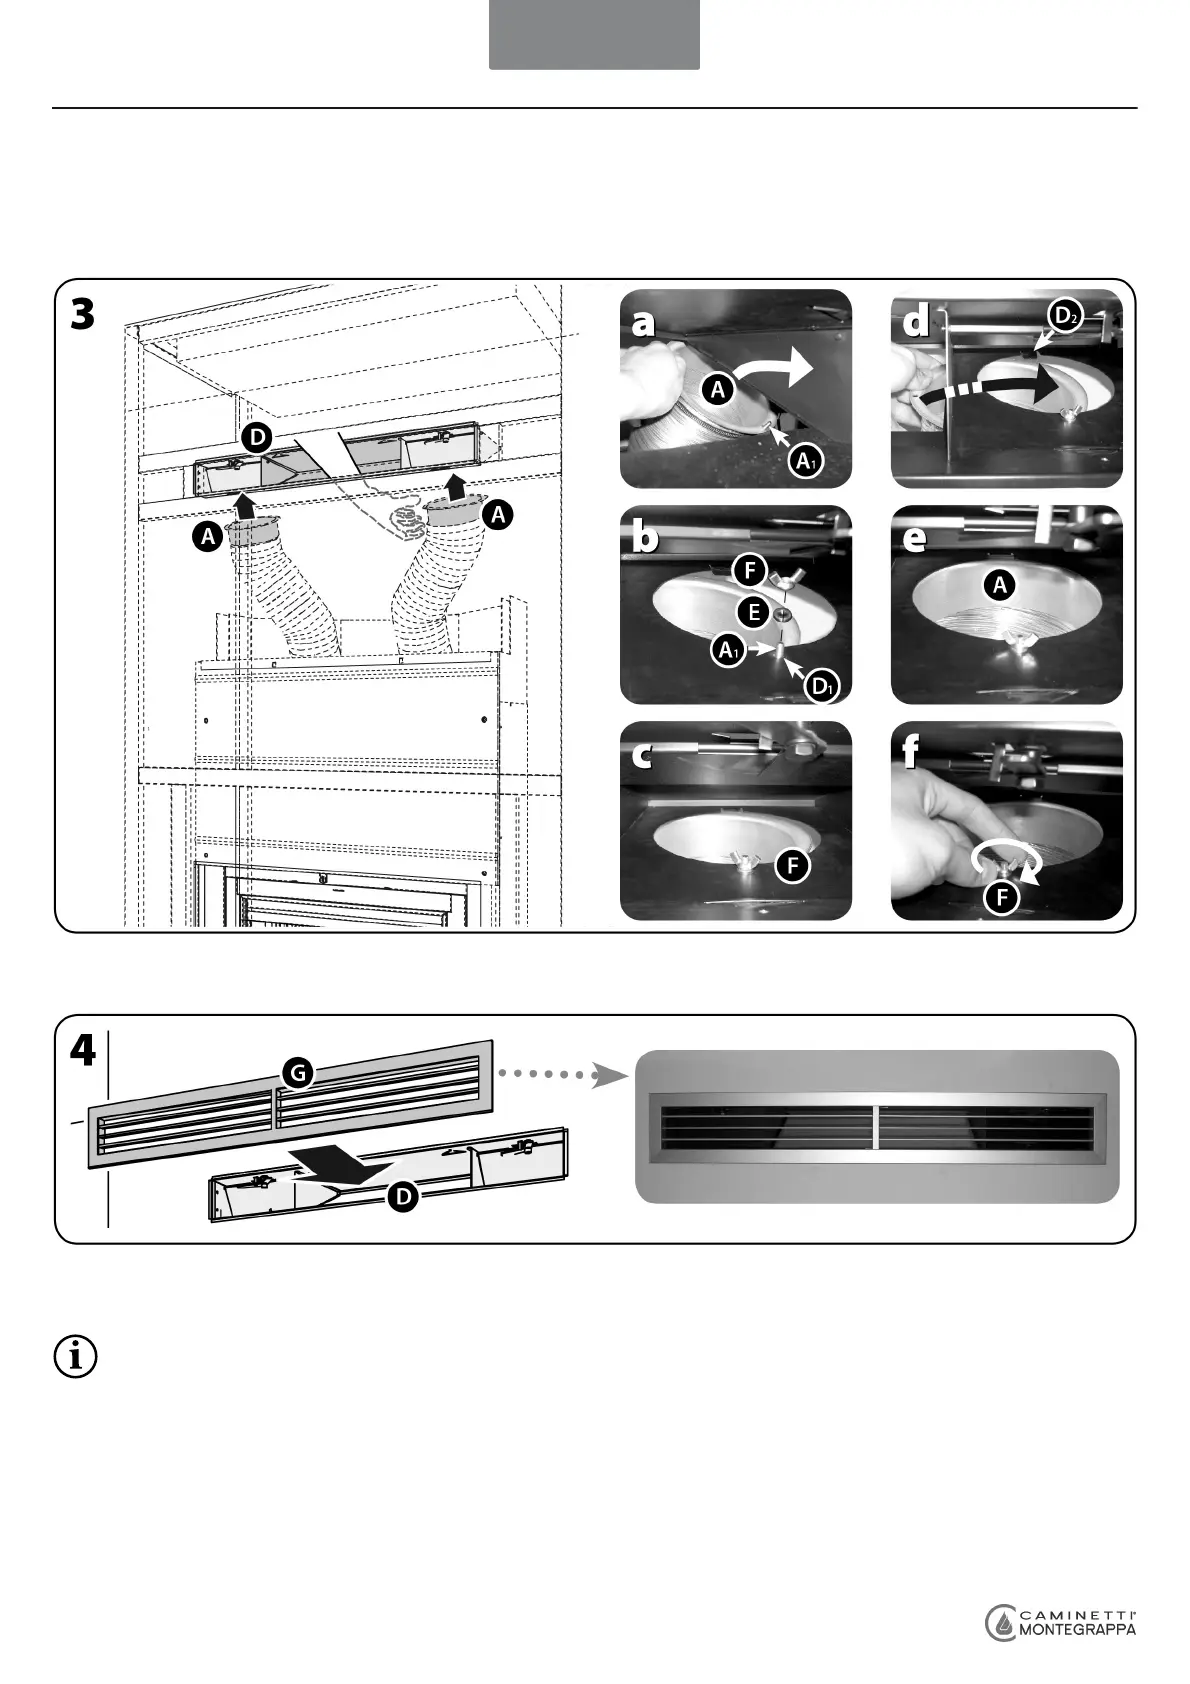
Insert the threaded pin [A1] of the union [A] in the hole of Ø 5 mm [D1] of the long hopper [D], then first insert the washer [E]
and then screw the winged nut M5 slightly [F].
Turn the union [A] until the rear part fits into the support tab [D2], slightly opened in advance.
Centre the union [A] in the hole of Ø 150 mm of the hopper [D], then screw the winged nut M5 [F] permanently.
Seeing as the appliance has 4 openings at the top, another two vents can be positioned also in adjacent rooms, provided the
flexible pipe has a short run (no more than 4 m), as straight as possible and efficiently insulated in the run outside the finishing
mantle or another "long hopper kit" can be positioned in an opposite room.
On the external sides of the long hopper you can control the flow of warm air, whereas the central part is always open to diffuse
the warm air by natural convection from inside the fireplace surround, to stabilise the temperature (see figure 4).
3. Put a hand in the central part of the long hopper [D] and get hold of the two unions [A] and:
4. Complete the installation by inserting the vent of 85x12,5 cm [G] in the long hopper [D], pressing slightly so that it fits into
place firmly.
Only with the Natural Convection unit version two of the warm air vents must be positioned in the room where the
appliance is installed and two in the opposite room.
ENGLISH
TECH 3
32