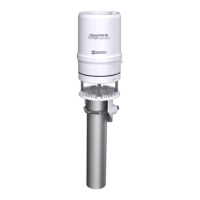
7. Press finished bird deterrent onto the ClimaVUE 50 funnel to at least the depth shown in
FIGURE 7-7 (p. 18).
NOTE:
You can bend the spikes to minimize the shadow on the pyranometer.
7.3 Wiring to the data logger
CAUTION:
To avoid shock or damage to the instrument, never apply power while wiring.
CAUTION:
Ensure that the ClimaVUE 50 is properly wired to the data logger before applying power.
Applying power when incorrectly wired could damage the ClimaVUE 50 beyond repair.
Connect the ClimaVUE 50 to the data logger in the order shown in Table 7-1 (p. 19).
Table 7-1: Wire color, function, and data logger connection
Wire color Wire function Data logger connection
White SDI-12 signal
C
1
or U configured for SDI-12
1
Clear Shield ⏚ (analog ground)
Brown Power 12V
Black Power ground G
1
C and U terminals are automatically configured by the measurement instruction.
If multiple SDI-12 sensors are connected to a data logger, Campbell Scientific recommends using
separate terminals when possible. However, multiple SDI-12 sensors or multiple ClimaVUE 50
sensors can connect to the same data logger control or U terminal. Each must have a unique
SDI-12 address. Valid addresses are 0 through 9, a through z, and A through Z. The ClimaVUE 50
ships with a default SDI-12 address of 0.
For the CR6 and CR1000X, triggering conflicts may occur when a companion terminal is used for
a triggering instruction such as TimerInput(), PulseCount(), or WaitDigTrig(). For
example, if the ClimaVUE 50 is connected to C3 on a CR1000X, C4 cannot be used in the
TimerInput(), PulseCount(), or WaitDigTrig() instructions.
ClimaVUE 50 Compact Digital Weather Sensor 19

 Loading...