EasyManua.ls Logo

Canon CanoScan 9000F - User Manual

Canon CanoScan 9000F
19 pages
Print Icon
To Next Page IconTo Next Page
Loading...
Quick Start Guide
Quick Start Guide
QT5-2915-V01 ©CANON INC. 2010 PRINTED IN THAILANDXXXXXXXX
Please read this guide before operating this scanner. After you finish reading this guide,
store it in a safe place for future reference.
Table of Contents
Safety Precautions.............................. 1 Using the Scanner Buttons ................. 10
Package Contents............................... 3 Scanning with MP Navigator EX......... 11
Installing the Software......................... 4 Scanning Film ..................................... 12
Preparing the Scanner........................ 7 Specifications...................................... 16
Try Scanning....................................... 9
CANON U.S.A. INC.
One Canon Plaza, Lake Success, NY 11042 U.S.A.
CANON AUSTRALIA PTY LTD
1 Thomas Holt Drive, North Ryde, Sydney N.S.W. 2113, Australia
CANON NEW ZEALAND LIMITED
Akoranga Business Park, Akoranga Drive, Northcote, Auckland, New Zealand
Question and Answer IconNeed help?

Do you have a question about the Canon CanoScan 9000F and is the answer not in the manual?

Summary

Installing the Software

Initial Software Setup

Steps for inserting the CD, running the setup, and handling initial dialog boxes.

Software Installation and Configuration

Guidance on selecting installation type, accepting agreements, and following wizard prompts.

Preparing the Scanner

Unlocking the Scanner

Procedure for unlocking the scanner's transport lock and preparing it for use.

Connecting the Scanner

Instructions for connecting the scanner to the computer and power source.

Try Scanning

Executing a Basic Scan

Steps for selecting scan settings and initiating the scanning process via MP Navigator EX.

Scanning with MP Navigator EX

Starting MP Navigator EX

Instructions on how to launch the MP Navigator EX software for scanning tasks.

Scanning Film

Film Preparation and Insertion

Steps to prepare the scanner, insert film strips/slides into guides, and use film retainer.

Overview

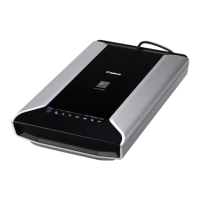
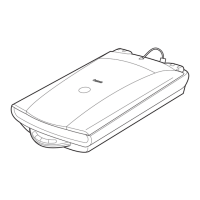
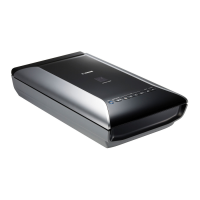
The Canon CanoScan 9000F is a flatbed scanner designed for scanning various document types, including photos, documents, and different film formats. It offers a range of features to simplify the scanning process, from automatic document type discrimination to specialized film scanning capabilities.

Function Description

The primary function of the CanoScan 9000F is to convert physical documents and film into digital images. It supports scanning of both reflective materials (like photos and paper documents) and transparent materials (such as 35mm film strips, 35mm slides, and 120 format film). The scanner is equipped with a CCD 12-line color sensor and a White LED light source, ensuring high-quality image capture.

The device integrates with Canon's MP Navigator EX software, which serves as a central hub for various scanning tasks. This utility allows users to composite images, utilize the scanner driver (ScanGear) for advanced settings, and correct or edit scanned images. The software provides different modes, including "Scan/Import Documents or Images," "View & Use Images on your Computer," and "Custom Scan with One-click," catering to diverse user needs.

A key feature of the CanoScan 9000F is its array of scanner buttons, which enable quick execution of common functions without needing to interact extensively with the computer software. These buttons include:

  • AUTO SCAN Button: Automatically discriminates the document type, scans, and saves with appropriate settings.
  • PDF Buttons (Color, Black & White, Custom, Finish): Facilitate the creation of PDF files. The Color and Black & White buttons scan images in A4 or Letter size at 300 dpi by default. The Custom button allows for user-specified settings, while the Finish button concludes the operation and saves the scanned image as a PDF.
  • COPY Button: Prints (copies) the scanned image using a connected printer.
  • E-MAIL Button: Attaches the scanned image to a new email message.

Usage Features

The CanoScan 9000F is designed for user-friendliness, with clear instructions for setup and operation.

Installation and Setup: Before connecting the scanner to a computer, users must install the bundled software from the provided Setup CD-ROM. This includes ScanGear (the scanner driver), MP Navigator EX (utility software), Solution Menu (menu panel software), and ArcSoft PhotoStudio (image editing software). An On-Screen Manual is also included for detailed guidance and troubleshooting. For Windows users, specific steps are outlined for different operating systems, including handling AutoPlay dialogs and User Account Control prompts. Macintosh users follow a similar process, with instructions for double-clicking the Setup icon and entering administrator credentials. After installation, users are prompted to restart their computer (for Windows) or the Solution Menu icon is registered in the Dock (for Macintosh).

Preparing the Scanner: The scanner comes with shipping tapes that need to be peeled off. Before initial use or transport, the scanner lock switch must be slid towards the unlock mark to release the scanning unit. When transporting the scanner, the lock switch should be moved to the lock mark to secure the scanning unit and prevent damage. The document cover is designed to open temporarily at an angle of about 50 degrees for easy access.

Connecting the Scanner: Connecting the scanner involves a specific sequence:

  1. Connect the scanner to the computer using the supplied USB cable.
  2. Connect the supplied power cord to the scanner.
  3. Plug the power cord into an electrical outlet.
  4. Press the ON button to power on the scanner. It is crucial to follow this order to prevent malfunctions. Only the supplied USB cable and power cord should be used. When turning off the scanner, the ON button should be pressed until the POWER lamp goes off, and then the power cord should be unplugged.

Scanning Documents and Photos: For general scanning, the protective sheet on the document cover should be in place. Documents or photos are placed face down on the platen glass, at least 1 cm (0.4 in.) away from the edges. MP Navigator EX is then launched, and users can select "Photos/Documents (Platen)," specify "Color Photo" as the document type, and click "Scan." After scanning, the image can be saved. During scanning, it is important not to move the scanner or look directly at the light source.

Scanning Film: The CanoScan 9000F offers specialized film scanning.

  1. Remove Protective Sheet: The protective sheet must be removed from the document cover and stored safely. It should be replaced when not scanning film to protect the light source.
  2. Insert Film into Film Guide:
    • 35 mm Film Strips: The film holder on the film guide is opened, and the film is placed face down. The film holder is then closed securely.
    • 35 mm Slides: Slides are placed face down in the film guide.
    • 120 Format Films: The film retainer sheet is removed from the film holder, the film is placed face down, and the film holder is closed. When placing multiple 120 format films, a gap of 5 mm (0.2 in.) or greater should be left between them.
    • For all film types, the film guide's tab must be aligned with the FILM symbol on the platen glass.
  3. Using Film Retainer Sheet: For curled film strips that may stick to the platen glass and cause "Newton Rings," a film retainer sheet can be inserted beneath the film (glossy side up). If Newton Rings persist, the film strip can be turned over and placed on top of the film retainer sheet to hold down the edges. The glossy side of the film retainer sheet (without illustration) should always face the film to prevent damage.
  4. Initiate Film Scan: After placing the film, the document cover is closed. MP Navigator EX is started, and "Film" is selected. Users can preview the scan, select the desired frames, and then click "Scan." It is advised to use a blower brush to remove dust from film and to handle film by its edges to avoid fingerprints. The Calibration Slot on the Film Guide must not be obstructed, as this can lead to incorrect color scanning. Film strips should not be left in the Film Guide for extended periods due to potential heat damage. After film scanning, the protective sheet should be reinserted into the document cover.

Maintenance Features

The manual provides essential maintenance guidelines to ensure the scanner's longevity and optimal performance.

Cleaning: When cleaning the scanner, the power cord must always be unplugged. A soft, dry cloth should be used for wiping. For stubborn dirt, a cloth damped with water and wrung well can be used, followed by wiping off moisture with a dry cloth. Flammable liquids such as alcohol, benzene, or thinners should never be used, as they can damage internal electrical parts or cables and pose a fire or electrical shock risk.

General Handling:

  • Avoid Disassembly/Modification: Users are warned not to take apart or modify the scanner or its supplies, as this can lead to fire or electrical shock.
  • Environmental Conditions: The scanner should not be placed in areas with high humidity, direct sunlight, high temperatures, or near flame sources. It should also be kept away from shaky or unstable surfaces to prevent falls and injuries. Adequate space (approximately 20 cm or 8 inches) should be left around the scanner for proper ventilation.
  • Power Cord Care: The power cord should not be subjected to heavy objects, pulling, excessive bending, twisting, or tying. It should be unplugged periodically and cleaned to remove dust from the outlet area. Plugging/unplugging with wet hands is prohibited. Overloading electrical outlets with too many plugs should be avoided. The power cord must always be fully plugged in.
  • Foreign Objects: Flammable sprays, water, liquids, or metallic pieces (like paper clips or staples) should not enter the scanner, as they can cause fire or electrical shock. If any foreign object enters the scanner, the power cord should be immediately unplugged, and customer support contacted.
  • Document Cover Handling: The document cover should be released only when it completely opens or closes to prevent pinching hands or damaging the scanner.
  • Weight Restrictions: Heavy objects should not be placed on the scanner or on the platen glass. Applying excessive pressure (more than 2.0 kg or 4.4 lbs.) to the document cover, platen glass, or light source glass can cause the glass to break and result in injury. Dropping heavy books or objects on the scanner, or subjecting the platen glass and light source glass to shock, can also cause breakage.
  • Long-Term Storage: For extended periods of non-use, the power cord should be unplugged for safety.
  • CD-ROM Usage: The supplied CD-ROM should not be used in regular CD players, as it can produce excessively loud sounds that may cause hearing damage.
  • Temperature Fluctuations: The scanner should not be set up in areas with excessive temperature fluctuations, nor moved directly from low-temperature to high-temperature areas, as condensation can cause image errors. The scanner needs time to adapt to new conditions.
  • Lightning: If lightning strikes in the vicinity, the power cord should be unplugged, and the scanner should not be used.

These guidelines ensure safe and effective operation, extending the life of the Canon CanoScan 9000F.

Canon CanoScan 9000F Specifications

General IconGeneral
Color scanningYes
Duplex scanning-
Input color depth48 bit
Maximum scan size216 x 297 mm
Output color depth24 bit
Enhanced scan resolution19200 x 19200 DPI
Optical scanning resolution4800 x 4800 DPI
Scanner typeFlatbed scanner
Product colorBlack, Silver
Sensor typeCCD
Button functionsScan
Daily duty cycle (max)- pages
USB version2.0
Standard interfacesUSB 2.0
Mac operating systems supportedMac OS X 10.4 Tiger, Mac OS X 10.5 Leopard, Mac OS X 10.6 Snow Leopard
Windows operating systems supportedWindows 2000, Windows 2000 Professional, Windows 7 Home Basic, Windows 7 Home Basic x64, Windows 7 Home Premium, Windows 7 Home Premium x64, Windows 7 Professional, Windows 7 Professional x64, Windows 7 Starter, Windows 7 Starter x64, Windows 7 Ultimate, Windows 7 Ultimate x64, Windows Vista Business, Windows Vista Business x64, Windows Vista Enterprise, Windows Vista Enterprise x64, Windows Vista Home Basic, Windows Vista Home Basic x64, Windows Vista Home Premium, Windows Vista Home Premium x64, Windows Vista Ultimate, Windows Vista Ultimate x64, Windows XP Home, Windows XP Home x64, Windows XP Professional, Windows XP Professional x64
Bundled softwareAdobe Photoshop Elements5, ArcSoft PhotoStudio, MP Navigator EX
Input voltage100-240 V
Power supply typeAC
AC input frequency50 - 60 Hz
Power consumption (standby)0.9 W
Power consumption (typical)15 W
Operating temperature (T-T)10 - 35 °C
Operating relative humidity (H-H)10 - 90 %
Sustainability certificatesENERGY STAR
Weight and Dimensions IconWeight and Dimensions
Depth480.1 mm
Width271.8 mm
Height111.8 mm
Weight4581 g

Related product manuals