Do you have a question about the Canon CanoScan 9950F and is the answer not in the manual?
Verify all scanner components and software are present.
Install necessary drivers and applications for Windows and Macintosh.
Release the scanning unit's lock to prevent damage during operation.
Connect the scanner to the computer using the provided cables.
Perform a basic scan using ArcSoft PhotoStudio to verify operation.
Learn how to use the scanner's physical buttons for quick tasks.
Detailed instructions for scanning various film formats using the scanner.
This document provides a Quick Start Guide for the Canon CanoScan 9950F, a flatbed scanner designed for both document and film scanning. It outlines the initial setup, basic scanning procedures, and additional features, emphasizing the importance of software installation before hardware connection.
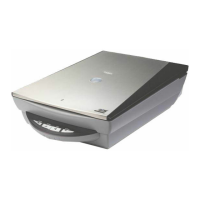
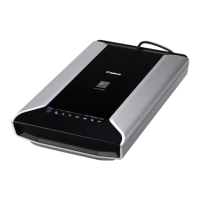
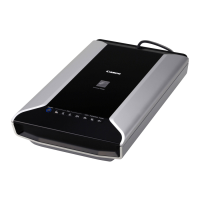
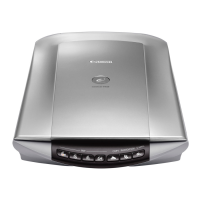
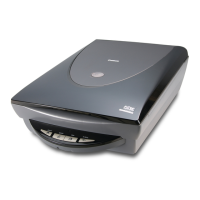
The Canon CanoScan 9950F is a versatile flatbed scanner capable of digitizing various types of originals, including photos, documents, and multiple film formats. Its primary function is to convert physical images and text into digital data for editing, storage, printing, or sharing. The scanner is equipped with a CCD 6-line color scanning element and a cold cathode fluorescent lamp, enabling high-resolution scans. It supports scanning of 35mm film strips and slides, 120 format films (strips or single frame), and 4"x5" format films, making it suitable for photographers and those needing to digitize a wide range of media. The device integrates with various software programs to facilitate different scanning tasks, from simple image capture to advanced editing and document management.
The CanoScan 9950F offers a user-friendly experience, starting with a clear installation process for its bundled software. Users are instructed to install the software (compatible with both Windows and Macintosh operating systems) before connecting the scanner to the computer. The software suite includes ScanGear CS (scanner driver), CanoScan Toolbox (scanning utility), ArcSoft PhotoStudio (image editing), ScanSoft OmniPage SE (OCR), Presto! PageManager (digital document management, Windows only), and Adobe Acrobat Reader (PDF file reader). Adobe Photoshop Elements is also provided on a separate CD-ROM for advanced image editing.
For basic scanning, users place a photo or picture on the scanner's glass, aligning its top edge with the alignment mark, and close the document cover. The process involves selecting the scanner as the source in the image editing software (e.g., ArcSoft PhotoStudio), choosing the type of original (Photo, Magazine, Newspaper, Document), previewing the scan, selecting the destination (e.g., Print or Image display), and finally, the output size before initiating the scan. The scanned image then appears in the PhotoStudio window, where it can be saved in various formats like JPEG.
A key feature of the CanoScan 9950F is its four convenient buttons located on the front panel: COPY, SCAN, PDF, and E-MAIL. These buttons allow users to perform common tasks with a single touch.
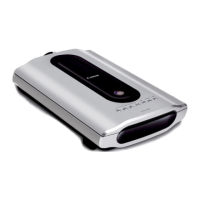
The scanner's ability to handle various film formats is a significant usage feature. For film scanning, users must first connect the FAU (Film Automatic Unit) cable to the scanner. The protective sheet from the document cover needs to be removed and stored safely when scanning films. Different film guides are provided for 35mm strips/slides, 120 format, and 4"x5" format films. Users are instructed on how to correctly position film strips or slides in the appropriate film guide, ensuring proper alignment and avoiding fingerprints or dust. For curled 120 format films, a film retainer sheet is supplied to prevent Newton Rings (patterns of rings) from appearing on the scanned image. The guide provides detailed instructions on how to use the retainer sheet, either beneath or on top of the film, depending on the film's curvature.
The device connects to a computer via a supplied USB interface cable. For Macintosh users, an IEEE1394 (FireWire) interface cable can also be used, but not simultaneously with the USB cable. The power switch on the scanner's front panel turns the device on, indicated by the Scan Lamp lighting up.
The manual highlights several maintenance-related instructions to ensure optimal performance and longevity of the scanner.
The manual also includes a system information form for users to record their operating environment details, which is crucial for customer support and warranty claims. This emphasizes the importance of documenting setup for future maintenance and support needs.
| Color scanning | Yes |
|---|---|
| Maximum scan size | 216 x 297 mm |
| Optical scanning resolution | 4800 x 9600 DPI |
| Sensor type | CCD |
| Compatible operating systems | Win 98 & Mac OS X v10.2 |
| USB version | 2.0 |
| Standard interfaces | FireWire 400, USB 2.0 |
| I/O ports | USB & FireWire |
| Dimensions (WxDxH) | 290 x 509 x 128 mm |
| Power consumption (typical) | 28 W |
| Operating temperature (T-T) | 10 - 35 °C |
| Operating relative humidity (H-H) | 10 - 90 % |
| Scanner type | Flatbed scanner |
| Weight | 5600 g |
|---|