22 Instruction manual C886G, C887G & C889G Please keep this instruction manual for future reference
VALVE ADJUSTMENT
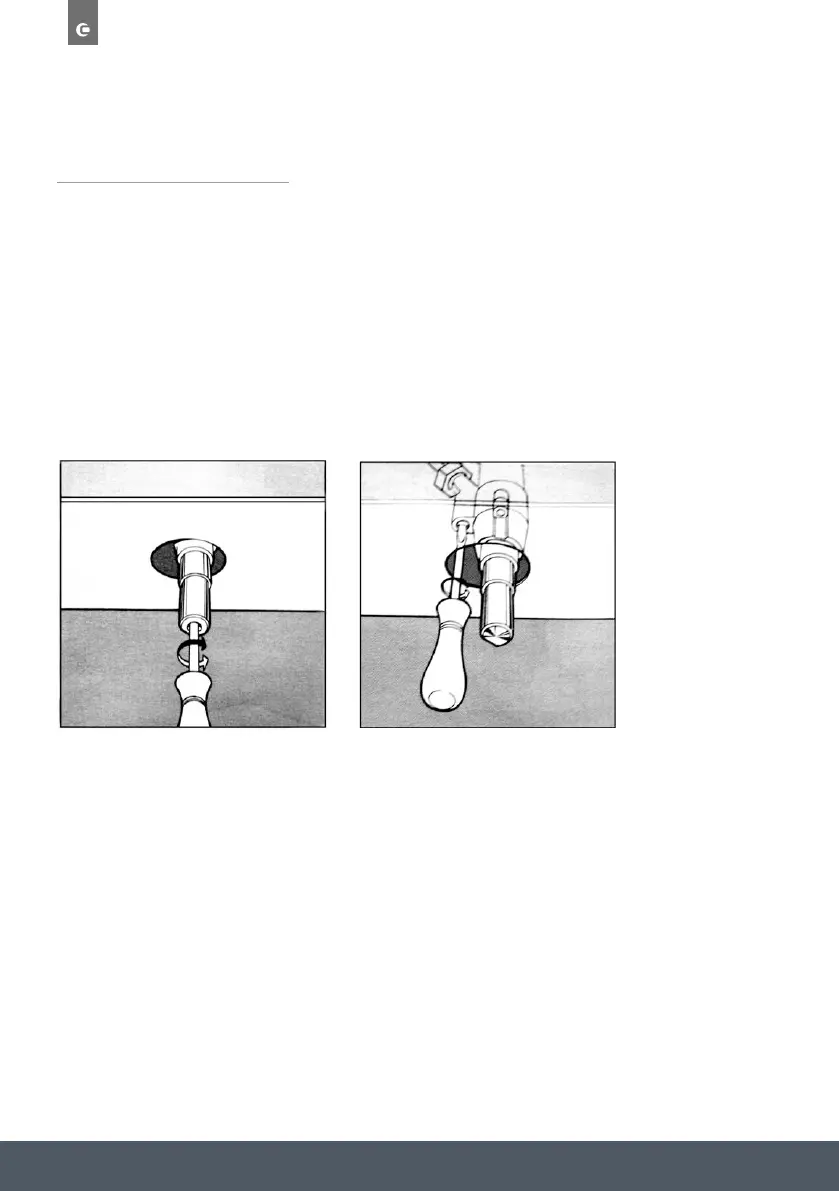
Valve adjustment should be done with the control knob set at Burner ON saving flame position.
Remove the knob, and adjust the flame with a small screwdriver (see fig.7 below).
Checking the adjusted flame: heat the burner at full open position for 10 minutes. Then turn the
knob into the minimum setting. The flame should not extinguish nor move to the injector. If it goes
off or moves over to the injector, readjust the valves.
FIG.7
NOTE:
It is up to the user to request converting the appliance to another gas type if so required by the
local conditions at a licensed gas fitter/service.
Replacement of burner injector: Loosen the injector with a dedicated
wrench(7).Fit the new injector, suitable for the required gas type (see table above for reference)。
After you have converted the cooktop to another gas type, make sure you have placed a label
containing that information on the appliance.
Adjustment of the reduced valve flow
Table2
Converting the
cooktop from LPG
to natural gas
Converting the
Cooktop from natural
Gas to LPG
Replace the burner
Injector according
To the guidelines in
table 1
Replace the burner
injector according
to the guidelines in
table 1
Loosen the adjustment
Spindle (see fig.7 below )
And adjust the flame
Loosen the adjustment
Spindle (see fig.7 below )
And adjust the flame
Valve adjustment
Valve adjustment should be done with the control knob set at Burner ON saving flame position.
Remove the knob, and adjust the flame with a small screwdriver (see fig.7 below).
Fig.7
Checking the adjusted flame: heat the burner at full open position for 10 minutes. Then turn the knob into the
minimum setting. The flame should not extinguish nor move to the injector. If it goes off or moves over to the
injector, readjust the valves.
Note.
It is up to the user to request converting the appliance to another gas type if so required by the local conditions at a
licensed gas fitter/ service.