12 Instruction manual PYR600 Please keep this instruction manual for future reference
Fix the hood to the wall using the screws supplied (Fig.7).
DUCTED VERSION
› Connect the lange to the air evacuation hole with
appropriate ducting.
› Make the electrical connection by inserting the plug into
the outlet.
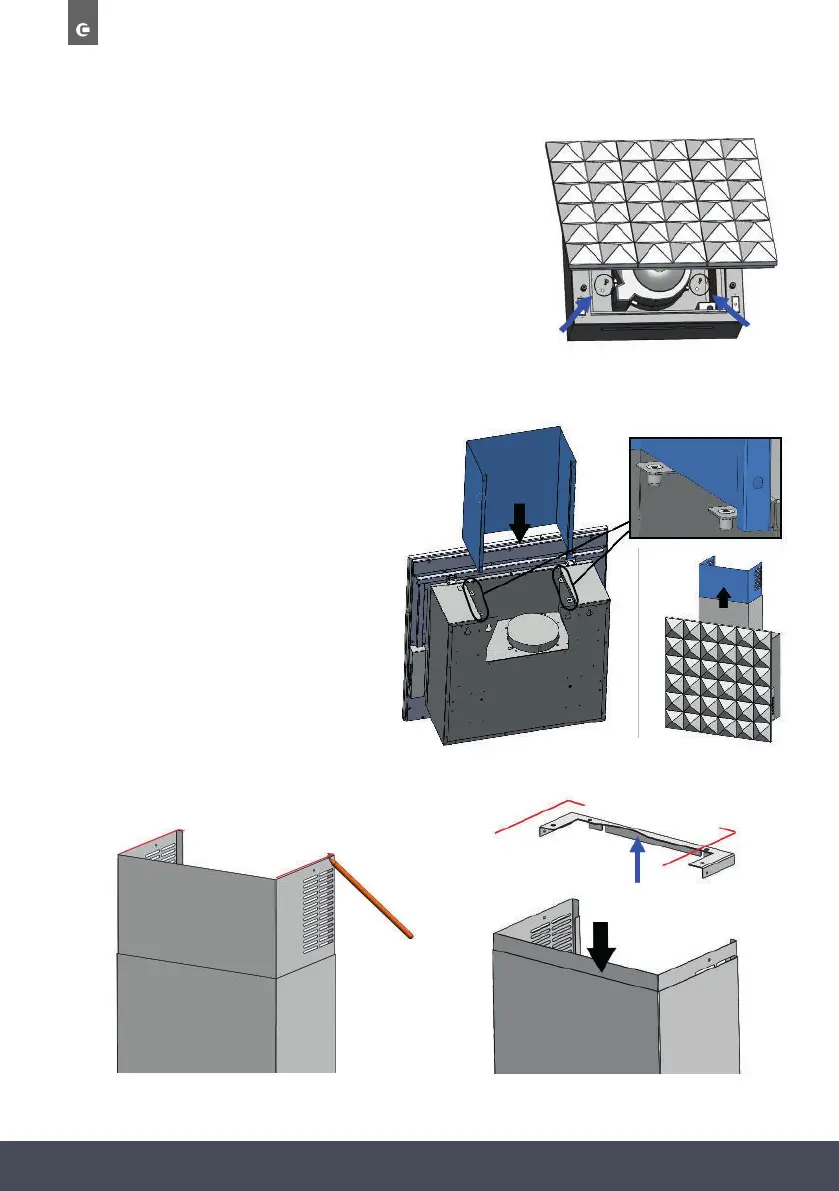
CHIMNEY INSTALLATION
› Take the inner and outer chimney
sections and place on the top of the
hood (Fig.8).
› Lift the internal stainless steel chimney
section to the chosen installation
height. Use a pencil to mark the
location (Fig.9).
› Lower the entire chimney and position
xing bracket in line with the marking
made (Fig.10).
Fix the hood to the wall using the screws
supplied (Fig.7).
Fig.9
Connect the lange to the air evacuation
hole with appropriate ducting.
g.
Make the electrical connection by inserting
the plug into the outlet.
CHIMNEYINSTALLATION
Take the inner and outer
chimney sections and place on
the top of the hood (Fig.8).
Lift the internal stainless steel
chimney section to the chosen
installation height. Use a
pencil to mark the location
(Fig.9).
Lower the entire chimney and
position fixing bracket in line
with the marking made
(Fig.10).
Fig.10
Fig.8
Fig.7
Fix the hood to the wall using the screws
supplied (Fig.7).
Fig.9
Connect the lange to the air evacuation
hole with appropriate ducting.
g.
Make the electrical connection by inserting
the plug into the outlet.
CHIMNEYINSTALLATION
Take the inner and outer
chimney sections and place on
the top of the hood (Fig.8).
Lift the internal stainless steel
chimney section to the chosen
installation height. Use a
pencil to mark the location
(Fig.9).
Lower the entire chimney and
position fixing bracket in line
with the marking made
(Fig.10).
Fig.10
Fig.8
Fix the hood to the wall using the screws
supplied (Fig.7).
Fig.9
Connect the lange to the air evacuation
hole with appropriate ducting.
g.
Make the electrical connection by inserting
the plug into the outlet.
CHIMNEYINSTALLATION
Take the inner and outer
chimney sections and place on
the top of the hood (Fig.8).
Lift the internal stainless steel
chimney section to the chosen
installation height. Use a
pencil to mark the location
(Fig.9).
Lower the entire chimney and
position fixing bracket in line
with the marking made
(Fig.10).
Fig.10
 Loading...