14 Instruction manual PYR600 Please keep this instruction manual for future reference
REAR DUCTED VERSION
If installing with rear ventilation, it is necessary to rst install the junction accessory supplied
(Fig.14) using the screws provided (Fig.15). Fix these screws from underneath (inside the hood).
If installing with rear ventilation, it is necessary to first install the junction accessory supplied
(Fig.15) using the screws provided (Fig.16). Fix these screws from underneath (inside the
hood).
REAR DUCTED VERSION
Fig.15
CONTROL PANEL
A: Light switch on/off
B: Motor switch - speed 1 / OFF
C: Motor switch - speed 2
D: Motor switch - speed 3
E: Motor switch - speed 4
F: 10-minute timer
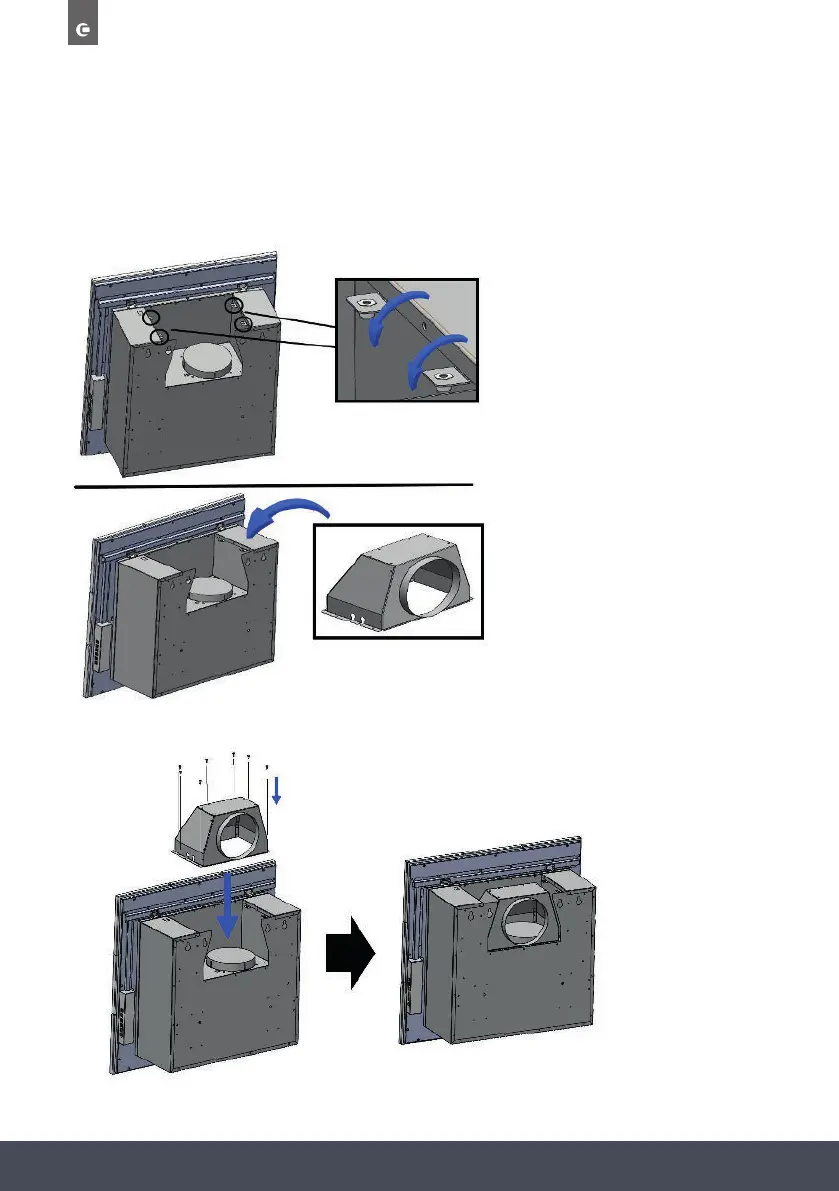
REAR DUCTED
To duct the appliance to the rear, remove the 18 screws from the motor support.
Take the metal support and motor out (Fig.11).
Rotate the motor to have the air outlet on the rear side and then fix the screws
previously removed (Fig.12).
RECIRCULATION VERSION
>Fix the bracket to the wall using the screws supplied (Fig.11).
>Lift up the internal chimney until it covers the bracket and secure it by fixing the screws
on both sides (Fig.12).
Fig.11
Fig.12
>e air outlet grill on top of Install th the hood. (Fig.13). The chimney sections are not
necessary when using the hood in recirculation mode.
>An activated charcoal filter is required when recirculating. This is to be installed behind
the grease filter and slots into place (Fig.14). Charcoal Filter CAP47CF can be purchased
directly from www.caple.co.uk or by calling our sales office on 0117 938 1900. This
should be replaced according to the effective use of the hood at least once every 6 months.
Fig.13
Fig.14
4
RECIRCULATING
If installing with rear ventilation, it is necessary to first install the junction accessory supplied
(Fig.15) using the screws provided (Fig.16). Fix these screws from underneath (inside the
hood).
REAR DUCTED VERSION
Fig.15