15
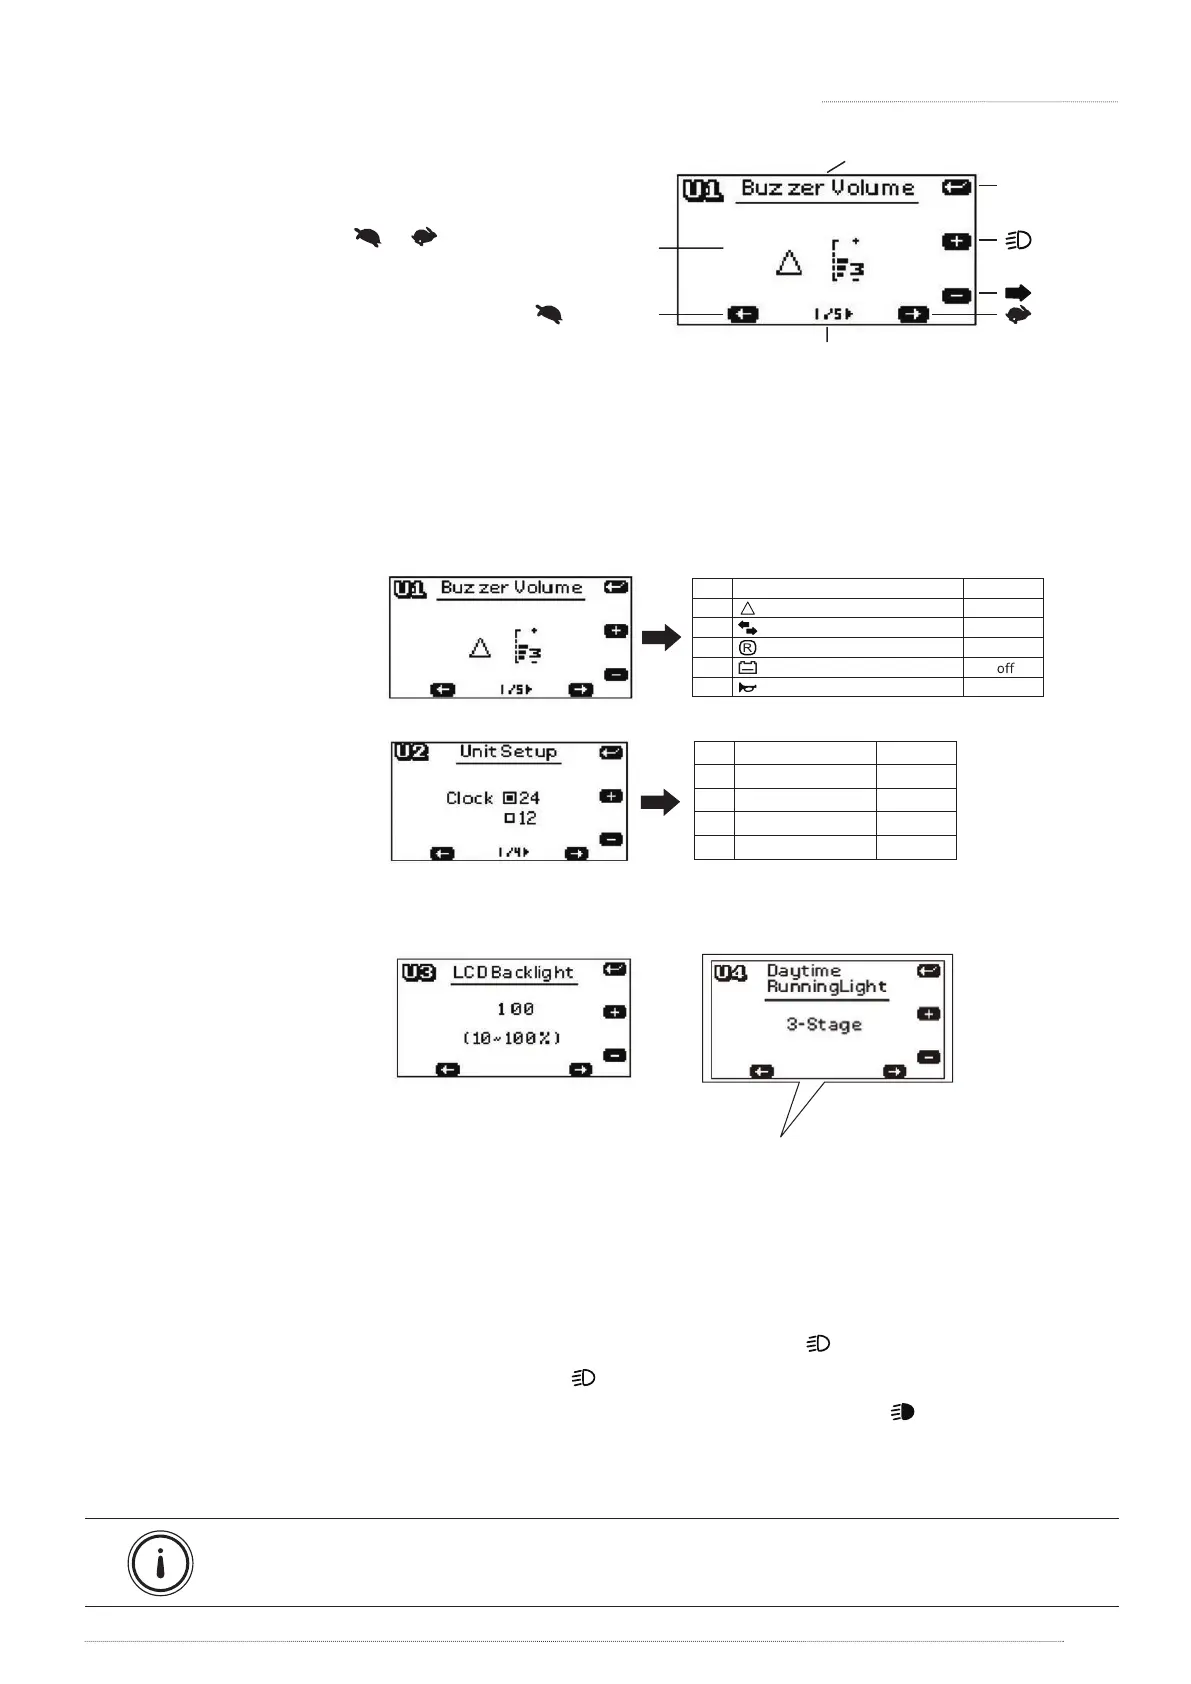
4.4 SETTING - USER DEFINE
1. Make sure the scooter (key) is o.
2. Press and hold both [ ] [ ] then
turn on the key. Keep holding the
buttons until the LCD screen is on.
3. Press [MODE] button to select the
modes you want to set up.
MODE
Page
next page
Set up
last page
Decreas e
Increase
Save/Exit /
Next Setu p
Figure 15
Exit /Save the setting:
» Setup mode will automatically quit after 15secs without pressing any button. Scooter will
save the setting and return to operation mode.
Unit setup (Figure 17):
Figure 17
Item
1/4
2/4
3/4
4/4
Initial value
24
km/h
km
o
C
Description
Clock 24 , 12
Speed km/h , mph
Odo km , hrs
Temp
o
C ,
o
F
Figure 18
Figure 19
LCD panel backlight (Figure 18):
Head light / Decorative light Modes (Figure 19):
[ON] In this default mode, the decorative light will be automatically on when scooter turns on.
[OFF] In this mode, the decorative light is primarily o and the head light will be on only if the headlight
button is pressed.
[Head Light] In this mode, the head light and decorative light will be on only if the headlight button is
pressed.
[3-Stage] In this mode, lights can be displayed in 3 stages by pressing [ ] button.
» Press to turn on the decorative light. The icon [ ] will be showed on the LCD screen.
» Press again to turn o the decorative light, and turn on the headlight. The icon [ ] will be showed
on the LCD screen.
» Press again to turn o both headlight and decorative light.
Suggestion: Refer to user manual when you set up the control panel.
4. OPERATION OF CONTROL PANEL
Buzzer Volume setup (Figure 16):
Item
1/5
2/5
3/5
4/5
5/5
Hazard Warning volume
Indicator warning volume
Reverse warning volume
Low battery warning volume
Horn volume
Initial value
3
3
3
5
Description
Figure 16
» Low battery warning
sound is controlled by
the controller.