Model 201CRD & 301CRD Advanced oil burners — Instruction manual
Carlin part number MN2301 Rev. 04/12/04
– 9 –
Pedestal-mounted burners
1. Check the diameter of the appliance opening. If larger than 4½ inches,
rebuild the opening so the open is reduced to 4½ inches maximum.
2. Insert the air tube into the appliance opening as in Figure 4. Do not attach
air tube to housing yet.
3. Slide the tube in until the end of the tube is flush with, or up to ¼ inch short
of, the inside of the combustion chamber.
4. Level the air tube using a spirit level.
5. Mark the air tube position with a pen or pencil around the circumference
of the tube.
6. Remove air tube from the opening
2. Prepare site • assemble burner • mount burner (continued)
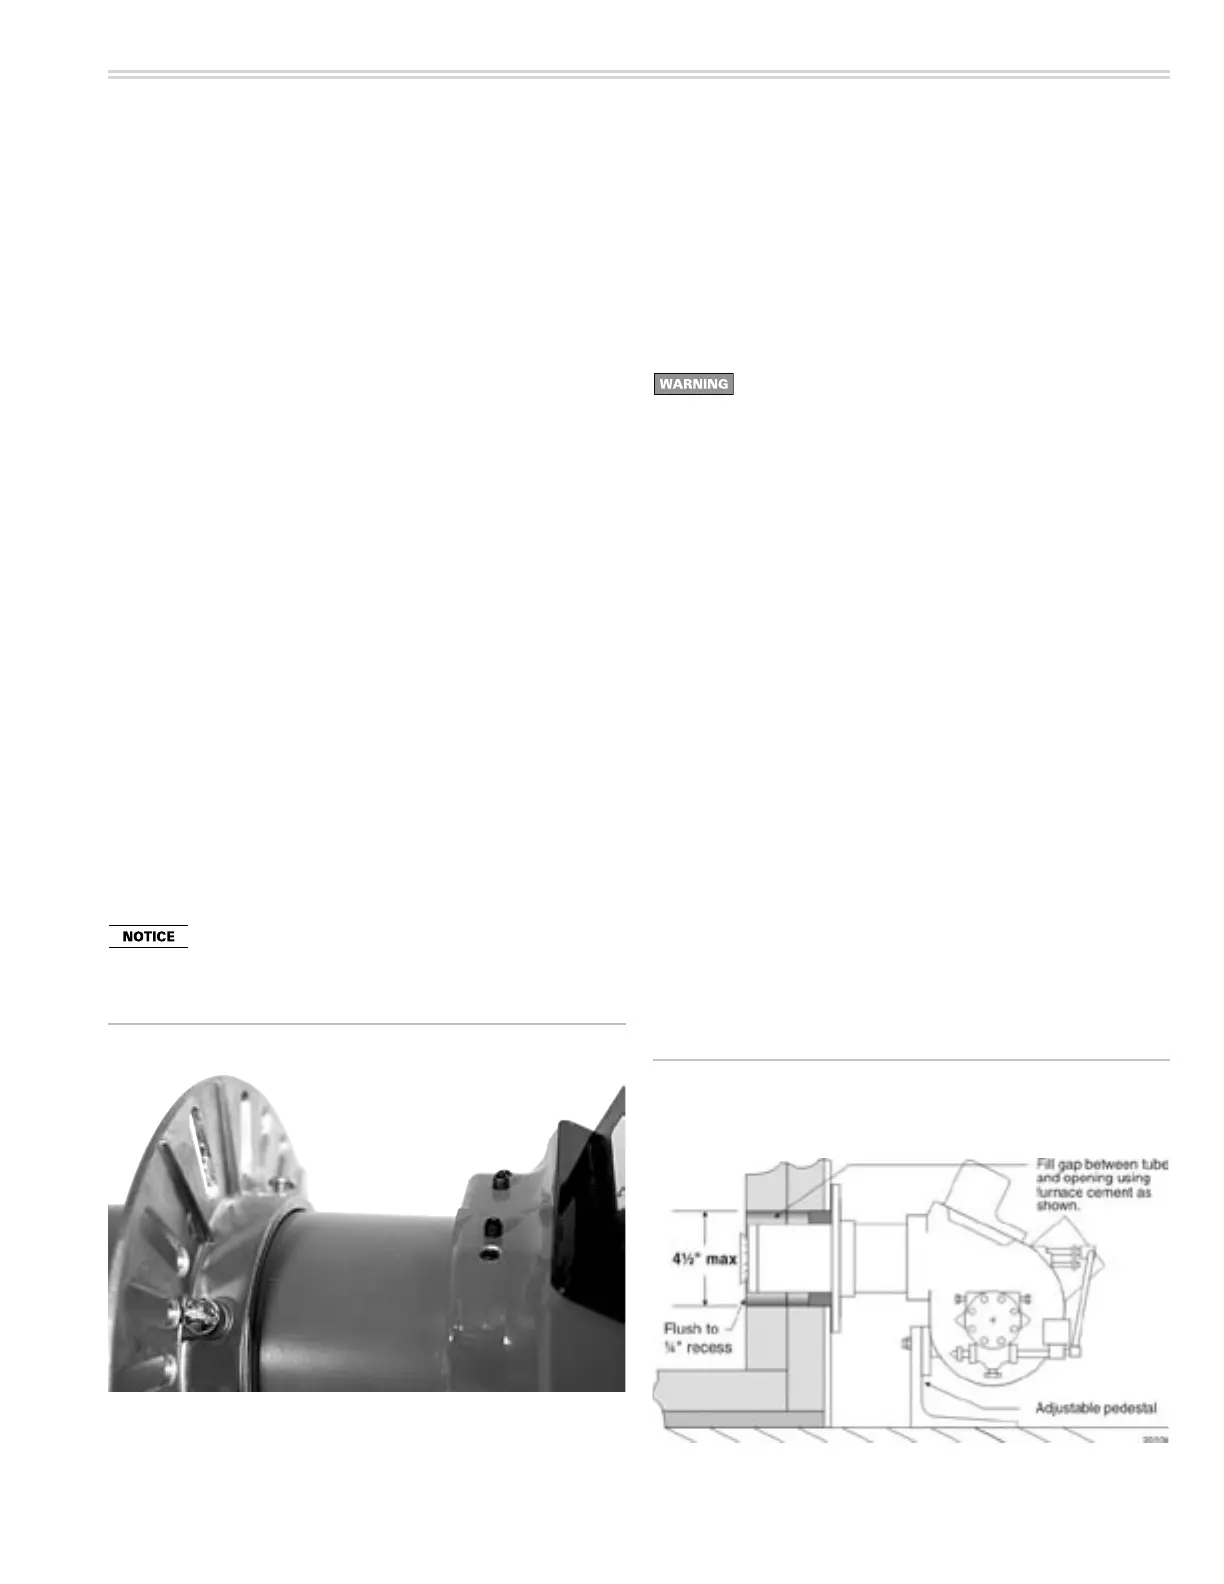
Attach air tube to housing
1. See Figure 5. Loosen the four hex set screws on the top front of the burner
chassis.
2. Open the ignitor cover plate by loosening the retainer screw on the left side
of the burner housing.
3. Swing the ignitor plate open.
4. Locate the drip hole in the burner air cone (301 burners) or throttle ring
(201 burners). Rotate the air tube so the drip hole is at the bottom.
5. Insert the air tube into the housing.
6. Make sure the air tube is inserted completely, butting against the air tube
socket ledge. If necessary, tap on the end of the air tube with a block of
wood until properly seated.
7. Secure the air tube by tightening the four hex set screws on the top front
of the burner housing.
On burners with welded flanges, you can bolt the air tube/
flange to the appliance first — then attach the housing to
air tube.
Figure 5 Attaching air tube to burner housing
Mount burner in appliance
Welded flange-mounted burner
1. Place gasket over burner air tube and insert burner into appliance opening.
Secure in place with hardware supplied with appliance.
Universal flange or pedestal mount — these insertion methods
are intended only for negative overfire pressure. For pressur-
ized firing, you must obtain a burner with a welded flange,
designed for use with the specific appliance. Failure to comply
could result in severe personal injury, death or substantial
property damage.
Adjustable flange-mounted burner
1. Place gasket over burner air tube.
2. Insert burner into appliance.
3. Verify burner is seated level and straight. Adjust flange slightly if neces-
sary.
4. Secure flange to appliance with hardware supplied with appliance.
Pedestal-mounted burner
1. Assemble the pedestal to the burner and tighten the bolt. Insert a screw
into each of the two holes in the pedestal feet if needed to level the as-
sembly.
2. Adjust the pedestal so the air tube is level and the center of the tube is at
the same height as the center of the appliance opening.
3. Tighten the pedestal bolt.
4. Insert the burner/air tube into the appliance opening until pen/pencil line is
even with appliance front (so end of air tube is flush with, or slightly short
of, the inside of the chamber).
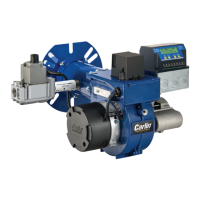
5. Seal the space around the air tube with furnace cement or equivalent
(Figure 6).
Figure 6 Seal opening around burner air tube when pedestal
mounting (burner shown with tube attached to housing
and installed)