EasyManua.ls Logo

Carlyle 5F Series User Manual

Default Icon
40 pages
To Next Page IconTo Next Page
Page #1 background imageLoading...
Page #1 background image
CA?LYL
I
oern-onrvr
I
c0MPRESSoRS
5F,H
Installation,
Start-Up and
Service
CONTENTS
Page
SAFETY CONSTDERATTONS . . . . . . . . . . . . . . . . . . I
INSTALLATION ..........1-13
.............
t
Step 1
-
Prepare for Installation
.
PREPARE
EQUIPMENT ROOM
SteD 2
-
Receive Machine .....
.
BEFORE UNLOADING
.
RIG
UNIT CAREFULLY
Step3
-
Install Unit . . . . . . . . . . . . . . . . . . . . . . . l0
.
TO MOUNT MOTOR ON BASE
.
TO MOUNT CARR]ER COMPRESSOR
UNITS
AND CONDENSER PACKAGES
.
TO MOUNT COMPRESSOR BASE ON
SUPPORT STANDS
Step 4
-
Assemble Befrigerant Piping
and ComDonenls
.
COMPRESSOR DISCHARGE PIP1NC
.
REFRICERANT
DRIER
Pressure-Relief Valves
nstructions
page
Suction Strainer ........... -................
26
Cylindor Head
and Valve Assemblies ........
27
Cyf inder and Unloader
Sleeves ... .. ... .. ....
2i
Connecting Rods and Pistons
............... 28
Capacity Control Operation . . . . . . . .
.
.
. . . . . . . 2 8
Capaciiy Control Inspecfion
and Service ...
3l
Crankshaft Inspection and Seruice
.....
pump-ena
rujin
*;;i"s .. . ......... .
.
Center Main B€aring ... ....
Seal-End Main Bearing ....
Crankshaft
Seal
Insoection
and
Replacem6nt
Accessodes
TROUBLESHOOTTNG ................
.....
37-39
SAFETY CONSIDERATIONS
Insrallarion..rafl up
3nd senrcrng
ofrhi,
eqJipmenr.rn
be hazardou\ due ru,y'rern pre""ure:.
elcLrricrl
Lompo-
nents and equipmen! localion.
Only trained,
qualitied
installation r d service
personnel
should install, starl-up o.
service this equipmenr.
When
working on this equipnrent,
observe
precautions
in
the literature, tags, stickers and labels alached
to rhe equip-
ment and any
other
.dier)
precdulion\
rhar xppl
t0
32
33
33
34
l4
l0
.
FELT FILTERS
Step 5
-
Install Multiple Compressors
.
EQUALIZING LINES
Step 6
-
Make Electrical Connections .
.
GENERAL
NOTES
.
ATTACH POWTR WIRES TO
COMPRESSOR MOTOR
.
CHECK MOTOR ROTATION
.
INSTALL
CRANKCASE
HEATER
Follow all safety codes.
Wear safety
glasses
and work
gloves.
Use care in handling, rigginS and setting
bulky
equipment.
13
.
BELT DRIVE
.
DIRECT DRIVE
.
HOT CHECK AND DOWELING
Step I
-
Assemble
Water Piping
.......
Srei i
-
erepare t-utti"itiori Svlie-
.......
.
INSTALL OPTIONAL EQUIPMENT
INSTALLATION
Step 1
-
Prepale for Installation
PREPARE EQUIPMENT ROOM
-
Locate compressor or
condensing unit in a well ventilated :lrea. If
nalural venii-
lation is inadequate, provide
forced venrilation
through
ductwork. Check applicable
code requiremenrs.
Provide fieeze up proleclion
for
water-cooled
condens
ers.
water
lines and accessories iffreezing temperatures
can
occur during winter
shurdown
periods.
Provide sufficient
clearance for removal of cornpLcssor
cylinderheads and valveplates. Allow
space on ihe oil
punp
end for
crankshaft removat as follows:
sF20,30,.+0.
and 60 compressors ...........20
in.
sH40.46.
60, and 66 compressors . .........
20 in.
5H80,86, 120,
and i26 compressors . . . 30
in.
(Conrinued
on
page
l0
)
Manulaclu.er .6ed€ lhe rlght lo di€conlinuB, or ch.ngo €l.ny tlne, 8p*lflc.llon.
or d€19.5 wllhour notl6lnd without Incunlnq
obttqatons,
c94lr
Pc302
cararog No.530-5os Pdnred in u.s.A. Fom sF,H-2ssr Psl 1290
R€pacas
5F,H.11s
ll
l3
.
CHECK
OIL LEVEL
.
RECOMMENDED O]LS
PREPABE FOB INITIAL START-UP ......,,.,,. 13
Evacuate, Dehydrate and Leak Test .......... 13
Refrigerant Charging ........................ 13
START-UP ................................ l3-16
Preliminary Steps ........................... l3
StartComDressor.,..
Check
Conirol ODeration
... ... ... ...
... .....
14
Check High-Pressure Switch ................ 14
Check Low-Pressure Switch ... ...... ........ .-
Adiust
Capacity Conlrol
(if
required) ......... 14
SCHEDULED
MAINTENANCE
....,,..,..,,. 17- 19
Check Lubrication Svstem ....... -......... - l7
Check Water-Cooled Heads .... ... ... ....... 19
SERV|CE ................................. r9 36
Service Notes . . .19
Lubrication System ... ...... ............. ... 19
Before
performing
service or
Naintenance operations
on unit. .hur o'f:rnJ
rag Indrn
powe-.upp\
r,, Lr
Elecrrical shock coLrld cru\c
fersonal
rniury.
Question and Answer IconNeed help?

Do you have a question about the Carlyle 5F Series and is the answer not in the manual?

Carlyle 5F Series Specifications

General IconGeneral
BrandCarlyle
Model5F Series
CategoryAir Compressor
LanguageEnglish

Summary

Safety Considerations

Installation Procedures

Prepare for Installation

Locating and preparing the equipment room for installation.

Receive Machine

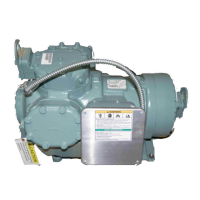
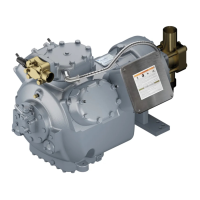
Checking unit nameplates, specifications, and examining for shipping damage.

Install Unit

Mounting motor on base and attaching compressor units/condenser packages.

Assemble Refrigerant Piping and Components

Connecting refrigerant piping, including discharge piping, filter drier, and felt filters.

Install Multiple Compressors

Installing equalizer lines for parallel compressor operation.

Make Electrical Connections

Attaching power wires to the compressor motor and checking rotation.

Check Compressor/Motor Alignment

Instructions for alignment of compressor and motor using belt or direct drive.

Assemble Water Piping

Instructions for assembling water piping for water-cooled units.

Prepare Lubrication System

Installing optional equipment and checking oil level and recommended oils.

Prepare for Initial Start-Up

Evacuating, dehydrating, leak testing, and charging the refrigerant system.

Start-Up Procedures

Preliminary Steps

Energizing crankcase heater and checking control circuit.

Start Compressor

Closing main power switch and checking oil level and pressure.

Check Control Operation

Verifying operation of high- and low-pressure switches.

Check High-Pressure Switch

Testing the cutout and cut-in points of the high-pressure switch.

Check Low-Pressure Switch

Testing the cutout and cut-in points of the low-pressure switch.

Adjust Capacity Control

Adjusting the capacity control for specific refrigerant applications.

Scheduled Maintenance

Check Lubrication System

Checking oil level before starting and adding oil as needed.

Check Water-Cooled Heads

Ensuring discharge gas temperature remains below 275 F.

Service and Repair

Service Notes

General notes on component removal and replacement parts.

Lubrication System Service

Information on oil pumps, oil pressure regulating valves, and oil return check valves.

Cylinder Head and Valve Assemblies

Inspecting and disassembling cylinder heads and valve assemblies.

Cylinder and Unloader Sleeves

Procedures for disassembling, inspecting, and reassembling cylinder and unloader sleeves.

Connecting Rods and Pistons

Removing, inspecting, and replacing connecting rods and pistons.

Capacity Control Operation

Explanation of how the capacity control unloader systems operate.

Crankshaft Inspection and Service

Procedures for inspecting and servicing crankshaft components.

Pump-End Main Bearing

Procedures for inspecting and replacing pump-end main bearings.

Center Main Bearing

Procedures for servicing the center main bearing and housing.

Seal-End Main Bearing

Procedures for disassembling, inspecting, and reassembling seal-end main bearings.

Crankshaft Seal Inspection and Replacement

Inspecting and replacing the crankshaft's rotating bellows-type seal.

Troubleshooting

A guide to diagnosing and resolving common compressor problems.

Related product manuals