Step 3—Heat Exchanger and Flue Pipe
Ordinarily, it is not necessary to clean heat exchanger or flue pipe
every year, but it is necessary to have your service technician
check unit before each heating season to determine whether
cleaning or replacement of parts is required.
If cleaning is necessary, the following steps should be performed:
1. Turn off all oil and electrical supplies upstream of furnace.
BURN HAZARD
Failure to follow this catuion may result in minor personal
injury.
If furnace has been in operation, some surfaces may be hot.
Allow time for unit to cool down.
2. Disconnect flue pipe.
3. Remove flue collar panel located in front part of furnace.
4. Remove baffle from secondary heat exchanger.
5. Disconnect oil line and remove oil burner from furnace.
6. Open 2 cleanout doors located in upper part of front panel of
furnace.
7. Clean secondary tubes, and primary cylinder with stiff brush
and vacuum cleaner.
8. Before re-assembly, the heat exchanger and combustion
chamber should be inspected to determine if replacement is
required.
9. After cleaning, replace baffle, flue collar plate, oil burner, and
close the 2 cleanout access doors. Reconnect flue pipe and oil
line.
10. Re-adjust burner for proper operation.
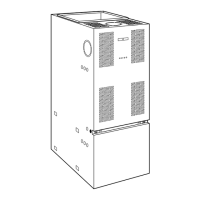
Step 4—Blower Removal
To remove blower from furnace:
1. Turn off all oil and electrical supplies upstream of furnace.
2. Remove burner access and blower door.
3. Remove blower retaining screw (on blower shelf).
4. Remove cover from control box and disconnect thermostat
and power wires from the board.
5. Slide blower forward on rails toward front of unit.
6. Reverse items 1 through 5 to re-install blower. Refer to wiring
diagram (See Fig. 3) of these instructions or diagram located
on inside of blower door to properly rewire unit.
15
 Loading...