4
Air Filters and Screens
Each unit is equipped with return air filters. If the unit has an econ-
omizer, it will also have an outside air screen. If a manual outside
air damper is added, an inlet air screen will also be present.
Each of these filters and screens will need to be periodically re-
placed or cleaned.
Filters
RETURN AIR FILTERS
Return air filters are disposable fiberglass media type. Access
to the filters is through the small lift-out panel located on the
rear side of the unit, above the evaporator/return air access
panel. (See Fig. 5.)
To remove the filters:
1. Grasp the bottom flange of the upper panel.
2. Lift up and swing the bottom out until the panel disen-
gages and pulls out.
3. Reach inside and extract the filters from the filter rack.
4. Replace these filters as required with similar replacement
filters of same size.
To re-install the access panel:
1. Slide the top of the panel up under the unit top panel.
2. Slide the bottom into the side channels.
3. Push the bottom flange down until it contacts the top of
the lower panel (or economizer top).
OUTSIDE AIR HOOD
Outside air hood inlet screens are permanent aluminum-mesh
type filters. Check these for cleanliness. Remove the screens
when cleaning is required. Clean by washing with hot low-pres-
sure water and soft detergent and replace all screens before re-
starting the unit. Observe the flow direction arrows on the side of
each filter frame.
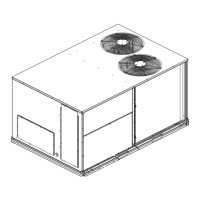
ECONOMIZER INLET AIR SCREEN
This air screen is retained by filter clips under the top edge of the
hood. (See Fig. 5.)
Fig. 5 — Filter Installation
To remove the filter, open the filter clips. Re-install the filter by
placing the frame in its track, then closing the filter clips.
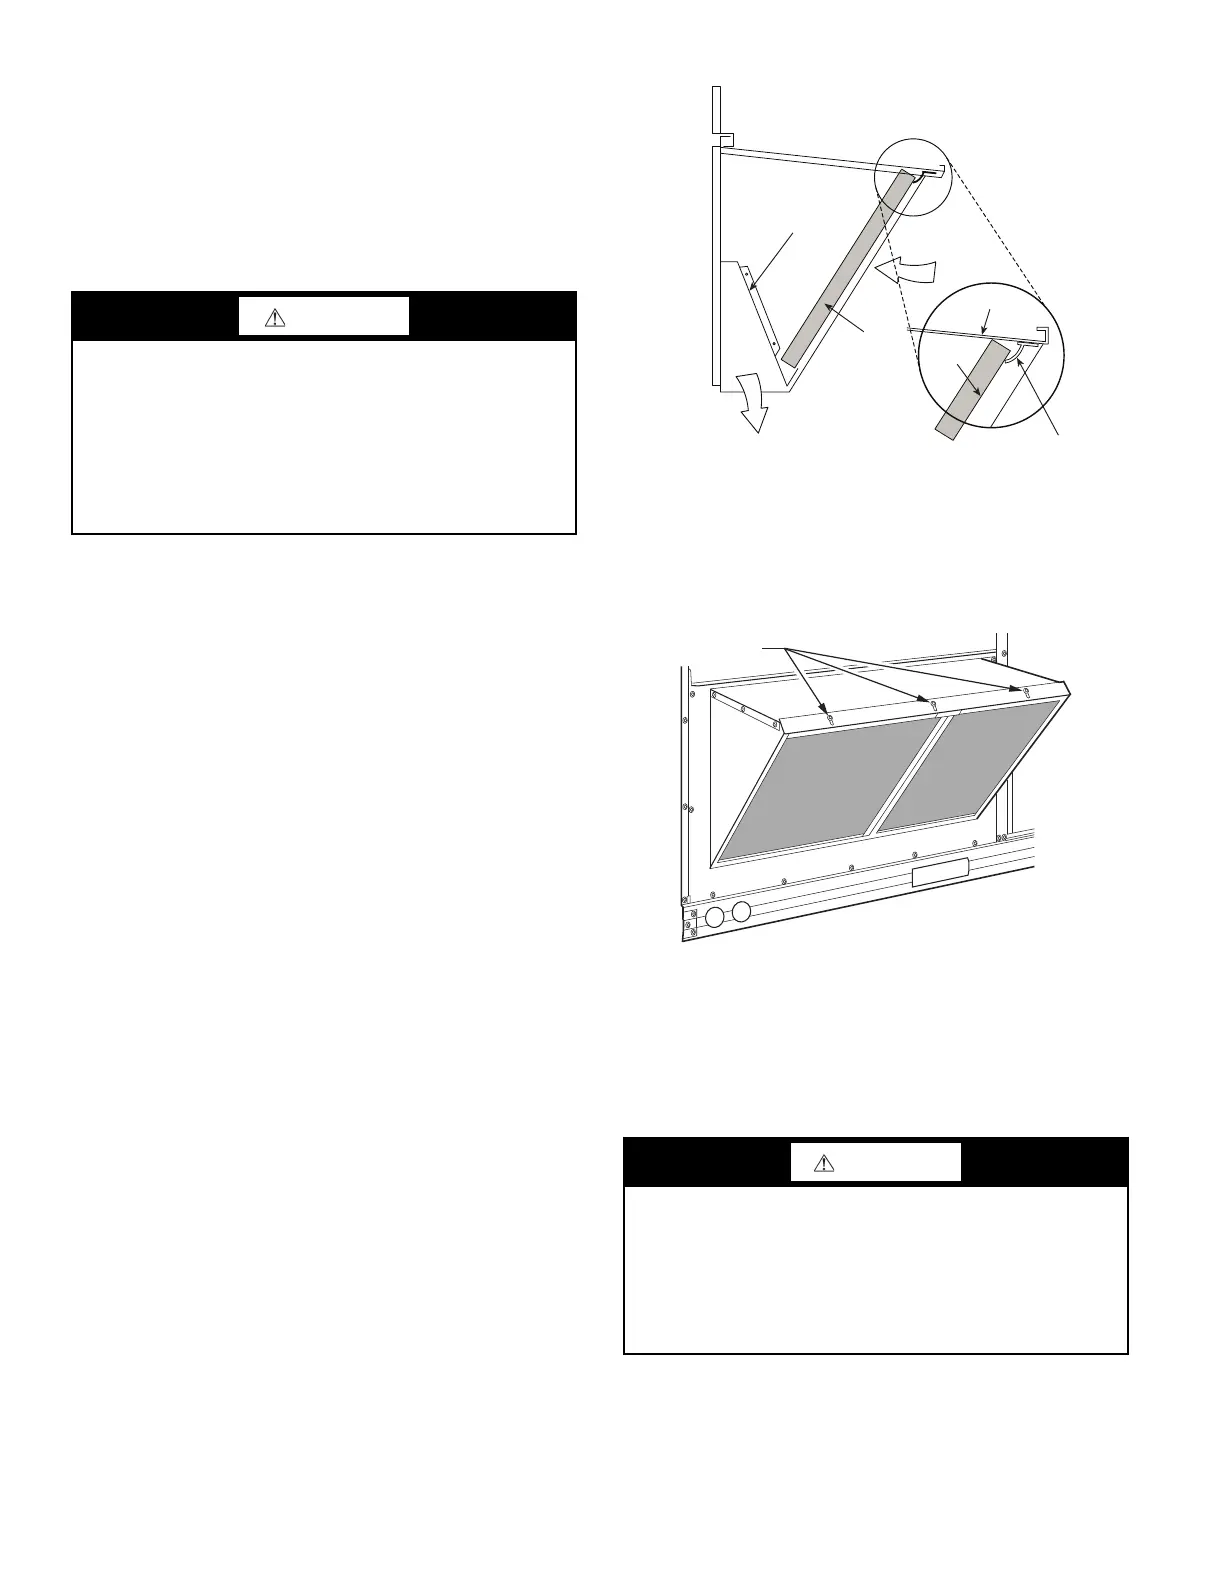
MANUAL OUTSIDE AIR HOOD SCREEN
This inlet screen is secured by a retainer angle across the top edge
of the hood. (See Fig. 6.)
Fig. 6 — Screens Installed on Outdoor-Air Hood
To remove the screen, loosen the screws in the top retainer and
slip the retainer up until the filter can be removed. Re-install by
placing the frame in its track, rotating the retainer back down,
and tightening all screws.
SUPPLY FAN (BLOWER) SECTION
Supply Fan (Direct-Drive)
All FC units have the EcoBlue™ direct drive vane axial fan sys-
tem. The fan is driven by an ECM motor with speed that is user set
through the Unit Control Board (UCB). Speeds are fully configu-
rable from 40% to 100% of motor’s maximum speed.
(See Fig. 7 and 8.)
CAUTION
EQUIPMENT DAMAGE HAZARD
Failure to follow this CAUTION can result in premature wear
and damage to equipment.
DO NOT OPERATE THE UNIT WITHOUT THE RETURN
AIR FILTERS IN PLACE.
Dirt and debris can collect on heat exchangers and coils
possibly resulting in a small fire. Dirt buildup on components
can cause excessive current used resulting in motor failure.
WARNING
ELECTRICAL SHOCK HAZARD
Failure to follow this warning could result in personal injury or
death.
Before performing service or maintenance operations on
unit, LOCKOUT/TAG-OUT the main power switch to unit.
Electrical shock and rotating equipment could cause severe
injury.
Divider
Outside
Air
Hood
Filter
Filter Clip
Cleanable
Aluminum
Filter
Barometric
Relief
 Loading...


