The following procedures are to be observed:
• Wear full eye protection and protective clothing;
• Where electrolyte contacts the skin, wash it off
immediately with water;
• Where electrolyte contacts the eyes, immediately
flush thoroughly with water and seek medical
attention; and
• Spilled electrolyte is to be washed down with an
acid neutralizing agent. A common practice is to
use a solution of 1 pound (500 grams) bicarbonate
of soda to 1 gallon (4 liters) or water. The bicar-
bonate of soda solution is to be added until the
evidence of reaction (foaming) has ceased. The
resulting liquid is to be flushed with water and the
area dried.
Lead-acid batteries present a risk of fire because
they generate hydrogen gas. The
following procedures are to be followed:
• DO NOT SMOKE when near the battery;
• DO NOT cause flame or spark in battery area; and
• Discharge static electricity from body before touch-
ing the battery by first touching a grounded metal
surface.
Be sure the AUTO/OFF/MANUAL switch is set to
the OFF position before connecting the battery
cables. If the switch is set to AUTO or MANUAL,
the generator can crank and start as soon as the
battery cables are connected.
Be sure the utility power supply is turned off, or
sparking may occur at the battery posts as the
cables are attached and cause an explosion.
2.1 BEFORE INITIAL START-UP
Before starting, complete the following:
1. Set the generator’s main circuit breaker to its
OFF (or open) position.
2. Set the generator's AUTO/OFF/MANUAL switch to
the OFF position.
3. Turn OFF the utility power supply to the transfer
switch using the means provided (such as the
utility main line circuit breaker).
4. Check the engine crankcase oil level and, if neces-
sary, fill to the dipstick FULL mark with the rec-
ommended oil. Do not fill above the FULL mark.
5. Check the fuel supply. Gaseous fuel lines must
have been properly purged and leak tested in
accordance with applicable fuel-gas codes. All
fuel shutoff valves in the fuel supply lines must
be open.
Never operate the engine with the oil level
below the “Add” mark on the dipstick. Doing
this could damage the engine.
2.2 CHECK TRANSFER SWITCH
OPERATION
Refer to Section 3.5, of the owner’s manual for man-
ual operation procedures.
DANGER
Do not attempt manual transfer switch opera-
tion until all power voltage supplies to the
transfer switch have been positively turned off.
Failure to turn off all power voltage supplies
will result in extremely hazardous and possibly
fatal electrical shock.
2.3 ELECTRICAL CHECKS
Complete electrical checks as follows:
1. Set the generator’s main circuit breaker to its
OFF (or open) position.
2. Set the generator's AUTO/OFF/MANUAL switch to
the OFF position.
3. Turn OFF the utility power supply to the transfer
switch using the means provided (such as the
utility main line circuit breaker).
4. Turn on the utility power supply to the transfer
switch using the means provided (such as a utility
main line circuit breaker).
DANGER
The transfer switch is now electrically “hot.”
Contact with “hot” parts will result in extremely
hazardous and possibly fatal electrical shock.
Proceed with caution.
5. Use an accurate AC voltmeter to check utility
power source voltage across terminals N1 and
N2. Nominal line-to-line voltage should be 240
volts AC.
6. Check utility power source voltage across termi-
nals N1 and the transfer switch neutral lug; then
across terminal N2 and neutral. Nominal line-to-
neutral voltage should be 120 volts AC.
7. When certain that utility supply voltage is compat-
ible with transfer switch and load circuit ratings,
turn OFF the utility power supply to the transfer
switch.
8. Set the generator's main circuit breaker to its
OFF (or open) position. Initial tests will be con-
ducted at no-load condition.
9. On the generator panel, set the AUTO/OFF/
MANUAL switch to MANUAL. The engine should
crank and start.
10. Let the engine warm up for about five minutes to
allow internal temperatures to stabilize. Then, set
the generator’s main circuit breaker to its ON (or
closed) position.
9
Section 2 — Post Installation Start-up and Adjustments
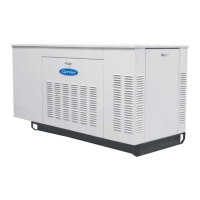
15 kW Generator
 Loading...