IMPORTANT: To increase drive belt life, engage attachment Drive Lever at slow engine
speed and also before encountering heavy grass.
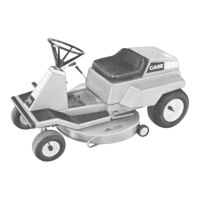
8. SEAT ADJUSTMENT - Three sets of mounting holes are provided in the seat sup-
port. Select the seat position which gives the maximum comfort with your hands
holding the steering wheel and your feet on the foot rests. To change position lift
the engine enclosure and remove the four capscrews, relocate seat and reinstall cap-
screws and lockwashers.
PRE-STARTING
CHECK
LIST
Before starting your new Case Riding Lawn Mower for the first time and before each
operating period thereafter, check the following.
L Make sure everyone responsible for tfie mower's operation and maintenance under-
stands the importance of clean
fuel,
oils, containers and funnels.
2.
Check that all lubricating fittings are serviced as directed in the Lubrication Chart.
3. Check engine oil level and add as necessary.
4.
Be sure that air cleaner, and blower air intake screen on engine are free of obstruc-
tions and excessive dirt.
5. Check that the fuel tank is filled with clean fuel that meets requirements listed
under Fuel Specifications. Always wipe fuel tank cap clean before removing it. Be
sure vent hole in fuel tank cap is open.
6. Check all operating controls for proper function.
A
Become Thoroughly fdmiliai with all iiding lawn mowei control'". i)e-
f oi e 0[iei aling.
RUN IN
PROCEDURE
Your new Riding Lawn Mower should be subjected to a run in period before it is op-
erated at full
load.
Drive it for approximately an hour to get the feel of operation. Shift
the travel control lever through its full range of forward travel and reverse during the run
in period,
MOUNTING
AND DIS-MOUNTING THE RIDING LAWN MOWER
Mount the mower from the left side, starting with your left foot on the left foot rest,
your left hand on steering wheel and right hand on seat back. Then swing your right foot
through between steering wheel and seat.
Dismount using the reverse of the above procedure.
- 15-