EN-6
Connections
IMPORTANT!
• Whenever connecting something to the Digital
Piano, first use the VOLUME controller to set the
volume to a low level. After connecting, you can
adjust the volume to the level you want.
Connecting headphones to either of the PHONES jack
cuts off output to the speakers, which means you can
practice even late at night without bothering others. To
protect your hearing, make sure that you do not set the
volume level too high when using headphones.
NOTE
• Be sure to push the headphones plug into the
PHONES jacks as far as it will go. If you don’t, you
may hear sound from only one side of the
headphones.
• If the plug of the headphones you are using does not
match the PHONES jacks, use the applicable
commercially available adaptor plug.
• If you are using headphones that require an adaptor
plug, make sure you do not leave the adaptor
plugged in when you unplug the headphones. If you
do, nothing will sound from the speakers when you
play.
You can connect audio equipment or a music amplifier
to the Digital Piano and then play through external
speakers for more powerful volume and better sound
quality.
IMPORTANT!
• The Digital Piano automatically adjusts sound output
to optimize for headphone output (when headphones
are connected) or built-in speaker output (when
headphones are not connected). This also will cause
a change in the output quality from the Digital
Piano’s LINE OUT R and L/MONO jacks.
• Whenever connecting a device to the Digital Piano,
first use the VOLUME controller to set the volume to
a low level. After connecting, you can adjust the
volume to the level you want.
• Whenever you connect any device to the Digital
Piano, be sure to read the user documentation that
comes with the device.
Connecting to Audio Equipment 1
Use commercially available cables to connect the
external audio equipment to the Digital Piano’s LINE
OUT jacks as shown in Figure 1. LINE OUT R jack
output is right channel sound, while LINE OUT L/
MONO jack output is left channel sound. It is up to
you to purchase connecting cables like the ones shown
in the illustration for connection of audio equipment.
Normally in this configuration you must set the audio
equipment’s input selector to the setting that specifies
the terminal (such as AUX IN) to which the piano is
connected. Use the Digital Piano’s VOLUME controller
to adjust the volume level.
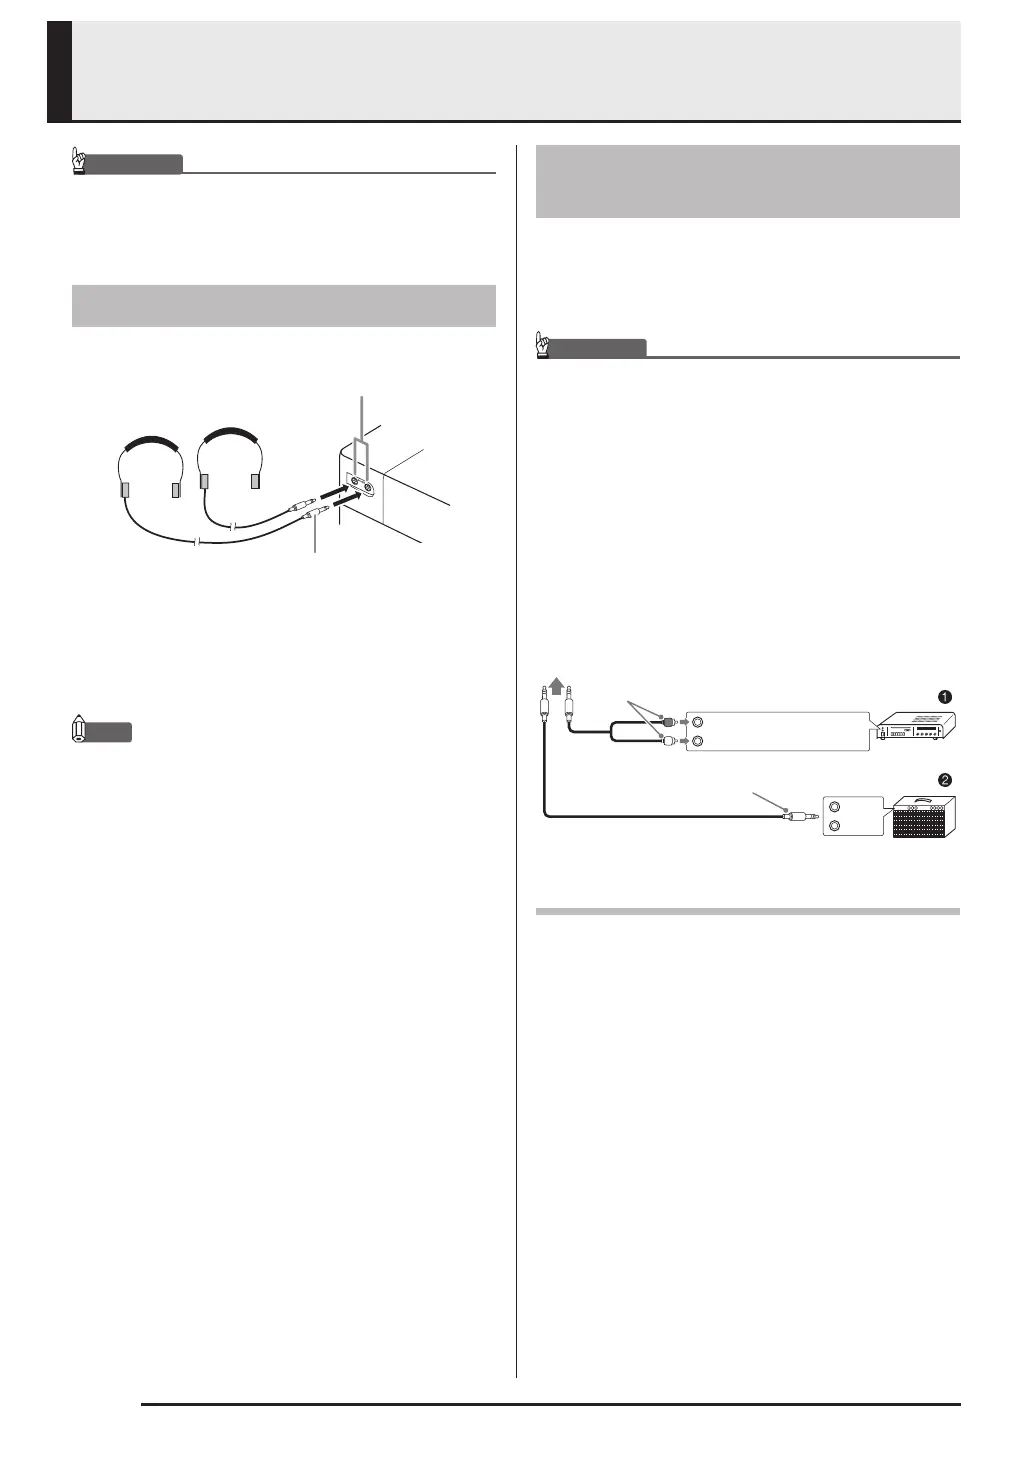
Connecting Headphones
Stereo mini plug
PHONES jacks
Front
Connecting Audio Equipment
or an Amplifier
INPUT 1
INPUT 2
Guitar amplifier
Keyboard amplifier, etc.
Standard plug
To either of the Digital Piano’s LINE OUT jacks
RIGHT (Red)
LEFT (White)
Audio amplifier AUX IN jack, etc.
Pin plug
PX160-ES-1B.indd 8 2016/01/20 17:58:30
 Loading...