– 27 –
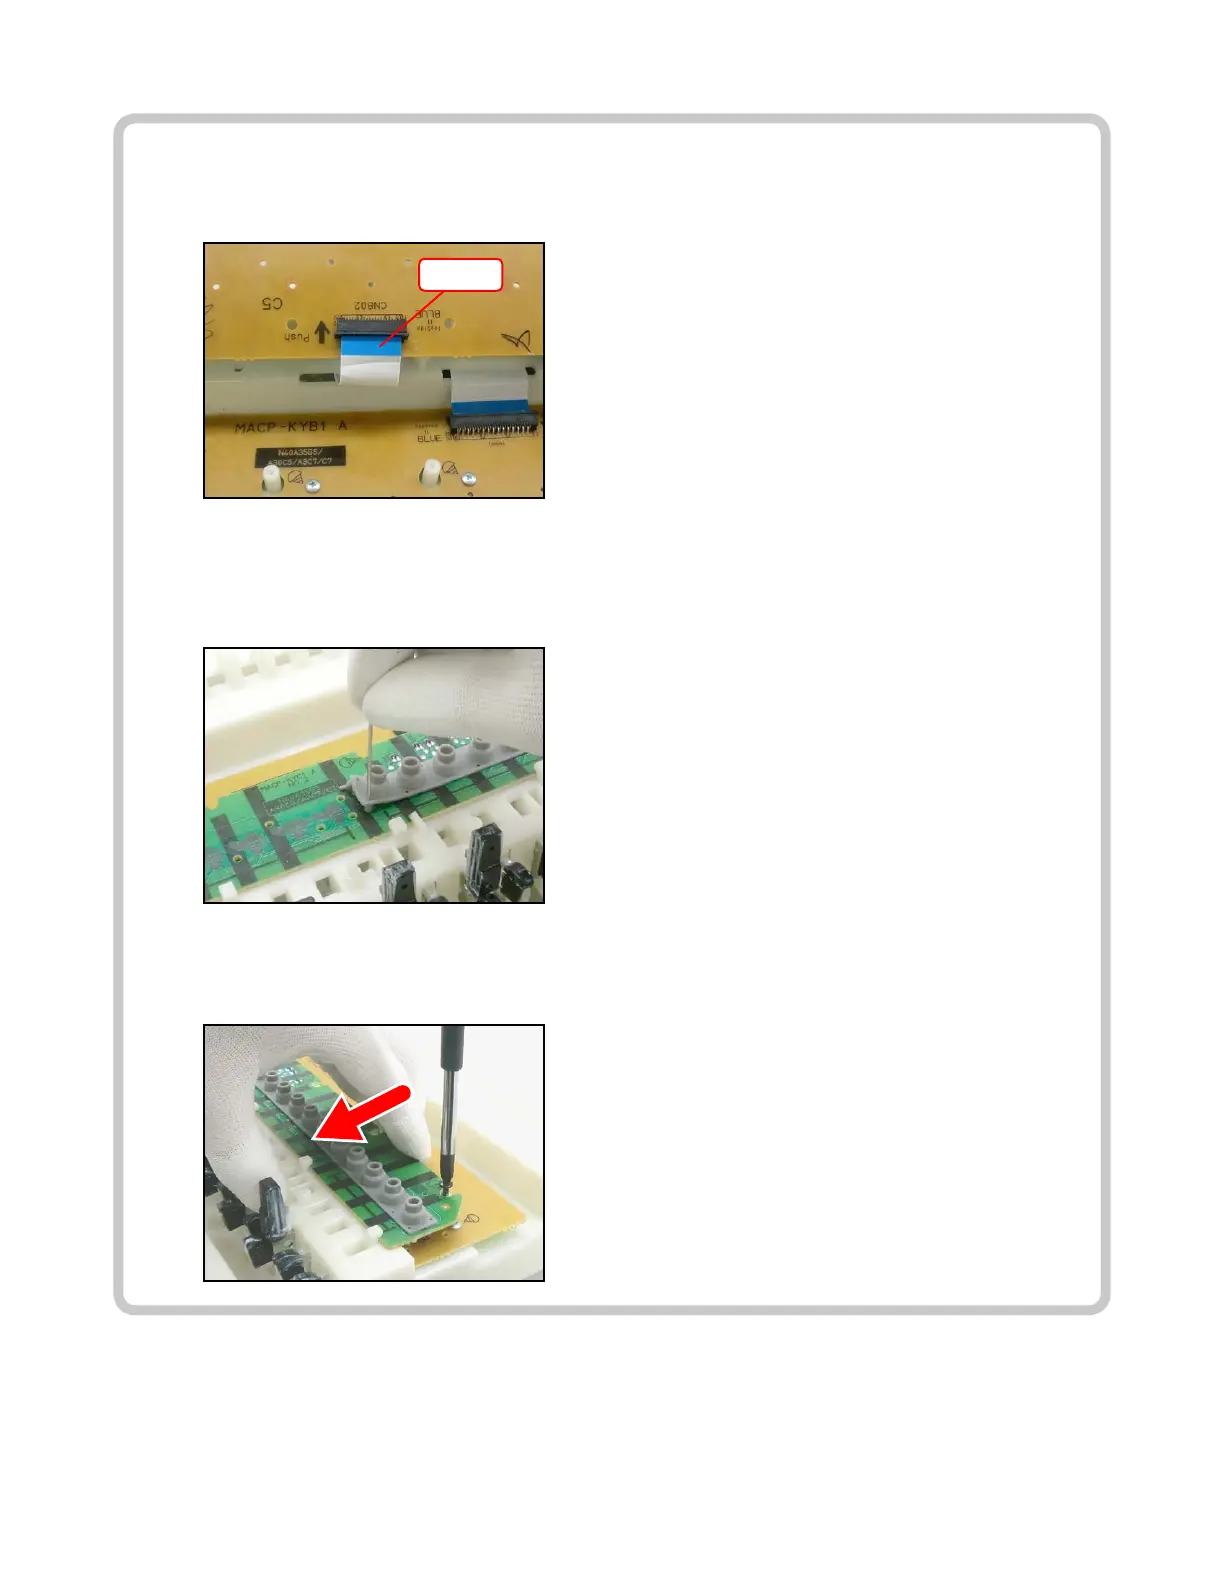
<Installing the keyboard PCBs (MACP-KYC1/KYC2, KYD1)>
1. Connect the FFC to the MACP-KYD1 PCB and lock the connector.
Be sure to connect it securely.
FFC
2. Install eight rubber keys.
Be sure to install the short rubber key at the correct location.
Lightly insert the tip of a rubber key into the PCB rst, and then, press it in using the end of a paper
clip. Do not press the rubber key forcefully to avoid damaging the rubber key.
3. Secure the MACP-KYC1 PCB, the KYC2 PCB, and the MACP-KYD1 PCB with 23 screws.
Press the PCBs lightly in the direction of the red arrow in the illustration below while tightening a
screw.