– 28 –
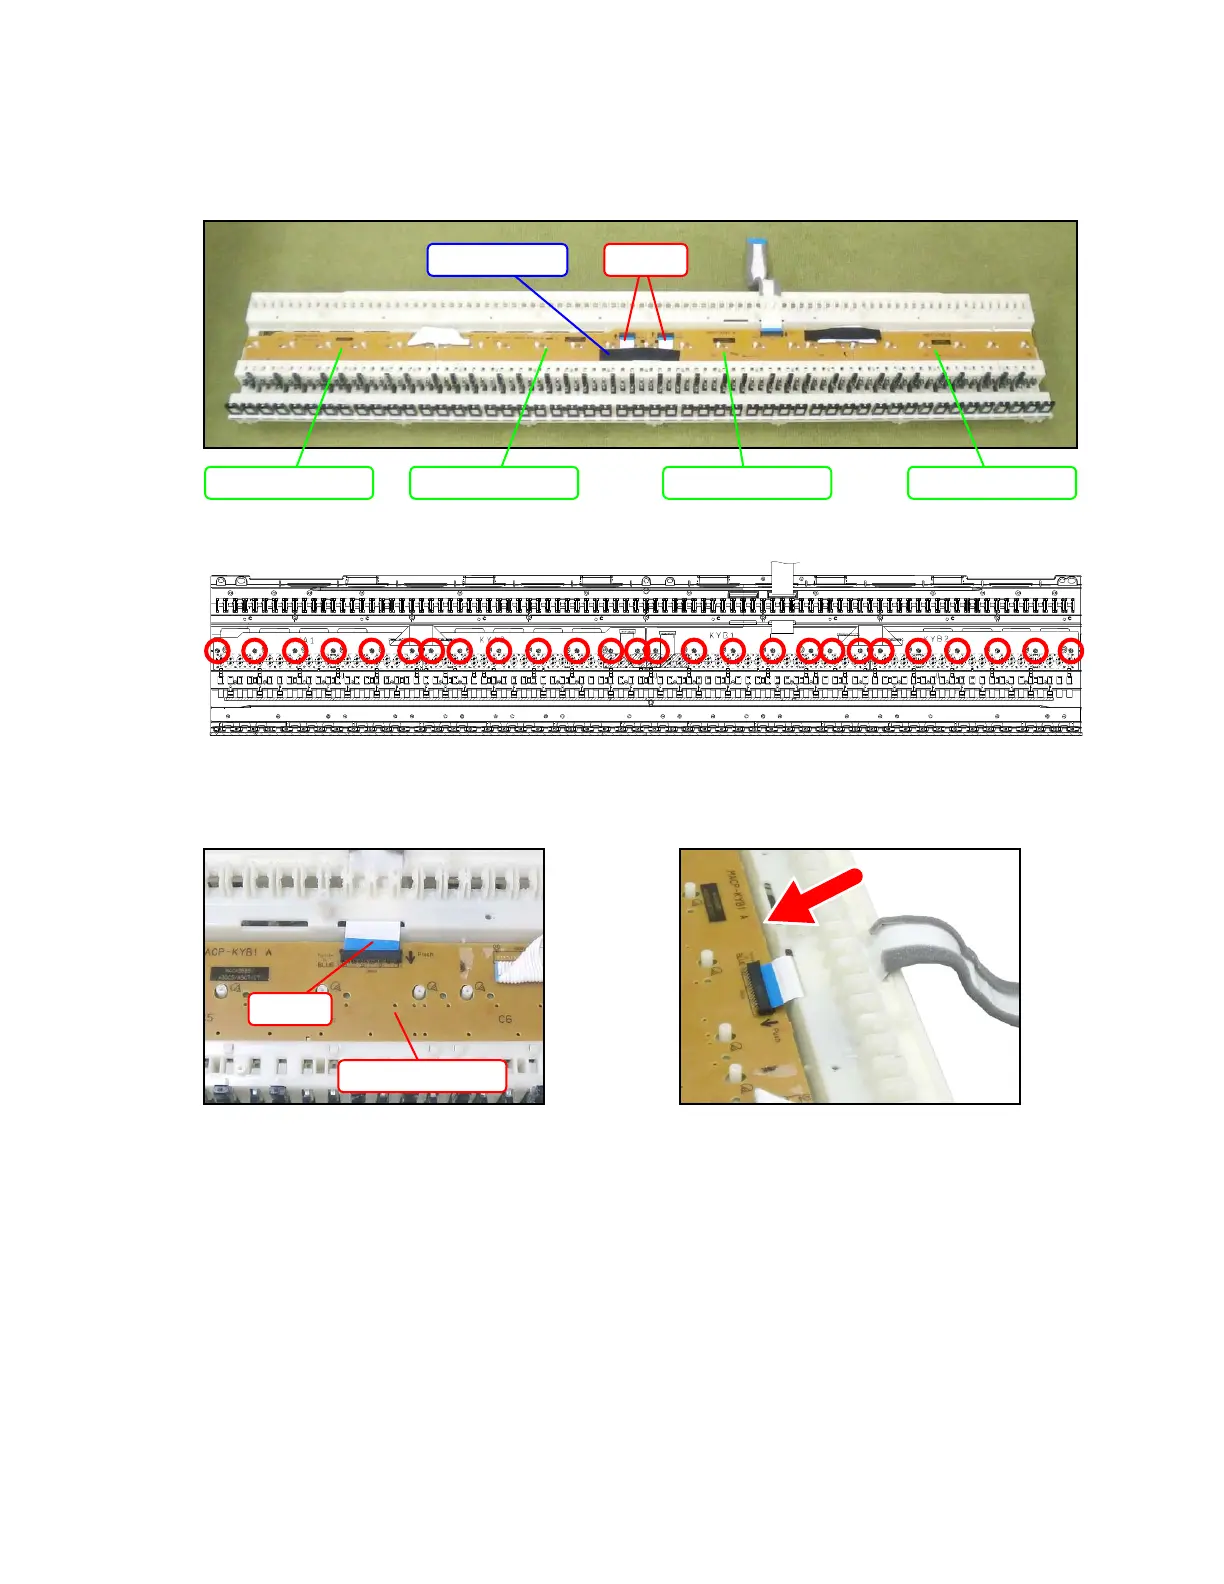
Removing the keyboard PCBs (MACP-KYA1/KYA2, KYB1/KYB2)
1. Remove the nonwoven tape. Unlock the connector and disengage the FFC connecting the MACP-
KYA2 PCB and the MACP-KYB1.
2. Remove 26 screws.
3. Unlock the connector and disengage the FFC connected to the MACP-KYB1 PCB.
NOTE: When removing the FFC, be careful not to pull it too much in the direction of the red arrow in
the illustration, or the PLATE on the back may come loose.
FFCNonwoven tape
MACP-KYA1 PCB MACP-KYA2 PCB MACP-KYB1 PCB MACP-KYB2 PCB
MACP-KYB1 PCB
FFC