– 30 –
<Installing the keyboard PCBs (MACP-KYA1/KYA2, KYB1/KYB2)>
1. Place eight rubber keys on the chassis.
Be sure to place the short rubber key in the correct location.
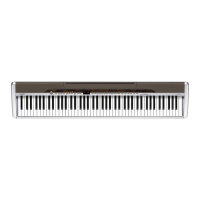
2. Connect the FFC to the MACP-KYB1 PCB and lock the connector.
NOTE: When connecting the FFC, be careful not to pull it too much in the direction of the red arrow
in the illustration, or the PLATE on the back may come loose.
MACP-KYB1 PCB
FFC
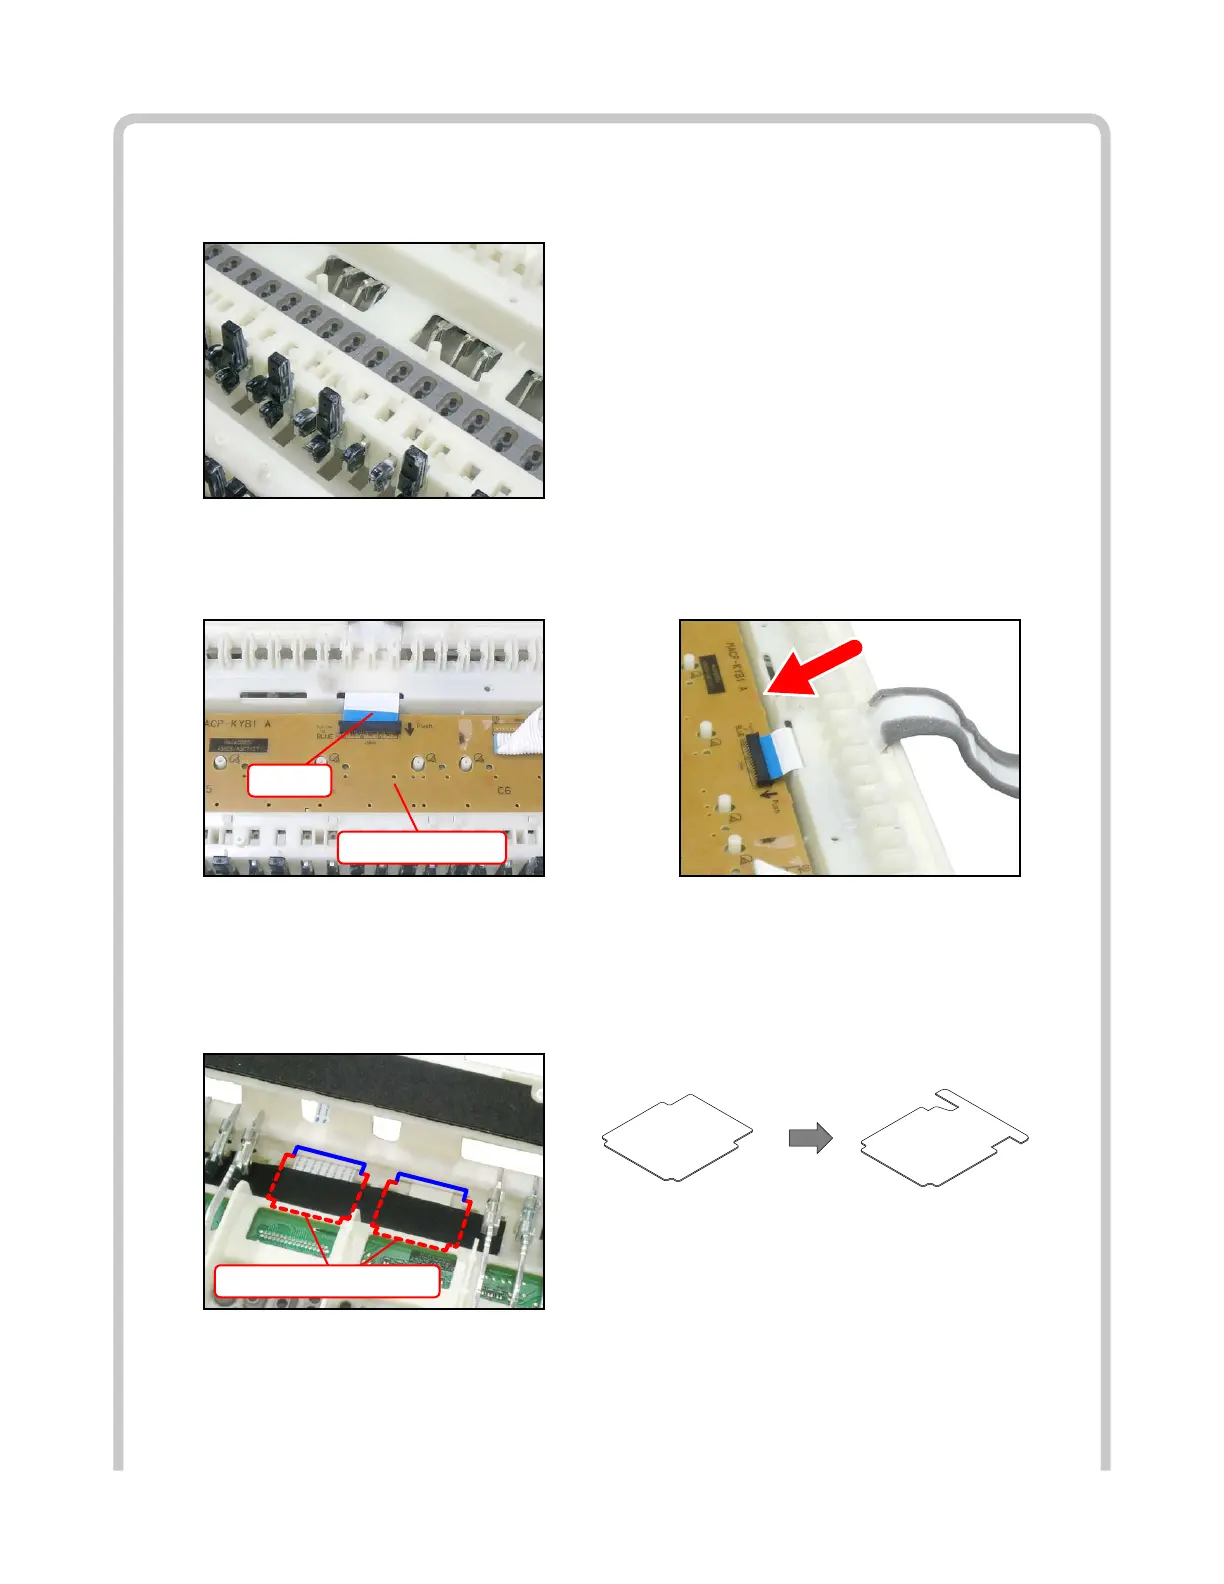
<If the PLATE comes off>
The PLATE is a transparent plastic plate. If the plate comes off, put it on the place where the FFC
is, and insert its end into place where the blue line is shown in the image.
NOTE: The design of the PLATE was modied after the mass production.
The new types of plates are installed in PX-130RD since the beginning of mass production.
<Before change> <After change>
PLATE (Before change)