– 83 –
10-6. Replacement of Paper Sensor PCB
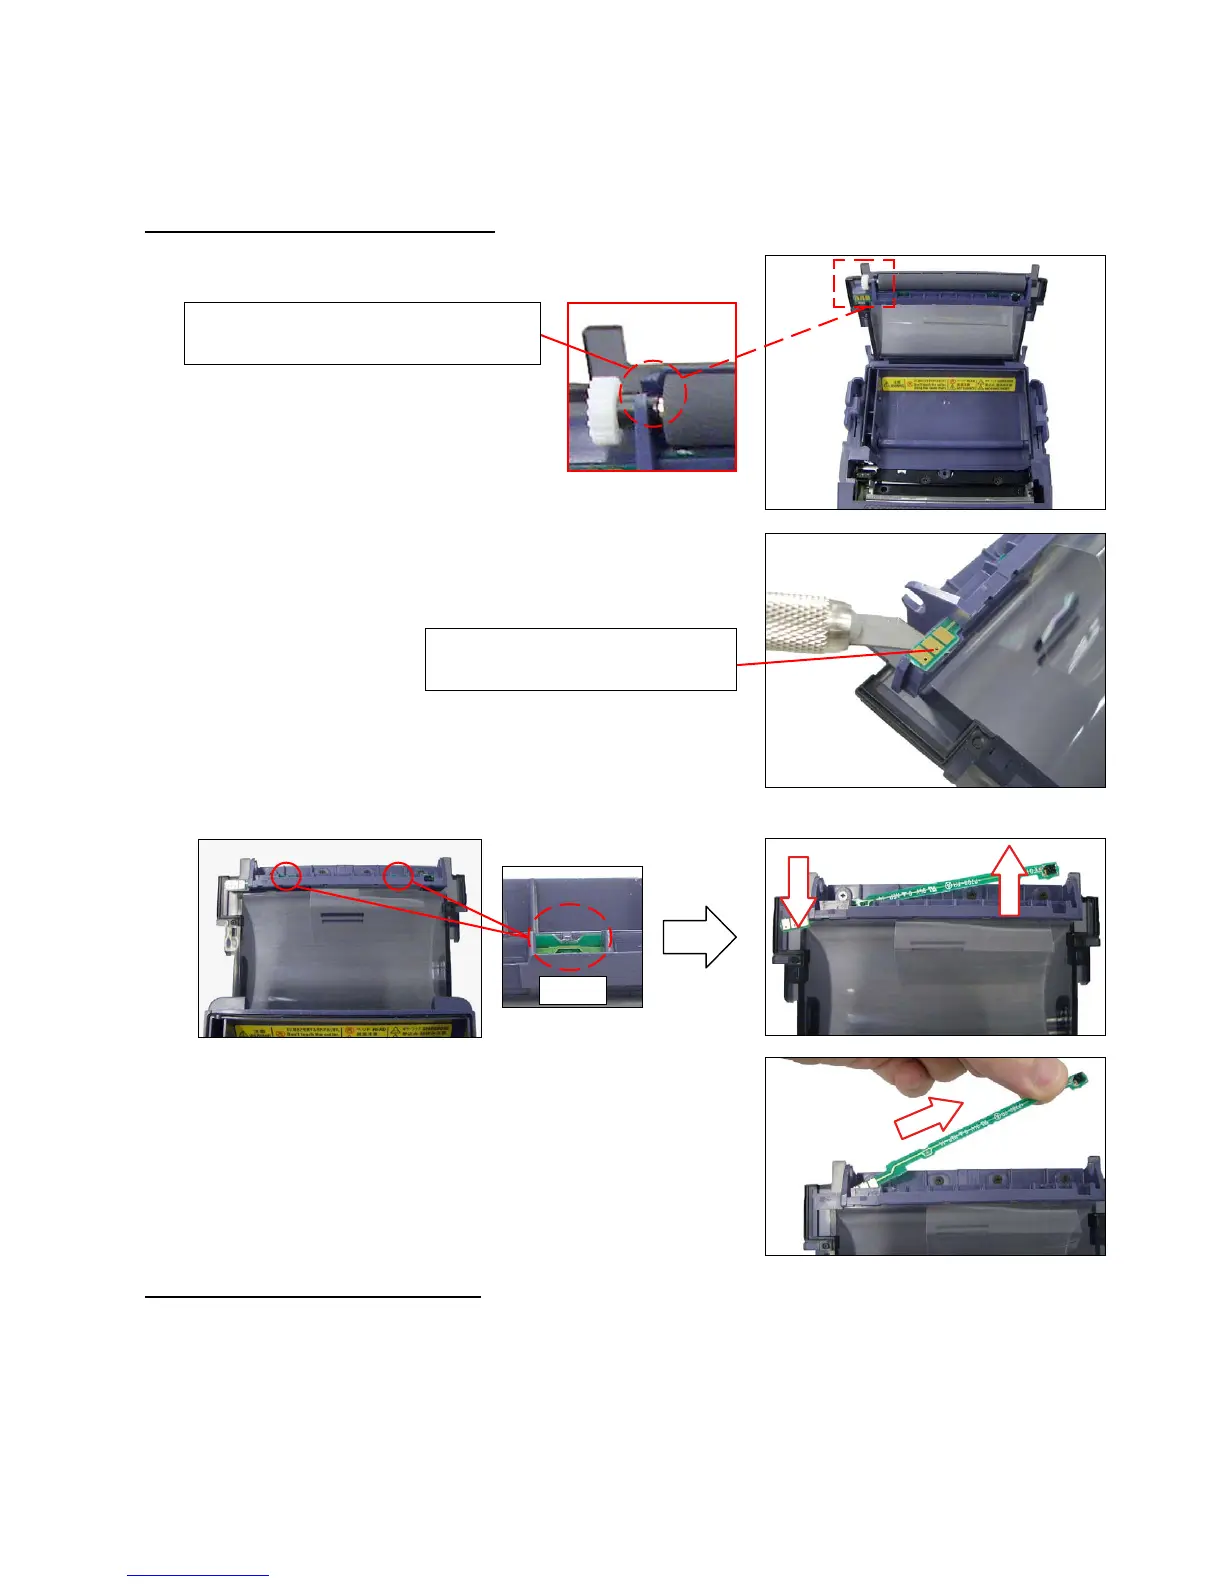
To remove the Paper Sensor PCB
1. RemovethePlatenRollerfromtheholder.
2. TheterminalareaoftheSensorPCBisxedtotheholderby
double-sidedtape.
Cutthedouble-sidedtapebysuchtoolasacutter.
3. MovetheSensorPCBwhilepayingattentiontothetwohooksasshowninthegure.
4. TakeouttheSensorPCBinthedirectionofthearrow.
To attach the Paper Sensor PCB
1. Attachdouble-sidedtapetotheplatenholder(wheretheplatenholderandthePCBterminalhavecon-
tact).
2. AttachtheSensorPCBaccordingtotheprocedurewhichisreverseofitsremoval.
3. HolddownthePCBterminalareafromabove,andconrmthatthereisnospacebetweenthePCB
andtheholder.
Payattentionnottodamagethehook
oftheholder(sameontheotherend).
Double-sidedtapeisattachedon
thebackside.
Hook