Page 10 For technical questions, please call 1-888-866-5797. Item 67979
Maintenance Instructions
NOTE: Make sure the batteries
have been removed from the tool
before performing maintenance.
1. Tool maintenance must be performed
only by qualified repair personnel.
Maintenance performed by unqualified
repair personnel could cause injury.
2. When maintaining, use only identical
replacement components.
3. Do not attempt to take any pieces of the
tool apart unless directed by the manual.
4. Follow instructions to
replace accessories.
5. Do not use acetone to clean the
tool. Instead, use alcohol. Avoid
rubbing too hard on the LCD screen.
After using, wipe the display unit
clean gently with a dry cloth.
6. Upon completion of any maintenance of
the tool, ask qualified repair personnel
to perform safety check to see if the
tool is in proper operating condition.
7. Stop using the tool if it starts smoking
or emitting noxious fumes.
8. Always handle the tool with care. It
is not shock-resistant and should
not be banged or dropped.
9. Do not disassemble the tool beyond
what is shown in the manual.
Doing so will void your warranty.
Troubleshooting
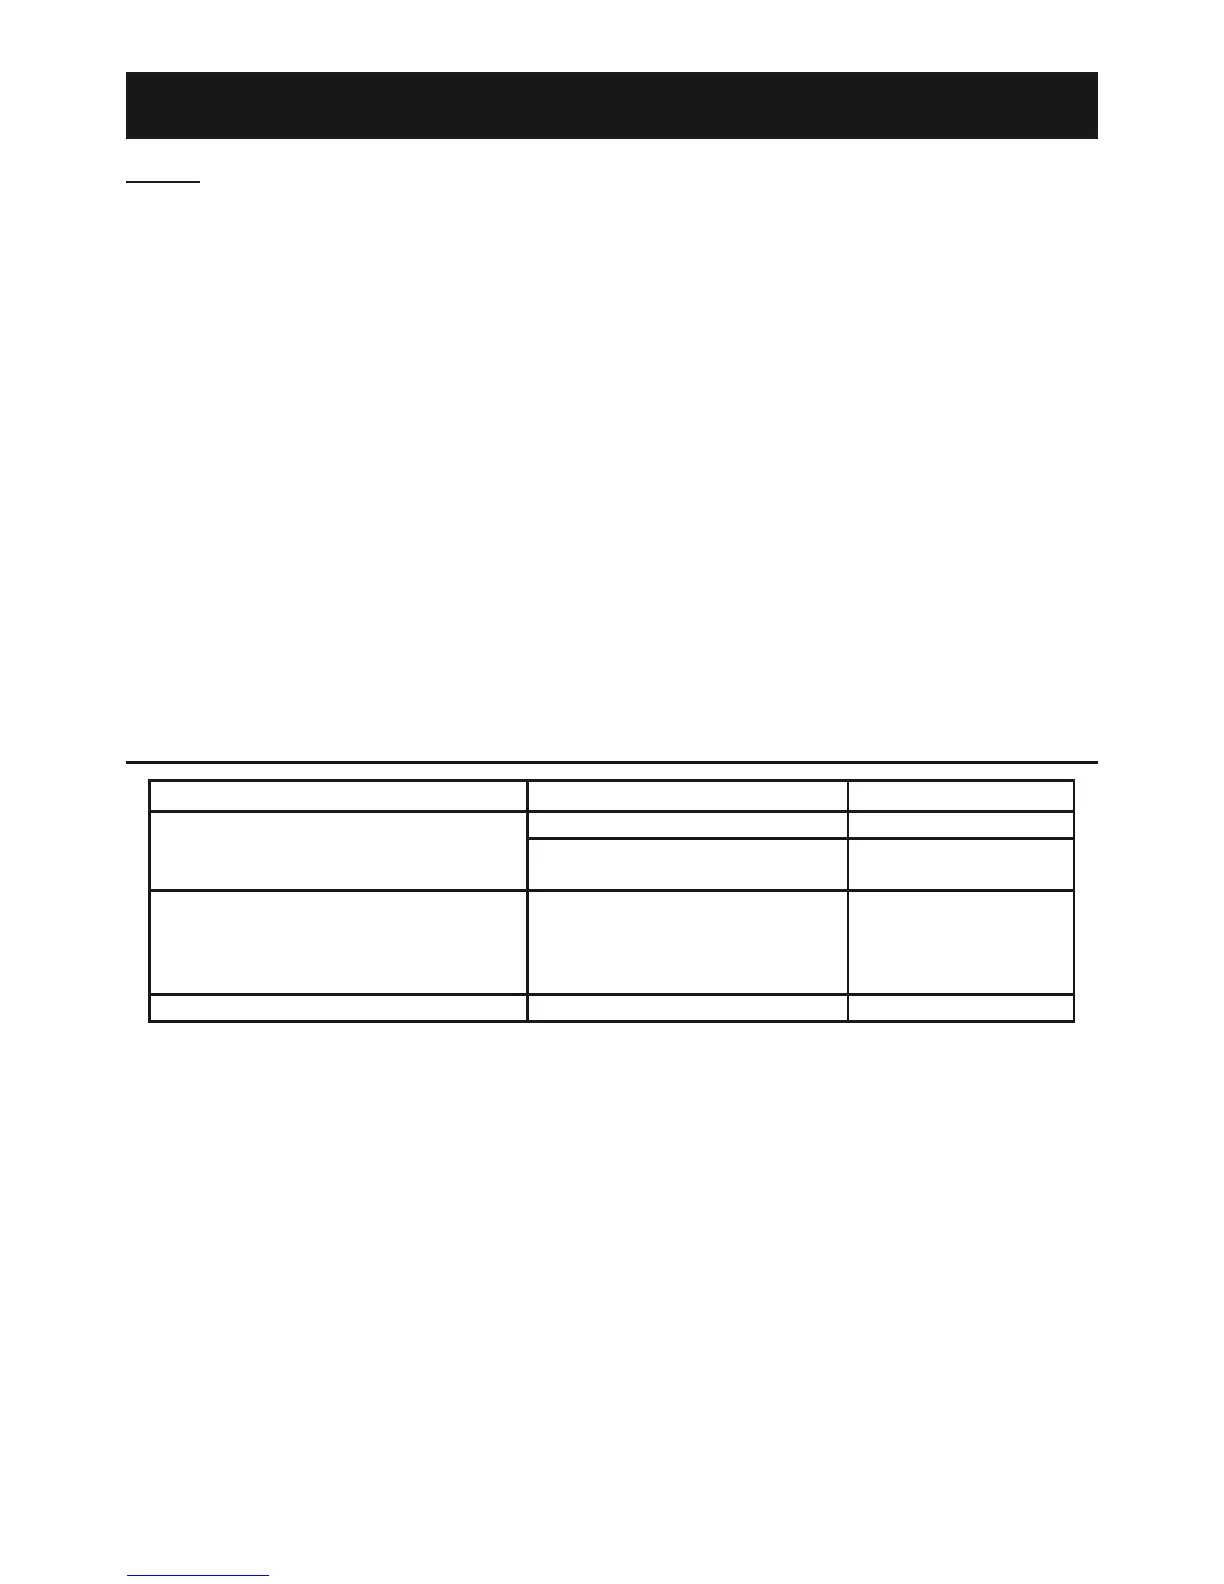
SYMPTOMS POSSIBLE REASONS SOLUTIONS
Display unit is on, but does
not show image.
Cable connection is loose. Check and reattach.
Imager head is covered
with debris.
Inspect imager head
and clean if needed.
LEDs on imager head are dim at max
brightness, display changes between
black/white and color, or display
turns itself OFF after a short period.
Batteries are low. Replace batteries.
The tool will not turn on. Dead batteries. Replace batteries.