Do you have a question about the Centrodyne S700 and is the answer not in the manual?
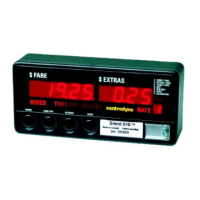
Defines the function of each switch (SW1-SW6) in different taximeter states.
Explains how to access and use statistics mode to view total and daily trip data.
Describes how to access and use programming mode via physical switches.
Details the Electronic Sealing (ESI) link between meter and bracket for security.
Explains the procedure for editing data values using the taximeter switches.
Introduces menu mode for accessing various settings and functions.
Details the switch functions specifically for navigating within menu mode.
Describes the Audit Trail Menu, used for logging configuration entries and dates.
Allows testing and adjusting display brightness and performing display sequence tests.
Explains how to view current calibration and perform a calibration check.
Allows viewing and printing stored tariff information including rates and increments.
Displays hardware and software information and allows printing factory configurations.
Allows displaying and adjusting the taximeter's current date and time.
Displays and allows editing the taximeter's odometer value.
Allows displaying and editing disable meter date and lease period settings.
Indicates a menu item that is not currently utilized.
Indicates a menu item that is not currently utilized.
Allows printing stored receipts and resetting the receipt pointer.
Details the switch functions for navigating and operating in programming mode.
Explains how to perform calibration using switch programming or auto-calibration.
Covers programming of tariff rates, including initial drop, distance, and time rates.
Details control options like rate lockout and statistics reset settings.
Allows setting programmable variables like auto rate change amounts and critical speed.
Manages time-of-day settings for features like auto rate change and inhibit extras.
Explains editing text data for receipt lines, including character and position editing.
| Brand | Centrodyne |
|---|---|
| Model | S700 |
| Category | Measuring Instruments |
| Language | English |