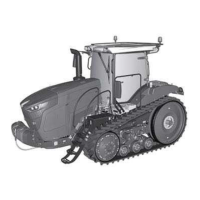
5. WARNING:
Equipment or parts under spring
tension can cause bodily injury.
Use caution in releasing belt
tension.
Install a 3/4 inch drive breaker bar into the
square drive (1) of the main serpentine belt
tensioner (2). Push counterclockwise and
remove the main serpentine belt (3) from the
pulleys. Slowly release the belt tensioner to
the neutral position. Remove the breaker bar.
Slide the belt over the fan to remove.
GUID-D3D4BD51-A323-4F40-9EE1-209B654B3F67-high.eps [High]
Fig. 8
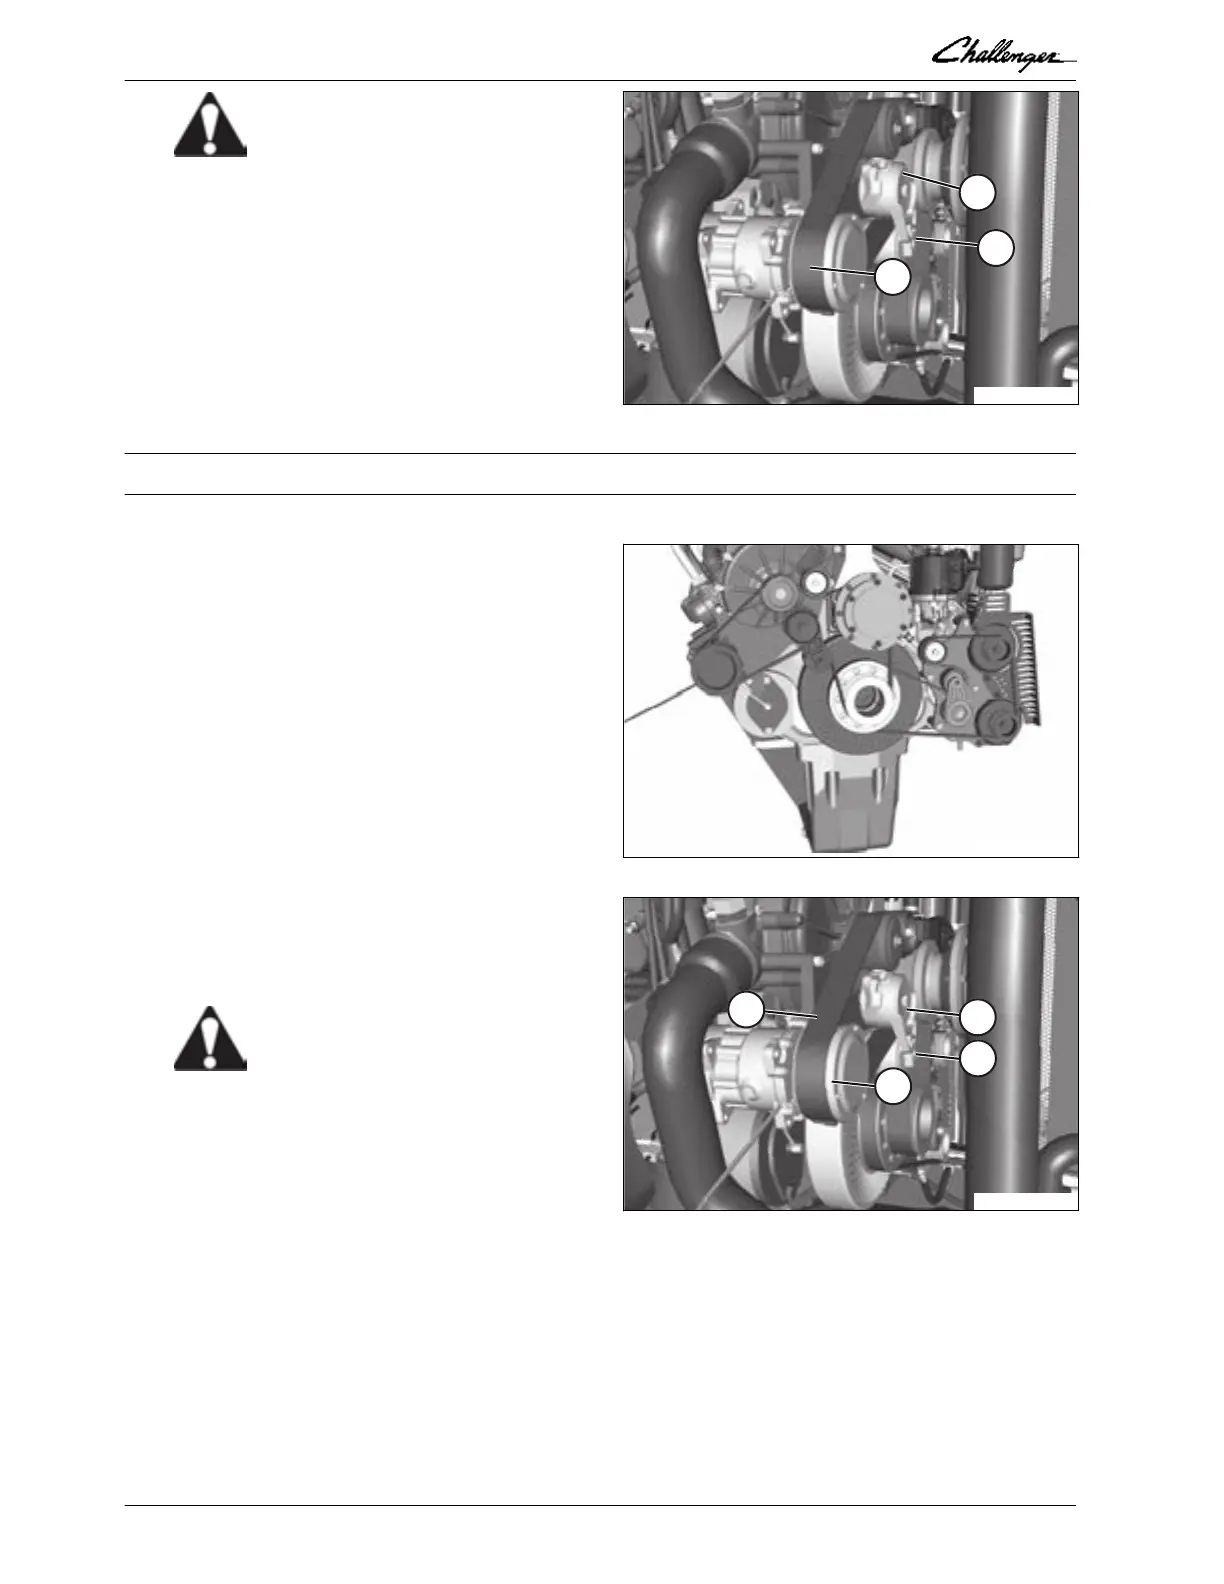
2.2.2 Installing the main serpentine belt
Procedure
1.
The main serpentine belt routing diagram.
NOTE:
Some parts have been removed for clarity.
GUID-48A64C9B-3338-47DE-A0A9-49358B1DB3C9-high.eps [High]
Fig. 9
2.
Install the main serpentine belt (3) around
the fan. Install the main serpentine belt on all
the pulleys except the alternator pulley (4).
Correctly seat the belt in the pulley grooves.
3.
WARNING:
Equipment or parts under spring
tension can cause bodily injury.
Use caution in releasing belt
tension.
Install a 3/4 inch drive breaker bar into the
square drive hole (1) on the main belt
tensioner (2). Push the drive
counterclockwise and install the main belt (3)
on the alternator pulley (4). Correctly seat the
belt in the pulley grooves. Slowly release the tension until the belt tensioner (2) makes contact with
the belt. Remove the 3/4 inch drive breaker bar.
NOTE:
Supply enough area for the swing of the 3/4 inch breaker bar to let the belt tensioner come to a
neutral position.
GUID-81C55BBF-C037-4D59-BA60-9AB5AE848726-high.eps [High]
Fig. 10
GUID-13023E97-66BB-463A-B4F9-08E87986426C [V2]
2. Engine, fuel, and exhaust system
2-8 Articulated Tractor
79036231D