EasyManua.ls Logo

Chamberlain 2110 User Manual

Chamberlain 2110
36 pages
To Next Page IconTo Next Page
Page #1 background imageLoading...
Page #1 background image
The Chamberlain Group, Inc.
845 Larch Avenue
Elmhurst, Illinois 60126-1196
www.liftmaster.com
GARAGE DOOR OPENER
Models 2110 1/3 HP
2220 1/2 HP
2220-267 1/2 HP
For Residential Use Only
®
Owner’s Manual
Please read this manual and the enclosed safety materials carefully!
Fasten the manual near the garage door after installation.
The door WILL NOT CLOSE unless the Protector System
®
is connected and
properly aligned.
Periodic checks of the opener are required to ensure safe operation.
The model number label is located on the front panel of your opener.
®
Question and Answer IconNeed help?

Do you have a question about the Chamberlain 2110 and is the answer not in the manual?

Chamberlain 2110 Specifications

General IconGeneral
TypeChain Drive
Horsepower1/2 HP
Max Door Height7 ft
Drive SystemChain Drive
Remote ControlYes
WarrantyLifetime motor warranty
Voltage120V
Speed7 inches per second
MotorDC motor
Remote Controls Included2
Battery BackupNo
Safety FeaturesSafety sensors
SecurityRolling code technology

Summary

Preparing Your Garage Door

Safety Warnings for Door Preparation

Important safety precautions to prevent injury or death during garage door preparation.

Garage Door Opener Assembly

Fasten the Rail to the Motor Unit

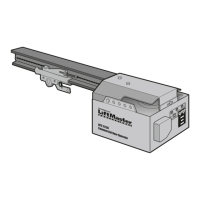
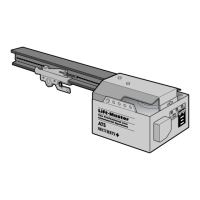
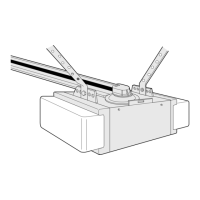
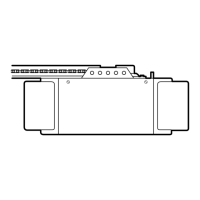
Connects the rail assembly to the motor unit using bolts and a coupling.

Garage Door Opener Assembly (continued)

Important Installation Instructions

Installation Step 1: Determine Header Bracket Location

Installation Step 2: Install the Header Bracket

Installation Step 3: Attach the Rail to the Header Bracket

Installation Step 4: Install The Protector System®

Installing the Safety Sensor Brackets

Mounting and Wiring the Safety Sensors

Installation Step 5: Position the Opener

Installation Step 6: Hang the Opener

Installation Step 7: Install the Door Control

Installation Step 9: Attach the Emergency Release Rope and Handle

Installation Step 10: Electrical Requirements

Installation Step 11: Complete Safety Reversing Sensor Installation

Installation Step 12: Fasten the Door Bracket

Installing the Door Bracket on One-Piece Doors

Installation Step 13: Connect Door Arm to Trolley

One-Piece Doors: Door Arm and Travel Limit Adjustment

Adjustment Step 1: Adjust the UP and DOWN Travel Limits

Adjustment Step 2: Adjust the Force

Adjustment Step 3: Test the Safety Reversal System

Adjustment Step 4: Test the Protector System®

Operation: Important Safety Instructions

Manual Door Operation

Troubleshooting Common Problems

Diagnostics and Troubleshooting Chart

Programming Your Garage Door Opener

Add or Reprogram Hand-held Remote Control

Steps to pair new remote controls with the opener using the learn button or door control.

Programming Keyless Entry PIN

Add, Reprogram or Change a Keyless Entry PIN

Instructions for programming the keyless entry keypad via learn button or door control.

Related product manuals