13
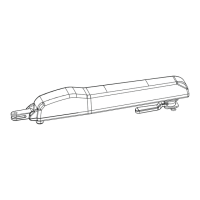
Step 3 Position the Gate Bracket
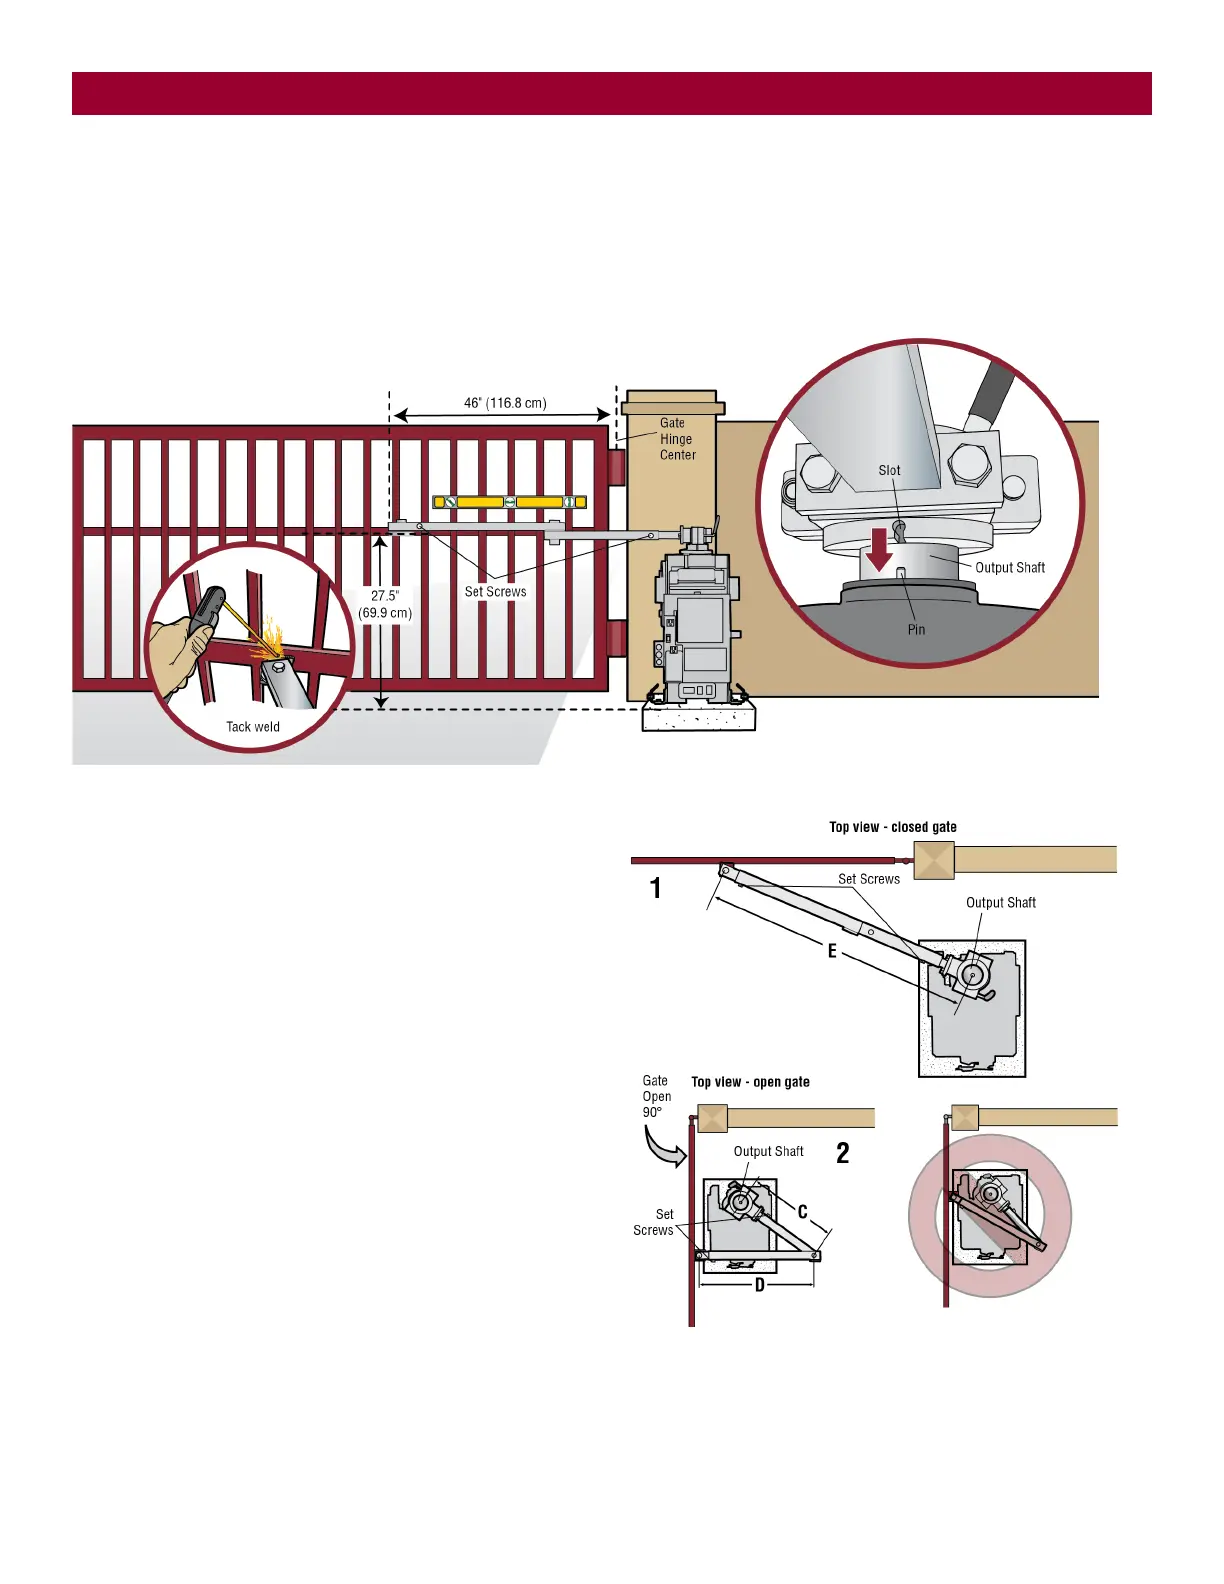
NOTE: It may be necessary to attach horizontal reinforcement to the gate before attaching the gate bracket.
1. Position the operator arm onto the output shaft so that the pin slides into the slot.
2. Measure 46" (116.8 cm) along the gate length from the gate hinge center.
3. Measure 27.5" (69.9 cm) up from the concrete pad to the gate hinge position on the gate as shown.
4. Make sure the operator arm is level and tack weld the gate bracket in this position. Use the set screws on the arm to temporarily hold the arm in place
while determining the correct measurements.
Step 4 Adjust the Operator Arm
Length
NOTE: The length of the arm can be adjusted if necessary. If adjusting the
length, ensure that both sections of the arm are adjusted proportionally.
Use the set screws on the arm to temporarily hold the arm in place while
determining the correct measurements.
1. Close the gate and measure the distance of the operator arm from the
gate bracket to the output shaft center. This distance is E.
2. Open the gate 90° (do not allow arms to scissor when open).
Measure both sections of the arm (D and C). The arm lengths are
correct as long as C+D=E (arm should be perpendicular to the gate
in the open position as shown).
INSTALLATION

 Loading...