Do you have a question about the Chamberlain Security+ 3112E and is the answer not in the manual?
Attaches the T-rail to the motor unit and installs the chain spreader.
Installs the chain/cable and attaches the sprocket cover for door openers.
Installs the chain/cable and attaches the sprocket cover for gate openers.
Crucial safety and installation guidelines before starting the opener setup.
Determines header bracket location for sectional and tracked one-piece doors.
Determines header bracket location for one-piece doors without tracks.
Guides on mounting the header bracket securely to a wall or ceiling.
Details electrical requirements, safety precautions, and grounding for the opener.
Sets the open and close limits for the door travel using adjustment screws.
Calibrates the force required for door operation to ensure safety.
Verifies the safety reversal mechanism functions correctly with an obstruction.
Key safety warnings for operating the garage door opener.
| Type | Chain Drive |
|---|---|
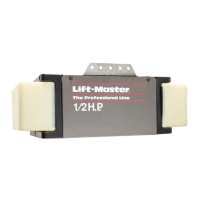
| Horsepower | 1/2 HP |
| Remote Control | Yes |
| Smart Technology | No |
| Frequency | 315 MHz |
| Drive Type | Chain Drive |
| Remote Controls Included | 1 |
| Battery Backup | No |
| Max Door Height | 7 ft |
| Technology | Security+ |
| Motor Type | AC |
| Security | Security+ rolling code |
| Keypad Compatibility | Yes |
| Lighting | 100W incandescent bulb (included) |
| Operating Voltage | 120V AC |