10
Setting Up & Using MultiNet
MultiNet provides up to two independent guest Wi-Fi networks and one encrypted
management network all with one CheckBox System.
With MultiNet you can
• Create a basic and a premium guest network, one free and one paid, with
different bandwidth limits.
• Create guest networks with different branding and different welcome pages,
such as one for the entire property and one for a restaurant on the property.
• Provide a third, private network that is encrypted for property management and
staff to use.
With MultiNet each access point can broadcast multiple networks simultaneously.
To Setup an additional network using MultiNet go to Network Setup -> Wireless
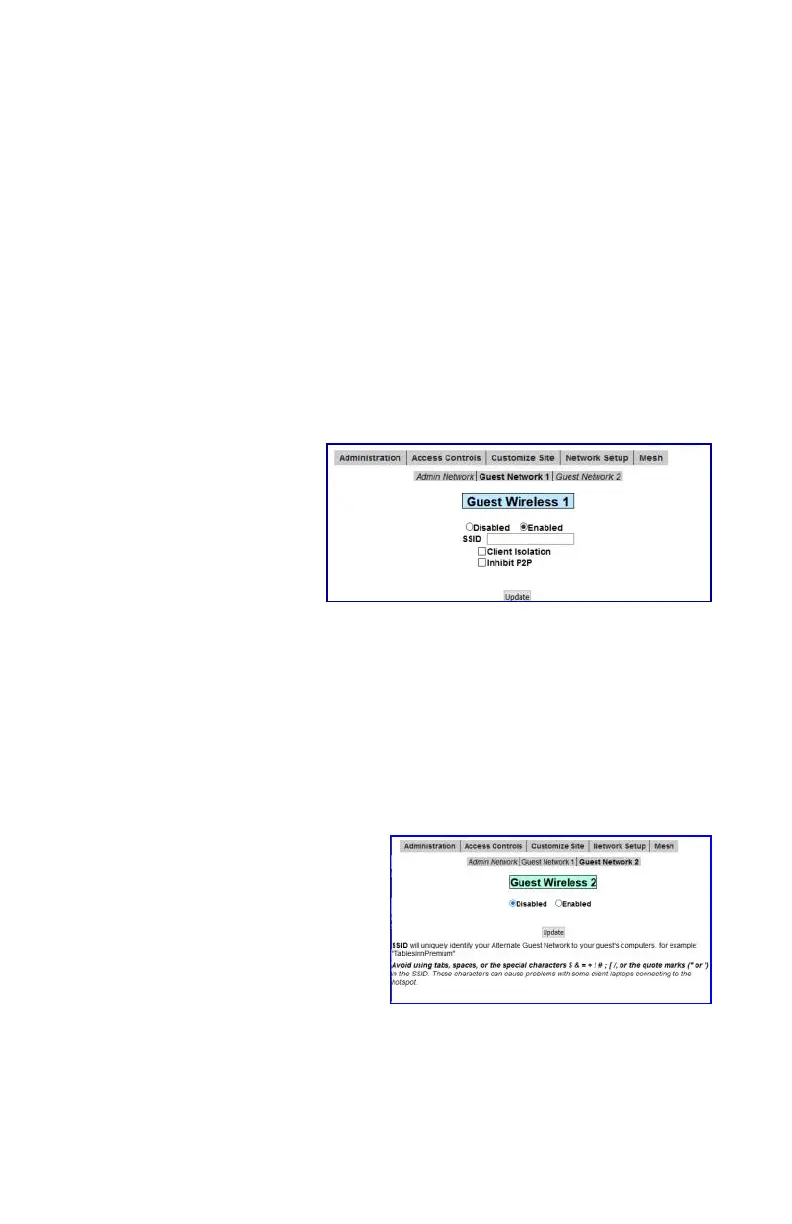
MultiNet. Here you will see a sub menu:
By default only Guest Network 1 is enabled. Here you disable or enable the
network, change the SSID (the name the network broadcasts to devices, and
choose Client Isolation and P2P Inhibit options. After making changes press
Update. Changes may take a few moments to take effect, and if you are connected
to the CheckBox wirelessly your connection may be dropped.
Guest Network 2
If you would like to enable a second guest
network select Guest Network 2 from the
gray menu bar.
You will not be able to set the options for
Guest Network 2 until you select Enabled.
After enabling the second guest network,
set your SSID and choose Client Isolation
and P2P Inhibiting options if appropriate.
The SSID must be different than the SSID
used for your first guest network or your admin network.
Select Update. And Wait.
Adding an additional network can take several minutes as the system has to set up
the network routes, login screens and update the access points.