4
STAGE 1
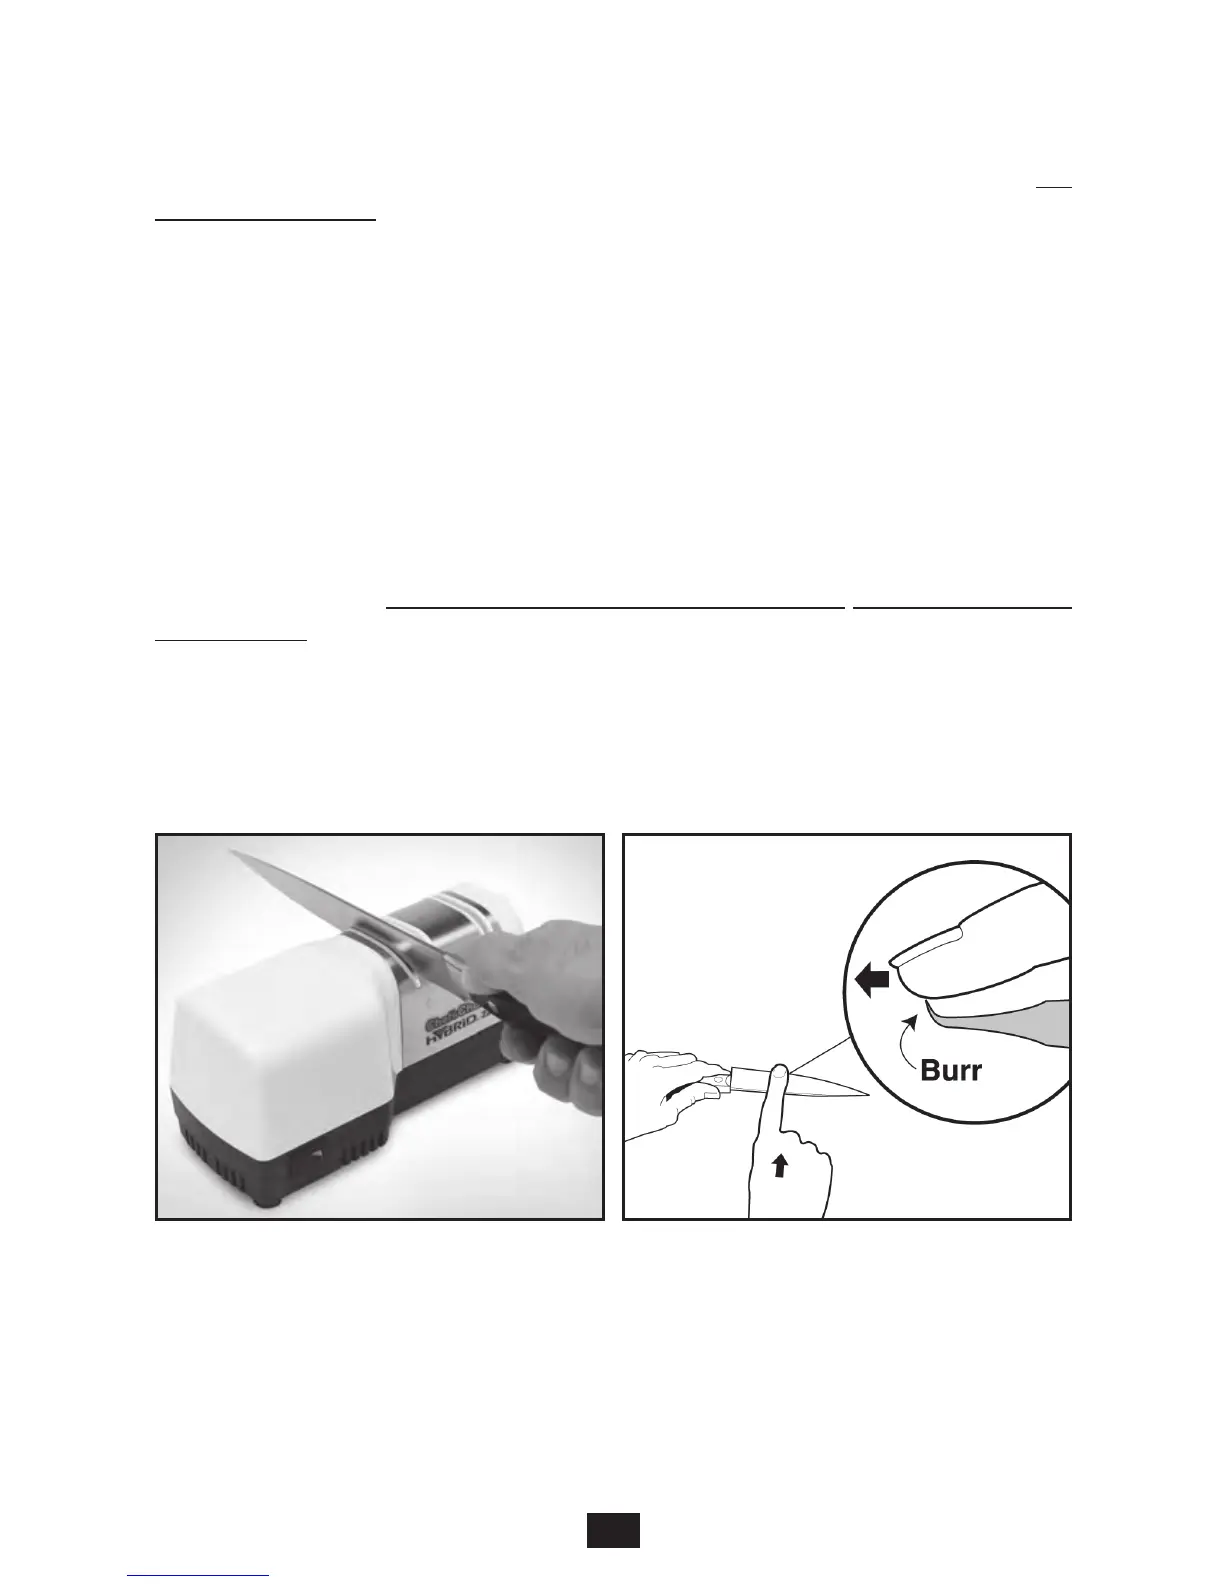
To sharpen, place the sharpener on the table gripping it securely with your left hand. Push
on the power switch. Insert the knife blade, Figure 1, near its handle, into the far left slot of
Stage #1 and allow the left face of the blade to rest on the left face of the slot as you pull
the knife toward you. The knife edge should be in sustained moving contact with the
internal diamond coated disk. Only light downward force will be necessary as you pull the
blade toward you. Listen carefully to insure your knife maintains good contact with the
diamond disk. Take about 5 seconds to make each pull if you have a six inch (6”) long blade.
Increase the time of each pull for longer blades or decrease the time for shorter blades.
Make one pull of the blade in the left slot as described above and then repeat the same
procedure in the adjacent (right) slot of Stage 1. As you pull the knife thru the right slot, (see
Figure 3), allow the right side of the knife to rest on the right face of the slot. If your knife,
before sharpening, is not very dull you will find that only about 5 pairs of pulls, alternating
in the left and right slots of Stage 1, will be sufficient to put a keen edge on the blade.
However, if the knife is initially very dull you may find that 10 or more alternating pairs of
pulls in the left and right slots of Stage 1 will be needed the first time as you reshape and
sharpen the old edge. In Stage 1 always pull the blade toward you.
Never push the blade
away from you when using Stage 1. Before leaving Stage 1 it is important to examine the
knife edge to insure there is a small burr along one side of the edge.
Figure 2 illustrates how to check for the burr. Proceed as follows: If your last sharpening pull
was in the right slot there should be a small burr on the right side of the blade edge. If the last
pull was in the left slot there should be a small burr along the left side of the edge. If there is
no burr make another pair of pulls and again check for a burr. Repeat making pairs of alter-
Figure 1. Inserting the blade in the left slot of the
Stage 1. Alternate individual pulls in left and right slots.
Figure 2. Develop a distinct burr along knife edge
before honing in Stage 2. Burr can be detected by
sliding finger across and away from the edge.
Caution! See text.