13 14
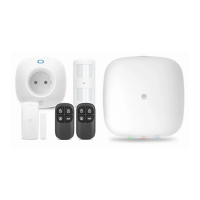
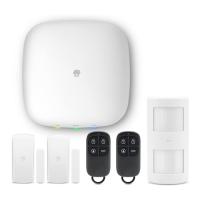
Installation of Accessories
Upon conrmation of successful pairing, enter installation processes.
Installation of Door/Window Contact
Step 1: Choose a Suitable Place
The contact can be mounted on objects that can be opened/closed like doors,
windows, and cabinets. To mount on a metal door, please block up the contact.
Step 2: Use Double-sided Adhesive Tape on the Back of Door/Window Contact
When attaching the contact, ensure the distance between the transmitter and the
magnet is less than 1 cm. When the distance exceeds 2 cm and the transmitter ashes,
this means the door/window contact is functioning properly.
Step 3: Testing
Set the panel to arm and then trigger the door/window contact (open the door
or window) to ensure proper functioning of the panel in receiving signals from the
accessory.
Installation of PIR Motion Detector
Insatallation notice: Should not face glass doors/windows; should not face objects
that easily swing; should not face any source of cold or heat, such as a heater, air-
conditioner, refrigerator or microwave oven; avoid installing two PIR motion detectors
within the same detection area to prevent mutual interference.
O
N
Step 1: Choose a Suitable Place
For best detection, it is recommended that you use a piece of 3M double-sided
adhesive tape inside the package to mount the PIR motion detector on a clean wall at
the corner of a major passageway (e.g. living room and corridor) at 2.2-2.5 m above
the ground.
2.2-2.5m
Ground
Step Two: Test the PIR Motion Detector
After mounting the detector, move within the detection area and observe the status
indicator light. If any human body movement is detected, the status indicator light will
ash once.
Note: You may also use an accessory stand and
screws to mount the product in a special position and
then achieve best detection through the walking test
and manual adjustment of angles.
Step 3: Testing
Set the panel to Arm and then trigger the detector to ensure proper functioning of the
panel in receiving signals from the accessory.