EN
EN - 3
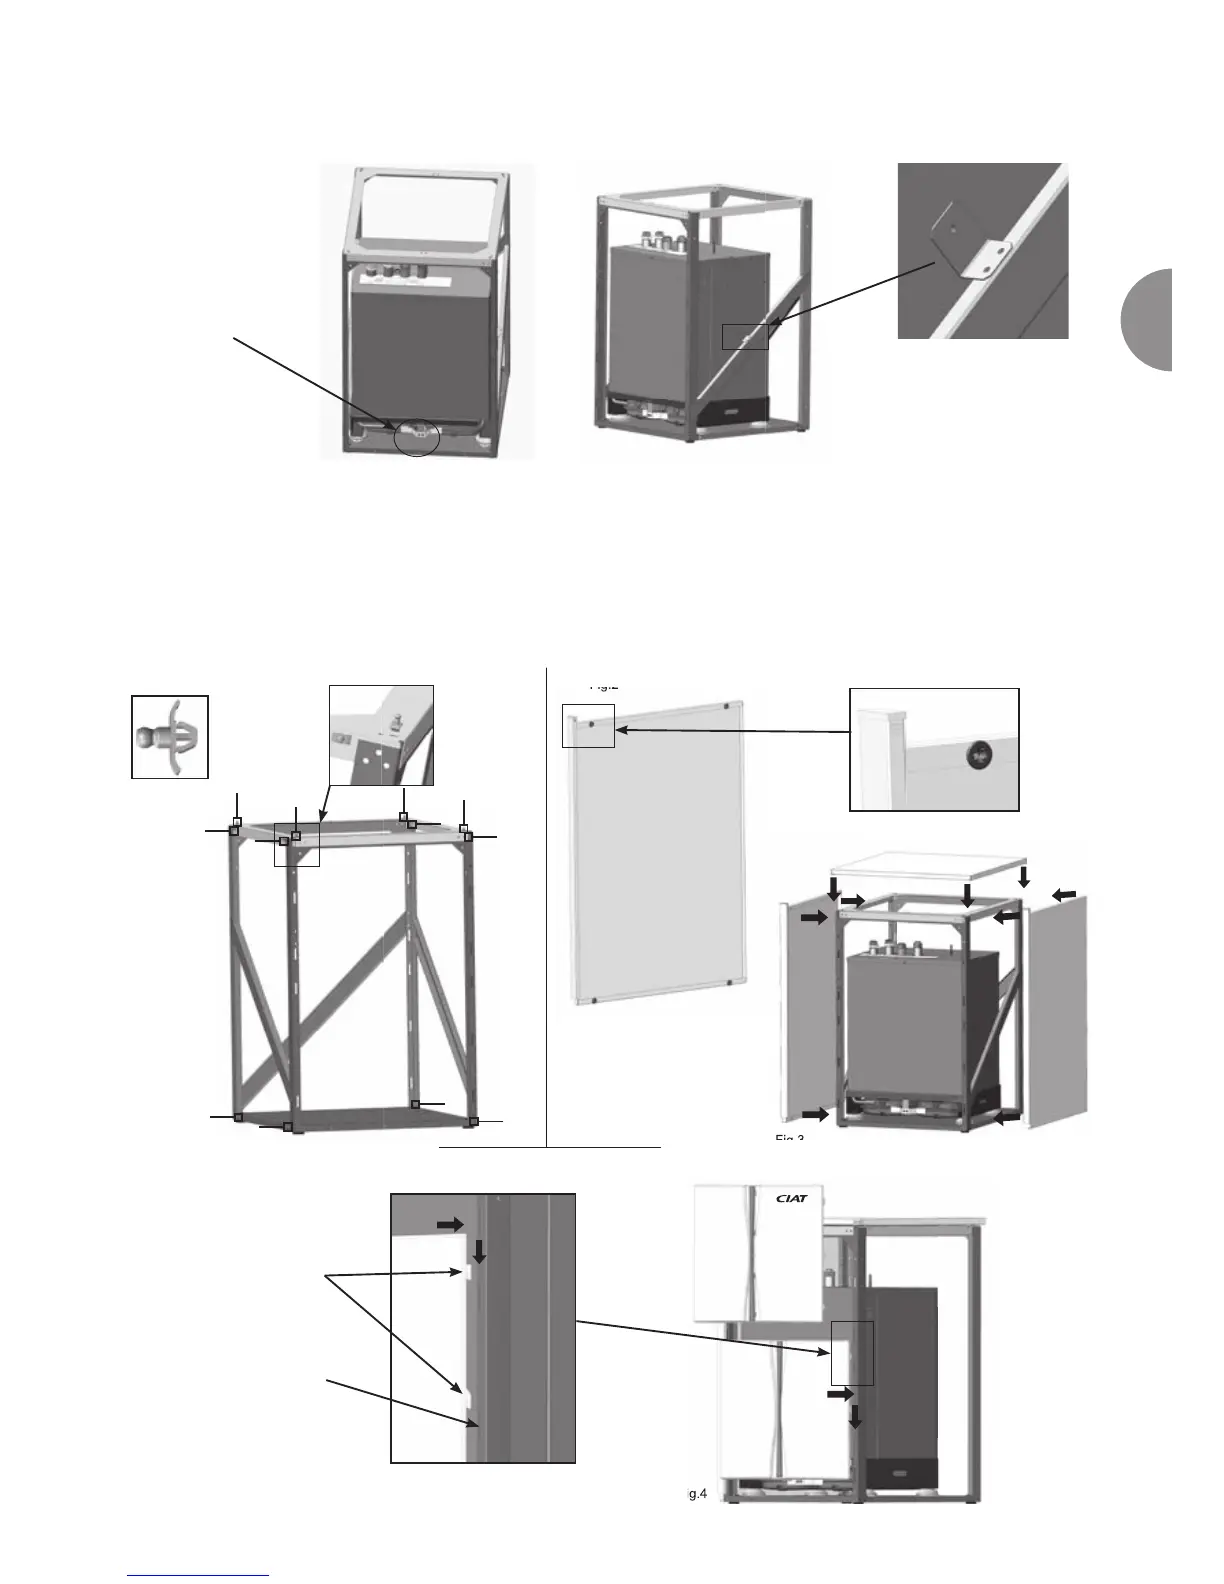
1.2.2 Removing the shipment protection
1 - Remove the lag bolt (fig. 1) securing the pallet to the heat pump
2 - Remove the red brackets (fig. 2) used to secure the refrigerating block to the frame during transport
1.2.3 Assembling the casing panels
1- Fit the male ball joints (fig. 1) on the frame (12 ball joints) (fig. 1b)
a. Use a wooden mallet to avoid damaging the male ball joints during fitting
b. Make sure that the transport brackets have been removed
2- Assemble the roof and the 2 side panels between the female couplers (fig. 2) and the male ball joints on the frame (fig. 3)
3- Fit the
GeoCIAT
TM
Modular
front panels (fig. 4) in the slots provided (fig. 5)
Position of the lag bolt
at the front of the unit
Fig.1
Fig.2
Remove the 2 red brackets
on the left and right to
release the refrigerating
block completely
Fig.1 b
Fig.3
Fig.2
Fig.1
Fit the 12 male ball joints (same on both sides):
GeoCIAT
TM
Modular
casing: