Outer rail attached to rack post3Inner rail release clip1
Inner rail attached to server and inserted into outer
rail
2
Step 5 (Optional) Secure the server in the rack more permanently by using the two screws that are provided with the slide rails.
Perform this step if you plan to move the rack with servers installed.
With the server fully pushed into the slide rails, open a hinged slam latch lever on the front of the server and insert the
screw through the hole that is under the lever. The screw threads into the static part of the rail on the rack post and prevents
the server from being pulled out. Repeat for the opposite slam latch.
What to do next
Install the Cable Management Arm (Optional)
The CMA is reversible left to right. To reverse the CMA, see Reversing the Cable Management Arm (Optional)
before installation.
Note
Step 1 With the server pushed fully into the rack, slide the CMA tab of the CMA arm that is farthest from the server onto the
end of the stationary slide rail that is attached to the rack post (see the following figure). Slide the tab over the end of the
rail until it clicks and locks.
Step 2 Slide the CMA tab that is closest to the server over the end of the inner rail that is attached to the server (see the following
figure). Slide the tab over the end of the rail until it clicks and locks.
Step 3 Pull out the width-adjustment slider that is at the opposite end of the CMA assembly until it matches the width of your
rack (see the following figure).
Step 4 Slide the CMA tab that is at the end of the width-adjustment slider onto the end of the stationary slide rail that is attached
to the rack post (see the following figure). Slide the tab over the end of the rail until it clicks and locks.
Step 5 Open the hinged flap at the top of each plastic cable guide and route your cables through the cable guides as desired.
Cisco Secure Network Server 3500 Series Appliance Hardware Installation Guide
18
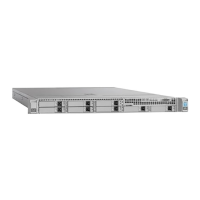
Install the Cisco SNS 3515 and Cisco SNS 3595 Hardware Appliances
Install the Cable Management Arm (Optional)
 Loading...