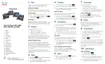
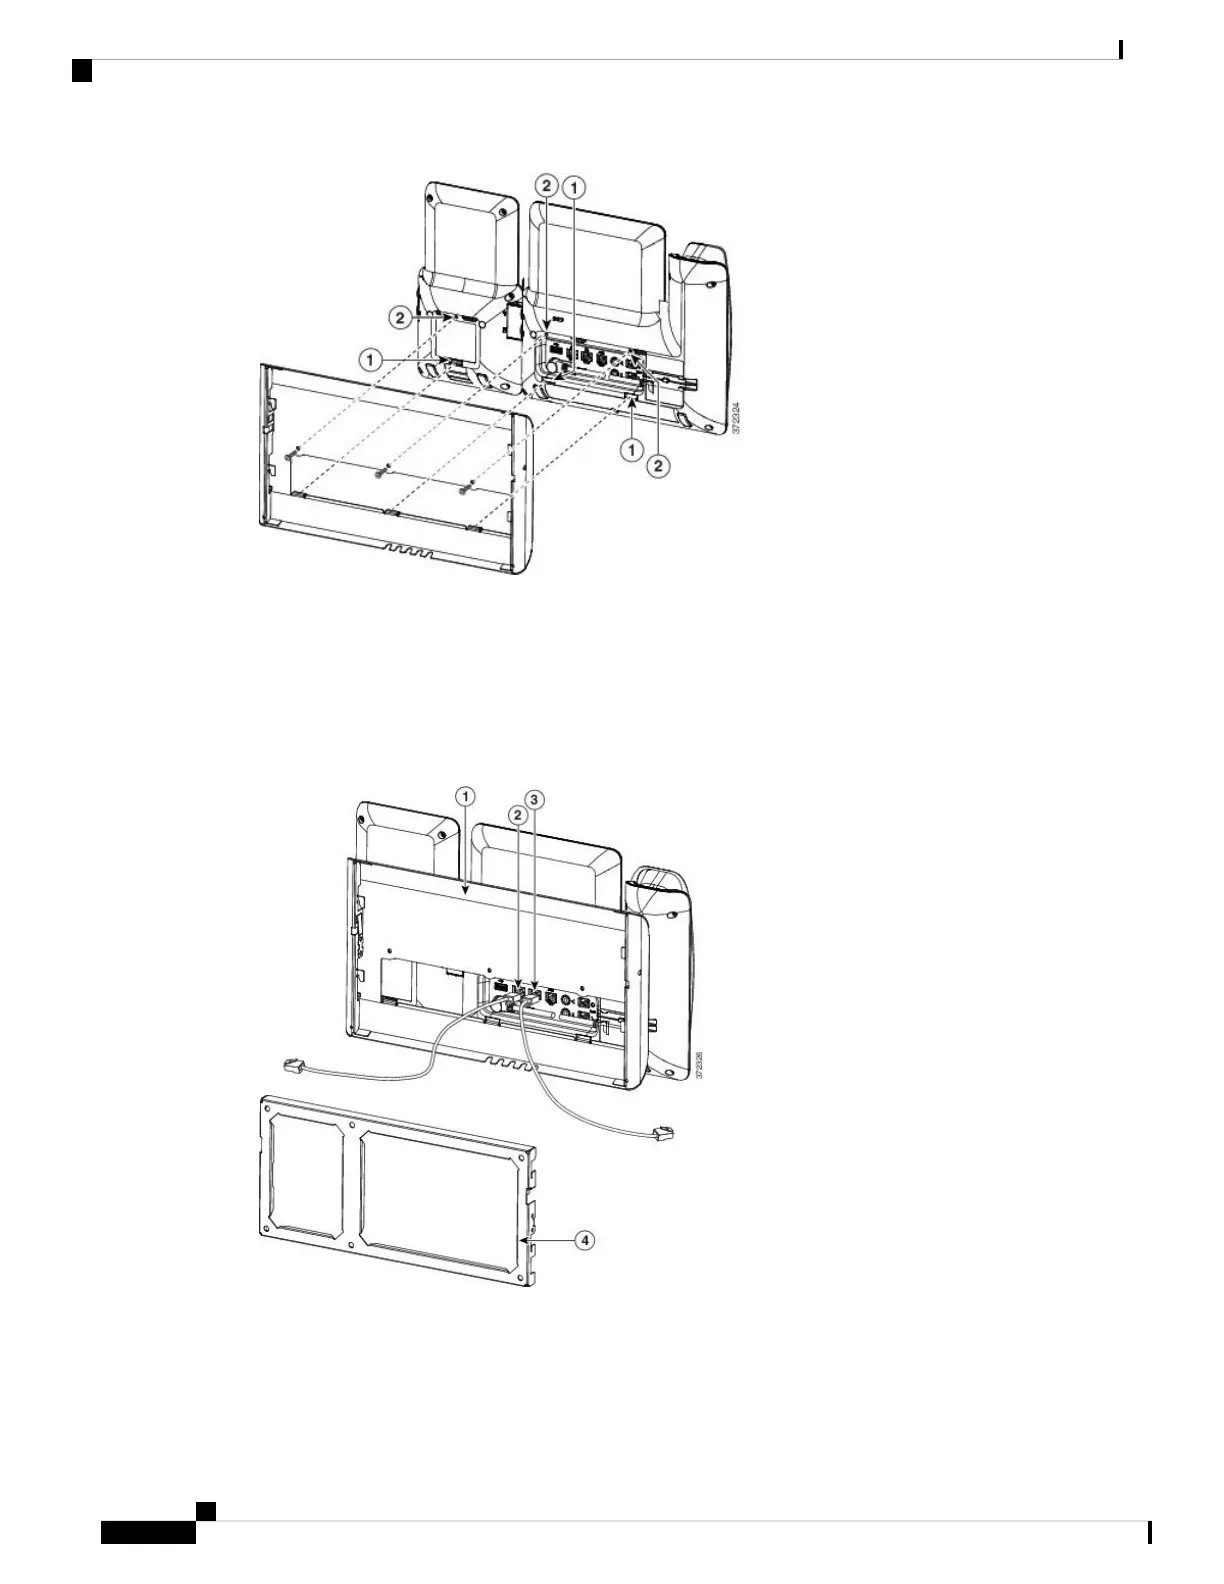
Step 3 Attach the cords.
a) Attach the Ethernet cable to the 10/100/1000 SW network port and wall jack.
b) (Optional) If you are connecting a network device (such as a computer) to the phone, attach the cable to
the 10/100/1000 Computer (PC access) port.
c) (Optional) If you are using an external power supply, plug the power cord into the phone and dress the
cord by clipping it into the clips that are incorporated into the phone body next to the PC port.
d) (Optional) If the cables terminate inside the wall bracket, connect the cables to the jacks.
Step 4 Attach the phone to the wall bracket by inserting the tabs on the top of the phone bracket into the slots on the
wall bracket.
Cisco IP Phone 8800 Series Multiplatform Phones Administration Guide
134
Hardware and Accessory Installation
Install Non-Lockable Wall Mount Kit for Phone with Key Expansion Module
 Loading...