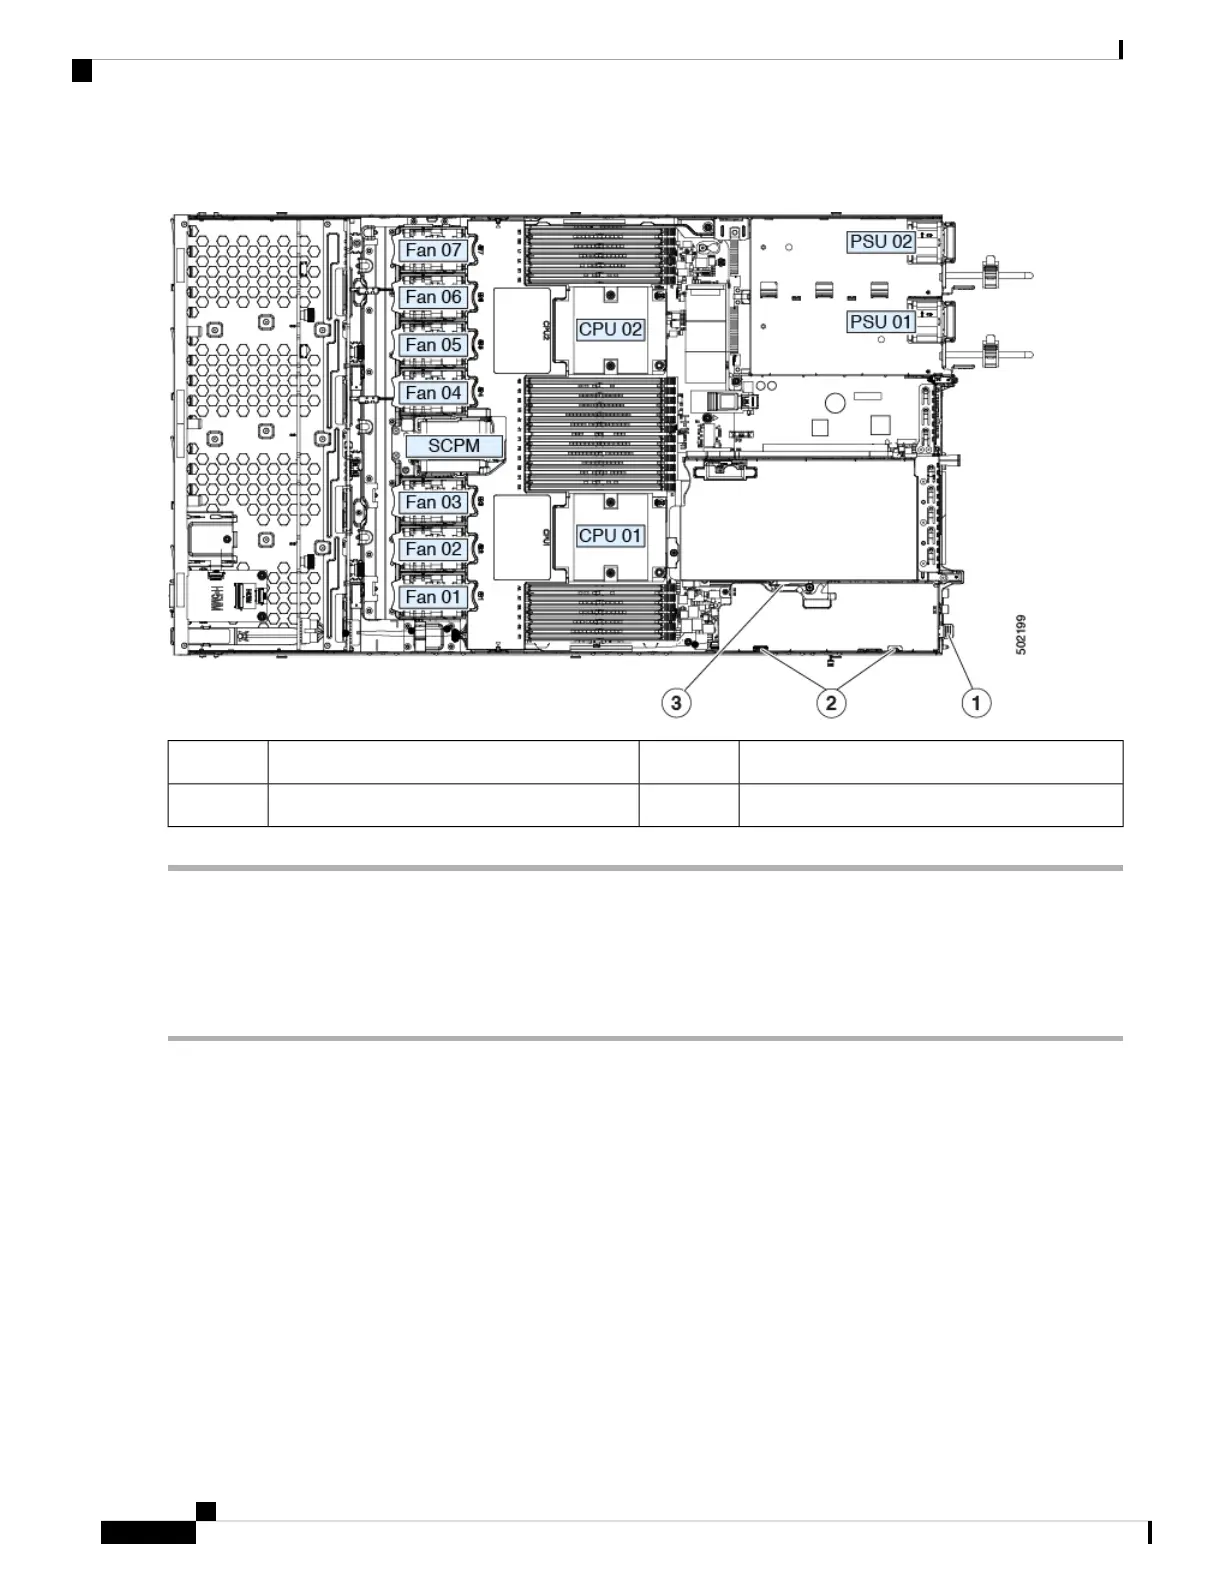
Figure 41: mRAID Riser (Internal Riser 3) Location
Card-ejector lever3External blue handle1
-Two pegs on inner chassis wall2
Replacing a Chassis Intrusion Switch
The chassis intrusion switch in an optional security feature that logs an event in the system event log (SEL)
whenever the cover is removed from the chassis.
Step 1 Prepare the server for component installation:
a) Shut down and remove power from the server as described in Shutting Down and Removing Power From the Server,
on page 29.
b) Slide the server out the front of the rack far enough so that you can remove the top cover. You might have to detach
cables from the rear panel to provide clearance.
If you cannot safely view and access the component, remove the server from the rack.
Caution
c) Remove the top cover from the server as described in Removing the Server Top Cover, on page 30.
Step 2 Remove an existing intrusion switch:
a) Disconnect the intrusion switch cable from the socket on the motherboard.
b) Use a #1 Phillips-head screwdriver to loosen and remove the single screw that holds the switch mechanism to the
chassis wall.
c) Slide the switch mechanism straight up to disengage it from the clips on the chassis.
Cisco APIC M3/L3 Server Installation and Service Guide
80
Maintaining the Server
Replacing a Chassis Intrusion Switch