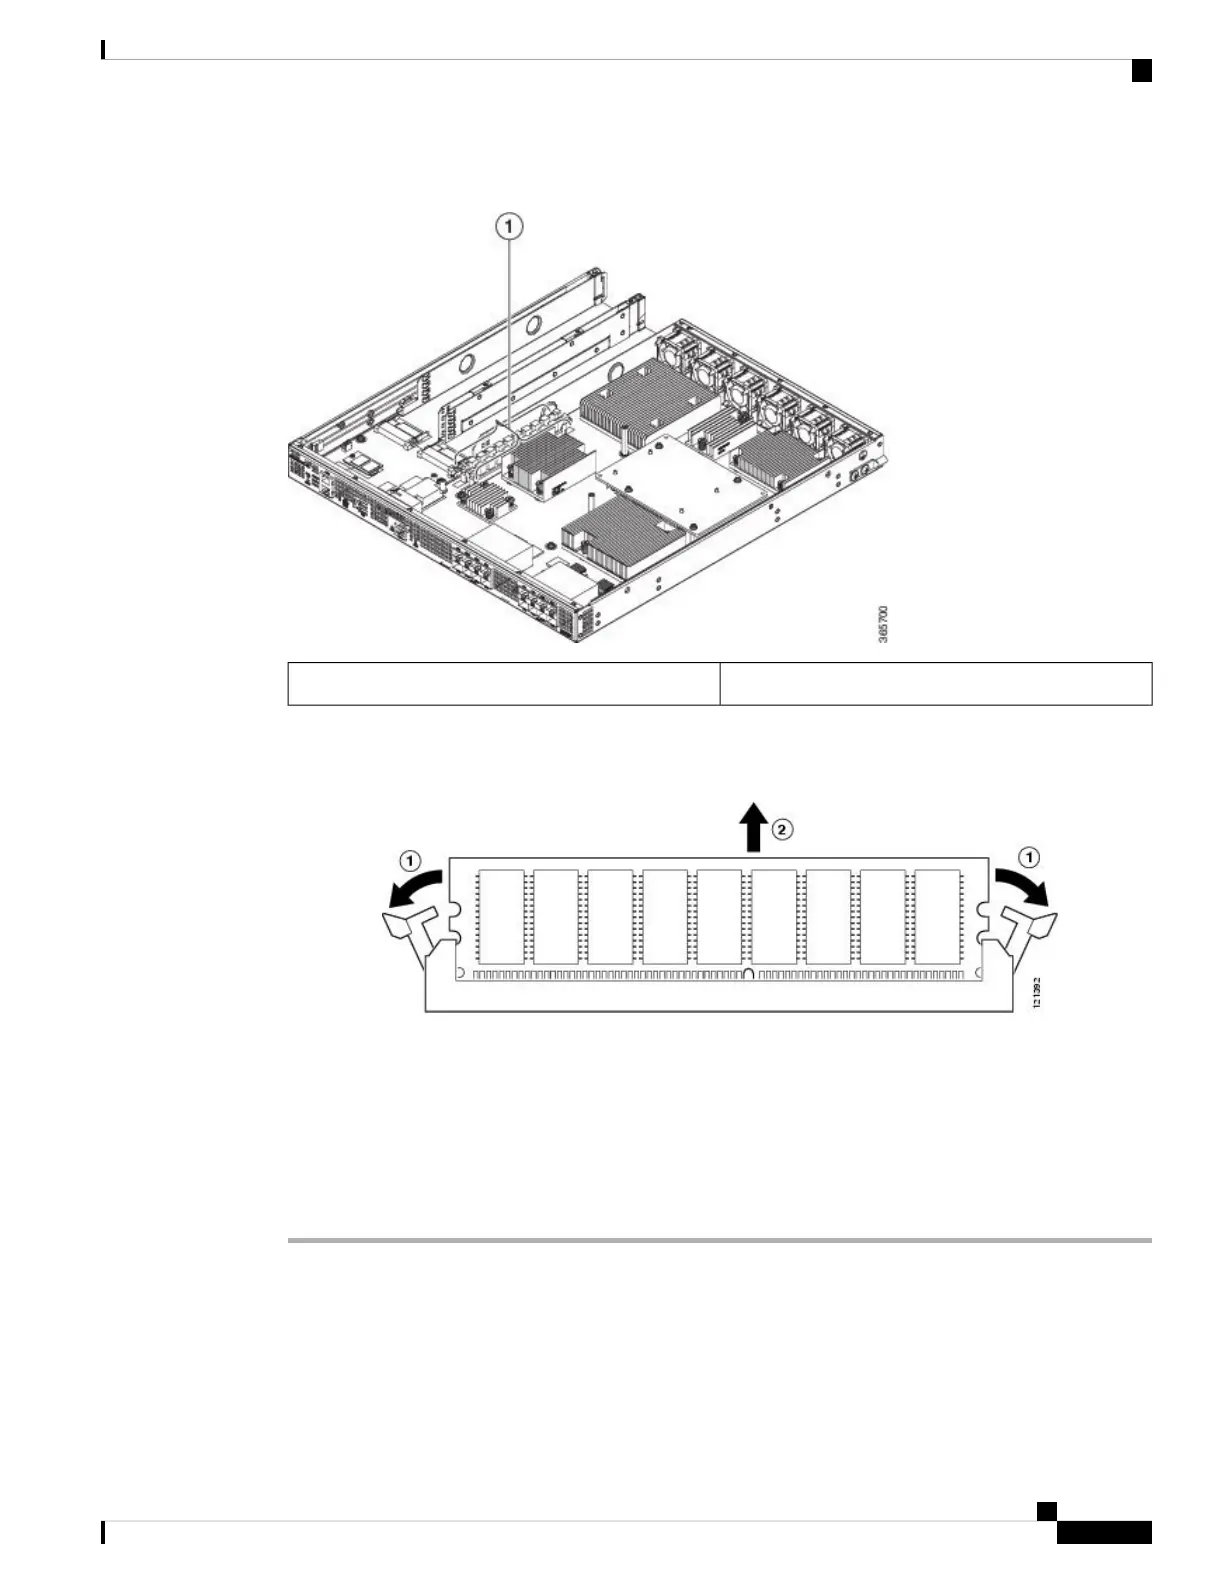
Figure 8: DIMM Location
DIMM location (two slots)1
Step 4 Pull down the DIMM module spring latches to release the corresponding DIMM from the socket.
Figure 9: DIMM Module Spring Latches to Remove the DIMMs
Step 5 When both ends of the DIMM are released from the socket, grasp each end of the DIMM with your thumb
and forefinger and pull the DIMM completely out of the socket. Handle only the edges of the DIMM; avoid
touching the memory module, pins, and the metal traces (the metal fingers along the connector edge of the
DIMM) along the socket edge.
Step 6 If you are upgrading the DIMM configuration from 8 GB to 16 GB using M-ASR1001HX-16GB, proceed to
the "Replacing a DIMM in a Cisco ASR 1001-HX Router, on page 12" section. Otherwise, place the DIMM
in an antistatic bag to protect it from ESD damage.
Removing and Replacing FRUs
11
Removing and Replacing FRUs
Removing a DIMM from a Cisco ASR 1001-HX Router

 Loading...


