Required Equipment
You need the following equipment for this installation:
• Number 2 Phillips screwdriver
• Tape measure and level (to ensure that shelf brackets are at level with each other)
• NEBS plate - If the airflow is port-side intake
Installing the Shelf Bracket Kit into a Two-Post Telco Rack
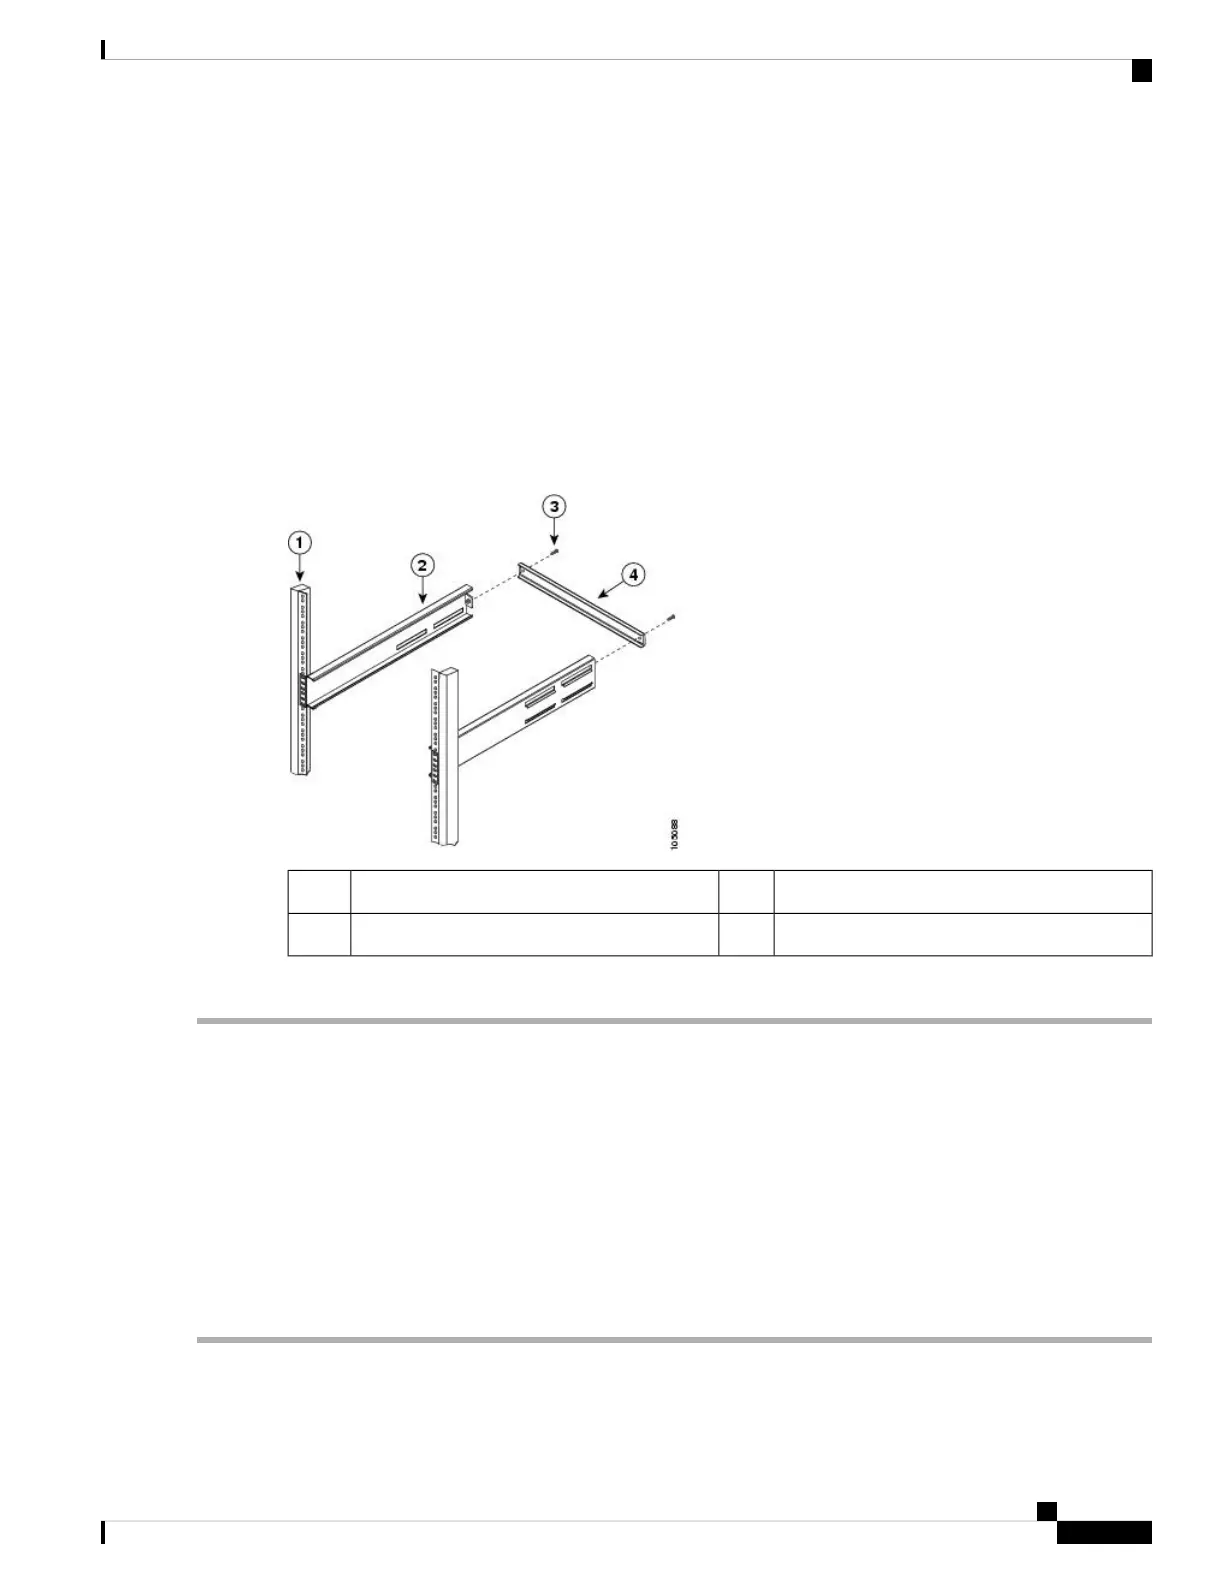
The following figure shows the installation of the shelf bracket kit into a two-post Telco rack:
Figure 1: Installing the Shelf Bracket Kit into a Telco Rack
10-32 screws3Rack-mounting post1
Crossbar4Shelf bracket2
To install the shelf brackets in a Telco rack, follow these steps:
Step 1 Position a shelf bracket inside a rack-mounting post as shown in Figure 1: Installing the Shelf Bracket Kit into a Telco
Rack, on page 3 and align the screw holes at the front of the shelf bracket with the holes in the rack-mounting post.
Then, attach the shelf bracket to the rack-mounting post using a minimum of four 12-24 or 10-24 screws.
The bottom hole of the shelf bracket should align with the bottom hole (the hole immediately above the 1/2 in.
spacing) of a rack unit on the rack-mounting post.
Note
Step 2 Repeat Step 1 with the other shelf brackets.
Step 3 Verify that the shelf brackets are at the same height (using the level or tape measure, as desired).
Step 4 Attach the crossbar to the rear of the shelf brackets, as shown in Figure 1: Installing the Shelf Bracket Kit into a Telco
Rack, on page 3, using the 10-32 screws.
Installing a Cisco MDS 9132T Switch
3
Installing a Cisco MDS 9132T Switch
Required Equipment

 Loading...