EasyManua.ls Logo

Cisco Meraki MR56 User Manual

Cisco Meraki MR56
19 pages
To Next Page IconTo Next Page
Page #1 background imageLoading...
Page #1 background image
MR56 Installation Guide
The Cisco Meraki MR56 are dual-band enterprise class 802.11ax cloud-managed access points. Designed for highest capacity and highest density, the
MR56 meets the needs of the most demanding environments. The access point also includes a third radio dedicated to optimizing the RF environment
and securing the airwaves.
About this Guide
This guide provides instruction on how to install and configure your MR56 access points. This guide also provides mounting instructions and limited
troubleshooting procedures. For more wireless installation guides, refer to the wireless installation guides section on our documentation website.
Product Overview
Physical Specifications
MR56
Interfaces
1x 1000/2.5G/5G BASE-T Ethernet (RJ45)
1x DC power connector (5.5 mm x 2.5 mm, center positive)
Power
Power over Ethernet: 42.5 - 57 V (802.at compliant)
Alternative: 12 V DC input
Power consumption: 22W max (802.3at)
Power over Ethernet injector and DC adapter sold separately
Environment
Operating temperature: 32 °F to 104 °F (0 °C to 40 °C)
Humidity: 5 to 95% non-condensing
Physical Security
Two security screw options (included) (3.5 mm long and 2.5 mm diameter and 5 mm
head)
Kensington lock hard point
1
Question and Answer IconNeed help?

Do you have a question about the Cisco Meraki MR56 and is the answer not in the manual?

Cisco Meraki MR56 Specifications

General IconGeneral
ModelMR56
MIMO8x8
MU-MIMOYes
OFDMAYes
Operating Temperature0°C to 40°C (32°F to 104°F)
Frequency Bands2.4 GHz, 5 GHz
Power over Ethernet802.3at
Mounting OptionsWall, Ceiling
Power MethodPoE or power adapter
SecurityWPA3, WPA2

Summary

About this Guide

Product Overview

Physical Specifications

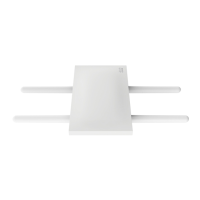
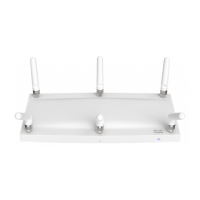
Details the MR56's physical aspects: interfaces, power, environment, and security features.

Security Features

Ethernet Ports

Power Source Options

Factory Reset Button

LED Indicators and Run Dark Mode

Package Contents

Safety and Warnings

Pre-install Preparation

Configure your Dashboard Network

Steps to add and configure access points within the Meraki Dashboard network.

Check and Set Firmware

Recommends upgrading the AP's firmware before mounting for optimal performance.

Check and Configure Upstream Firewall Settings

Details firewall configuration requirements for outgoing connections for the access point.

Assigning an IP Address

Explains how to assign IP addresses (DHCP or static) to the access points.

Collect Tools

Collect Additional Hardware for Installation

Choose Your Mounting Location

Attach the Mount Cradle

Wall or Solid Ceiling Mount Using Mount Cradle

Details mounting the cradle to a wall or solid ceiling using provided hardware.

Drop Ceiling Mount using Mount Cradle

Explains how to mount the AP cradle onto a drop ceiling T-rail using the accessory kit.

Electrical Junction Box Mount Using Mount Cradle

Details mounting the AP cradle to electrical junction boxes or outlet boxes.

Getting Power to the AP

Attach the MR56 AP to the Mount Cradle

Desk or Shelf Mount

Physical Security

Security Screw

Details using the included security screw to prevent dislodging and theft.

Kensington Lock

Describes securing the AP using a standard Kensington lock and cable.

Verify Device Functionality and Test Network Coverage

Check LEDs

Explains how to interpret the LED indicators to confirm device status and firmware upgrades.

Verify access point connectivity

Instructions for checking wireless connectivity by associating a client device to the AP.

Check network coverage

Guidance on testing and confirming signal strength across the coverage area.

Basic Troubleshooting

Check Radio Functionality by Making the AP a Repeater

Check Ethernet Port Functionality by Connecting to the AP

Check Static IP Address Configuration

Warranty

Support and Additional Information

Related product manuals