Cisco TelePresence Video Systems
D15318.02 Video Systems Getting Started Guide CE8.1, APRIL 2016. Copyright © 2016 Cisco Systems, Inc. All rights reserved. 9
Getting Started Guide
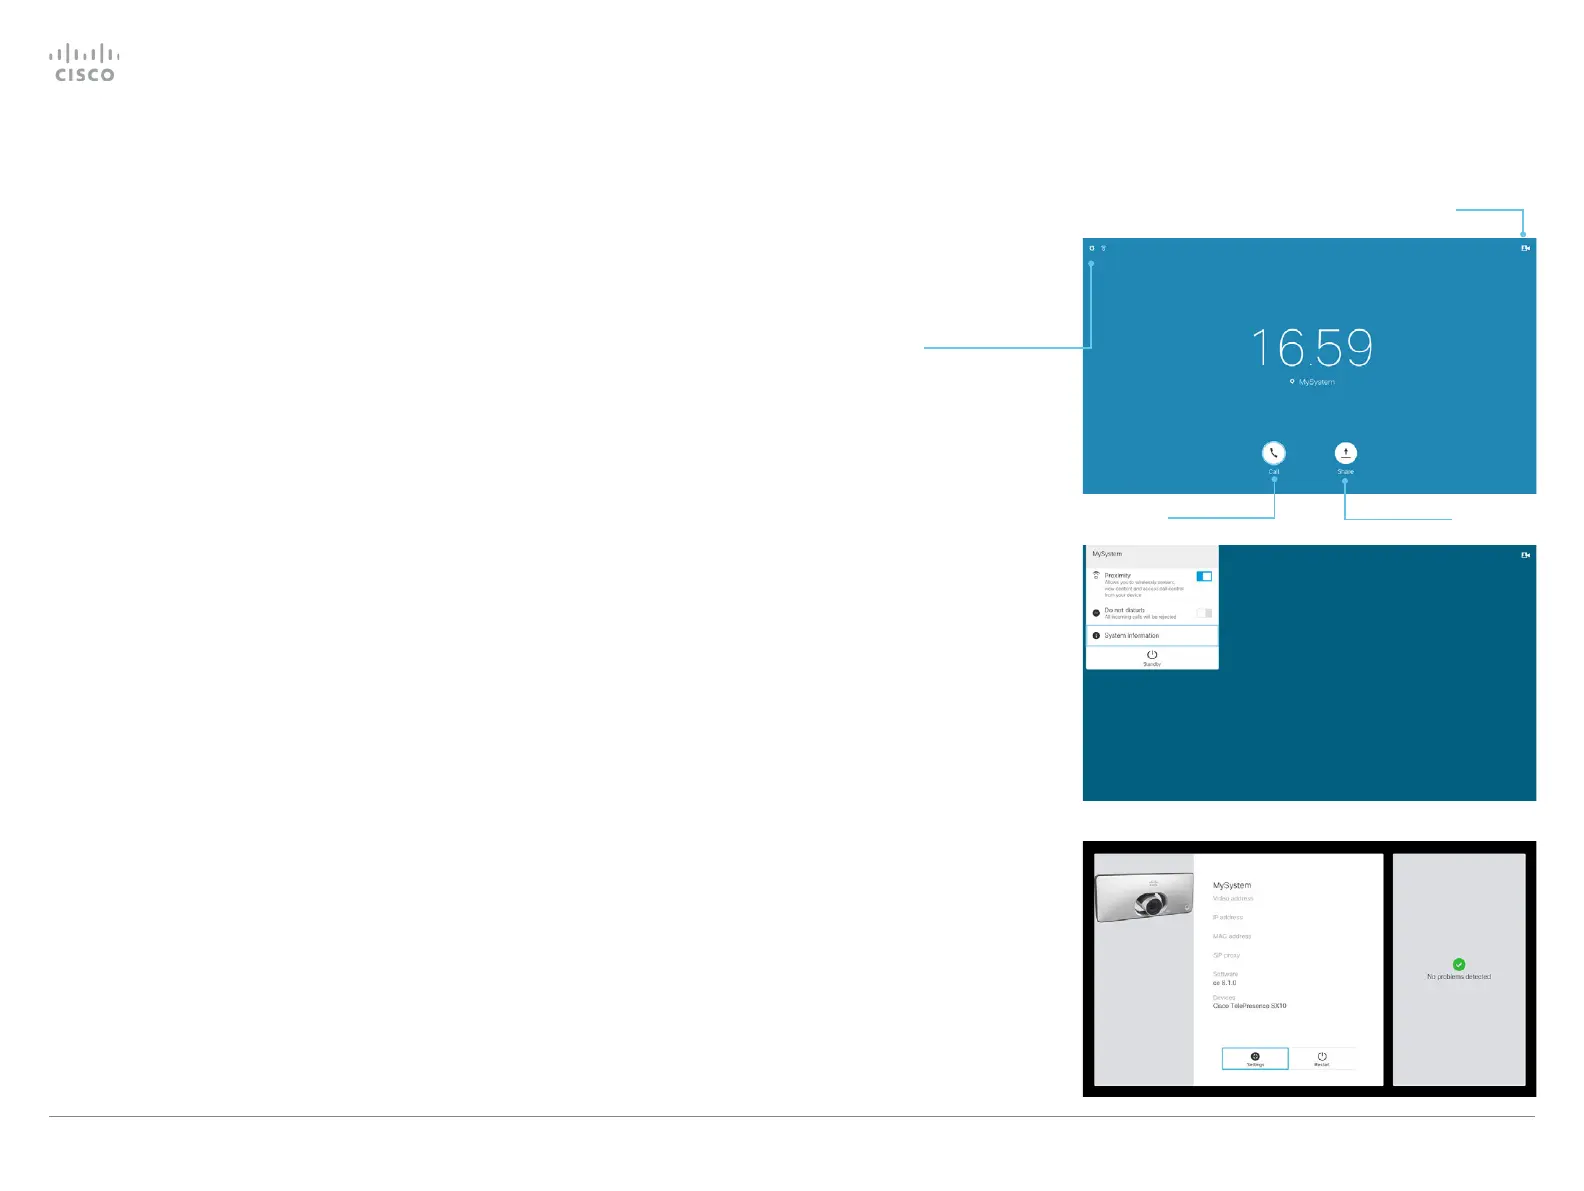
On-screen menu when using a remote control
To access the Settings menu, navigate to
upper left corner of the screen and press OK
on the remote control. Then navigate down
to System Information and press OK again.
Settings menu
After the initial set up, you can revisit the configurations and
more in the Settings menu:
• Language: Select a language for the user interface.
• Time zone: Select your local time zone.
•
Screen adjustment: Adjust display and system settings for
correct rendering of video and graphics.
•
Network connection: Change the IPv4 settings, if those
have not been configured by autoprovisioning or the
network. VLAN settings are also available.
•
Service activation: Change provisioning settings, if those
have not been configured by autoprovisioning.
•
Microphone check: Check that the microphone is working.
If you are using an external microphone, use this test to
adjust its location.
• Sound test
• Default camera preset: Set the default camera position for
future calls.
•
Presentation: Test presenting from your computer. You
need an HDMI or VGA cable for this.
•
Factory settings: Reset your video system to its factory
settings, and you lose your current registration. You cannot
undo a factory reset.
•
Extended logging: Helps diagnose network issues and
problems during call setup. While in this mode more infor-
mation is stored in the log files. Extended logging uses
more of the system’s resources, and may cause it to
underperform. Only use extended logging mode when you
are troubleshooting an issue.
Place calls Share content
• Proximity
• Do not disturb
• System Information
• Standby
Camera
Control
When you start the system for the first time, the Setup assistant
starts automatically.
Read how to configure the system with the on-screen setup
assistant on page 20.
The System Information menu shows the
basic system information and potential
issues the system might have. You can also
restart the system from this page.
In addition this page provides access to
the Settings menu. These settings can
be protected with a PIN set from the web
interface.
On-screen setup assistant