2 OPERATION N” MA. 453-O : (./
‘cc ,,,g md ndjaslisg I/w hsdrmlir hrnkr rev/m/
k.
II. BLEEDING THE BRAKES ON ESTA
,TE VEHICLES (-
0 ,970 )
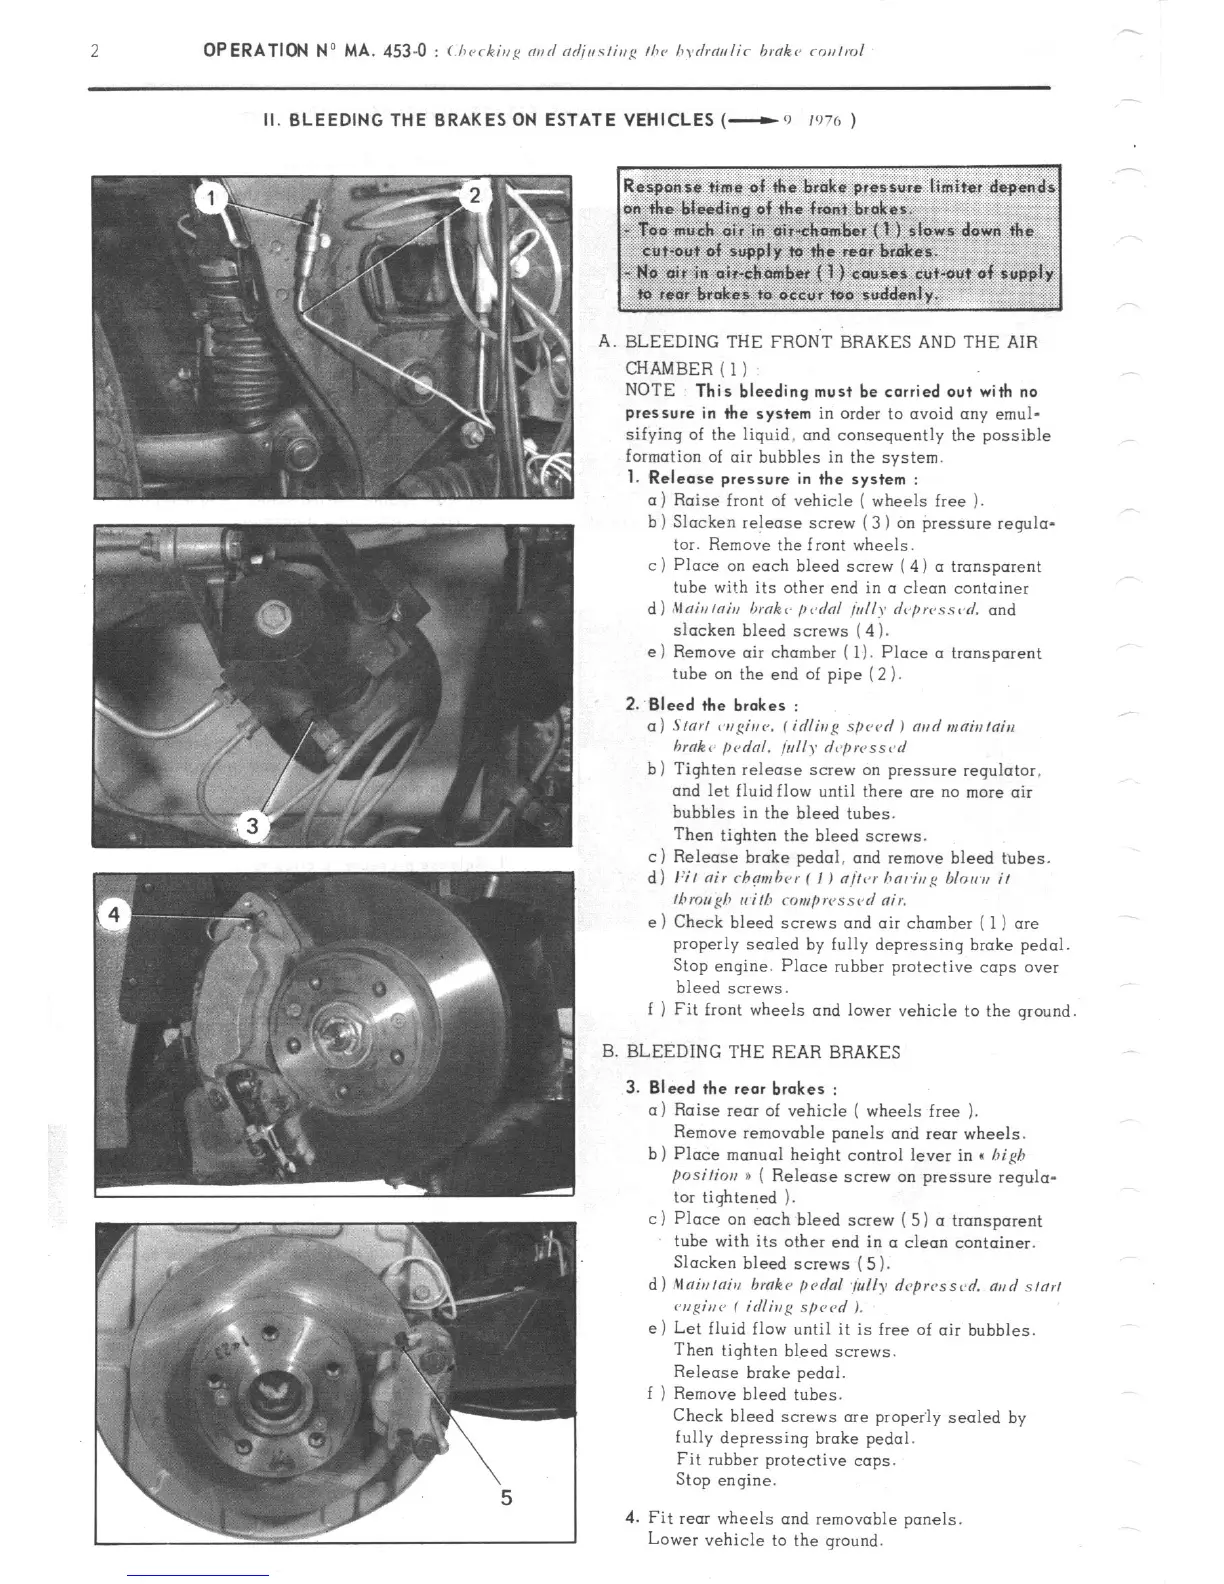
A. BLEEDING THE FRONT BRAKES AND THE AIR
CHAMBER ( 1)
NOTE
This bleeding must be carried out with no
pressure in the system
in
order to
avoid any emul-
sifying of the liquid. and consequently the possible
formation of air bubbles in the system.
1. Release pressure in the system :
a 1 Raise front of vehicle ( wheels free ).
b ) Slacken release screw (3 ) on $ressure requlo-
tor. Remove the front wheels.
c 1 Place on each bleed screw ( 4 1 a transparent
tube wi!h its other end in a clean container
d ) ,Mnir,lnh, brnk L p&d /u//y d<~pwss,~d. and
slacken bleed screws (4 ).
e) Remove air chamber ( 1). Place a transparent
tube on the end of pipe (2 ).
2.
Bleed the br.kes :
a) S/or/ ~v,gir,c,. C id/ivg spevd I md vrnialni,r
hrnk L firdnl. tullr d,~pwss<~d
b) Tighten release screw on pressure regulator.
and let fluid flow until there are no more air
bubbles in the bleed tubes.
Then tighten the bleed screws.
c) Release broke pedo1, and remove bleed tubes.
d) I:;/ nir rhnmhrr ( I ) nltcr hnr~htg /dorm i/
Ibrouph I, i/h Nmp IPSS ?,I nir.
e ) Check bleed screws and air chamber ( 1) are
properly sealed
by
fully depressing brake pedal.
Stop engine. Place rubber protective caps over
bleed screws.
f 1 Fit front wheels and lower vehicle to the ground
B. BLEEDING THE REAR BRAKES
3.
Bleed the rear brakes :
a 1 Raise rear of vehicle ( wheels free ).
Remove removable panels and rear wheels.
b) Place manual height control lever in c high
posi~im H ( Release screw on pressure regula-
tor tightened 1.
c) Place on each bleed screw ( 5) a transparent
tube with its other end in a clean container.
Slacken bleed screws (5).
d) nlfliuiniv broke pcdfll ~yrrlly depwssvd. ar,d s/or,
vspiuv C idiivg sprcd ).
e) Let fluid flow until it is free of air bubbles.
Then tighten bleed screws.
Release brake pedal.
f ) Remove bleed tubes.
Check bleed screws are propeily sealed by
fully depressing broke pedal.
Fit rubber protective cops.
Stop engine.
4. Fit rear wheels and removable panels
Lower vehicle to the ground.