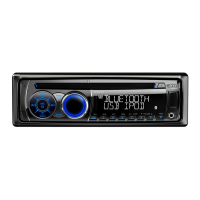
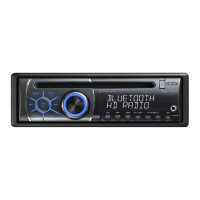
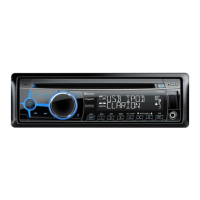
HD Radio Operations
About
HD
Radio
TM
Technology
HD Radio Technology
allows CO-quality
digital
broadcasting of your local
AM
and
FM
radio stations. HD Radio broadcasts
can
include multiple
channels
on
the same
frequency, which
is
called
multicasting. With
multicasting, you can receive up to eight
additional multicast channels: HD1-HD8.
With an HD Radio tuner connected, you
will receive HD Radio
digital
broadcasts
automatically
when tuned to a station that
offers
HD
Radio Technology.
NOTE:
Not
all
FM
or
AM
stations
offer
HD Radio (digital) broadcasting. You can
receive
both
analog
and
digital
stations
with the unit.
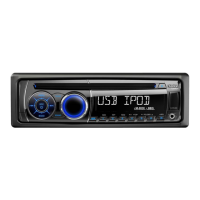
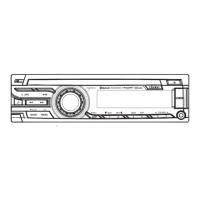
Accessing radio mode
Press
the
[c!>
I
SRC]
button
on
the front
panel
or remote
control
to
switch
to
the HD
RADIO
source, and
HD
icon
will illuminate.
Select
a
band
Press
the
[BANDIAS/tc]
button to change
between three
FM
and one
AM
bands. Each
band stores
up
to
six preset stations.
Tuning
- Seek Tuning
Press
and
hold
the
[~+~~]
or
[..,...]
button to
seek the next/previous station
automatically.
-
Manual Tuning
Press
the
[~+~~]
or
[..,...]
button to move the
radio frequency number up or down one
step.
HD
Radio multicast channels
To tune to
an
HD Radio multicast channel,
tune to the main
signal
and then press the
[MENU
I
-.:j ]
button
on
the panel. PTY
and
SUB
CH
are displayed. Select
PTY
or
SUB
CH
by rotate [VOLUME] knob and push to
confirm.
• Select
PTY
type from the category
list
by
rotate [VOLUME] knob and push.
• Select SUB
CH
by
rotate
[VOLUME]
knob
and push.
10
CZ505
• Multi channel
is
available
when a
digital
signal
is detected, the
DIGITAL
icon
will
illuminate. If
the
digital signal
becomes
unavailable,
the unit
will
revert to
Analog
reception.
Preset stations
Up
to
six
stations
on
each
band can be
stored as presets, which can then be instantly
recalled
by pressing the associated preset
button. To store a station, turn the radio
on
and select
the desired band and station. Press
and
hold
the desired preset button (numbered
one through six on the face of the radio or
remote control) for more than
1 second. When
stored, the preset number
will
appear
in
the
display. The station
is
now stored and can be
recalled
by pressing the corresponding preset
button. Repeat for the remaining five presets
on the current band and for presets on the
other four bands.
NOTE: Multicast stations can be stored as
presets,
but
the
unit
must
be
In
Digital
or
Auto
reception mode to receive them.
Preset scan
Press
the [PS/AS]
button
to
scan and
play all
preset stations for
10
seconds each. Press
[PS/AS]
again to stop scanning and
play
the
current station.
Note:
Be
careful
not
to
press and
hold
the
[PS/AS]
button for
1 second or
longer,
otherwise the
auto store function
is
engaged and the unit
starts storing stations.
Automatic
store
(AS)
Press
and
hold the
[PS/AS]
button
(1
sec.) to
select
six strong stations and store them
in
the
FM3 or
AM
band using the Auto
Store
feature.
After entering the stations into memory, the
unit
will automatically
stop at each station for
five seconds, allowing you to preview each
selection. When using the Auto
Store feature,
the new stations
replace
any stations
already
stored
in
preset memory.
Note:
You can stop the Auto
Store
function at any
time by pressing the [PSI AS] button again.
SiriusXM
Satellite
Radio Operations
Only SiriusXM® brings you more of what you
love
to
listen
to,
all
in
one
place.
Get over
140 channels, including commercial-
free music plus
the best sports, news, talk,
comedy and entertainment.
Welcome to the
world
of
satellite radio.
A SiriusXM
Vehicle
Tuner and Subscription
are required. For more information, visit
www.
siriusxm.com.
Displaying the Radio ID
Before you
listen
to
satellite
radio, you must
subscribe to the service using the SiriusXM
Radio
ID
number.
1.
Press
[c!>
I
SRC]
button
to
activate
Siri-
usXM-mode.
2.
Press
[...,..]or
[..,...]to
select channel
"0".
The unit displays Radio
10.
Radio
I
D.
Note that unit does not
display
"OCH"
when
you
tune to
channel
"0".
Activating
your
SiriusXM
Subscrip-
tion
After
installing
your
SiriusXM-Connect
Vehicle Tuner and antenna, power
on
your
headunit and
select
SiriusXM mode. You
should
be
able
to
hear the SiriusXM preview
channel
on
Channel 1
.
If
you cannot hear the
preview channel,
please
check the installation
instructions
to make sure
your
SiriusXM
Connect tuner
is
properly
installed.
After you can hear the Preview channel, tune
to Channel 0
to find the Radio
10
of your
tuner.
In
addition, the Radio
ID
is
located
on
the bottom of the SiriusXM Connect
Vehicle
Tuner and its packaging. You
will
need this
number to activate your subscription. Write
the number down for reference.
Note: the SiriusXM Radio
10
does not
include
the
letters
I,
0,
S
or
F.
In the
USA, you can activate online
or by
calling
SiriusXM Listener care:
•
Visit www.siriusxm.com/activatenow
• Call SiriusXM Listener Care at 1-866-635-
2349
For Canadian Subscriptions,
please
contact:
•
Visit www.siriusxm.ca/activatexm
• Call
XM
customer Care
at
1-877-438-9677
As
part
of
the
activation
process,
the
SiriusXM satellites will
send
an
activation
message to your tuner. When your radio
detects
that
the
tuner
has received the
activation message, your radio
will
display:
"Subscription
Updated". Once subscribed,
you
can
tune to channels
in
your subscription
plan.
Note, the activation process
usually
takes
10
to
15
minutes, but may take
up
to
an
hour. Your radio
will
need
to
be
powered
on and receiving the SiriusXM
signal to
receive the activation message.
Storing
Channel
Presets
1.
Press [BANDIASAC] to
select
the desired
band you want
to
store the preset
in.
There are 3 Satellite
Radio
Preset
bands.
Each press
of
[BANDIASAC] changes the
band:
SXM1
->
SXM2
->
SXM3
->
SXM1
2.
Tune to the desired channel
and then
press and
hold
one of the preset buttons (
1
through
6),
to
store the
channel.
3.
Repeat the procedure to store up to 5
other channels
on
to
the same band.
Note:
•
A
total
of
18
channels can
be
stored
in
the
preset memory, 6 channels for each band
(SXM1, SXM2
and
SXM3).
Tuning
Channels
using Presets
1.
Press [BANDIASAC] to
select
the desired
band of Presets
you
wish
to
access.
2.
Press the preset button
(1
through
6)
that
has your desired
Satellite
Radio
channel
stored
in
memory.
Category Browsing
1.
Press
and
hold [BANDIASAC]
to activate
the Category Browsing mode.
2.
Rotate the
[VOLUME]
knob to select
desired category.
 Loading...