19
Using the PowerView Gauge
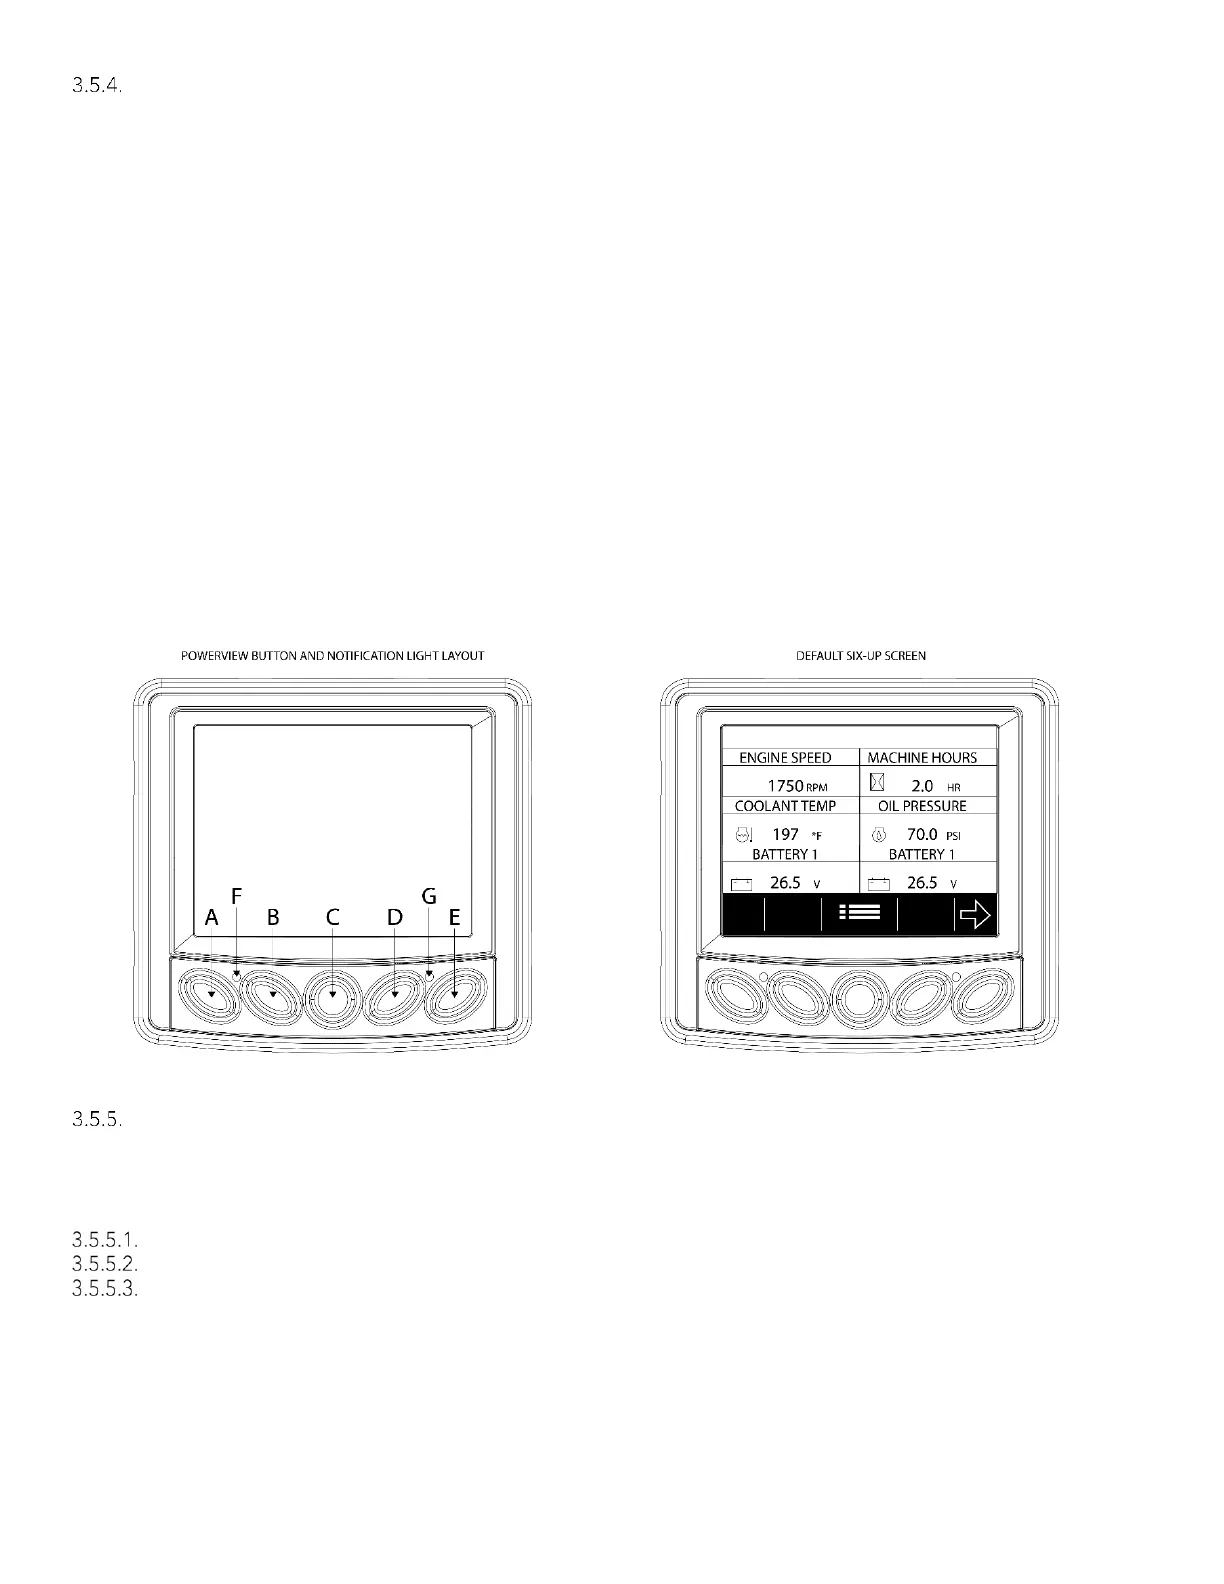
The PowerView gauge (reference Figure #3-6) allows the operator to view operating conditions and diagnostic
trouble codes (DTC’s). Press the menu key (C) to access the various engine functions in sequence. The displays
can be selected as either customary English or metric units. The following menu of engine parameters can be
displayed on the power view (refer to Figure #9E).
System voltage (battery #1)*
System voltage (battery #2)*
Percent engine load at the current rpm
Intake manifold temperature
Stored diagnostic codes from the engine
Set the units for display
View the engine configuration parameters
* These six parameters are fixed for the power-up display. (See Figure #3-7)
The PowerView gauge includes a liquid crystal display (LCD) screen. The display is programmed to show six
NFPA required engine parameters simultaneously. The diagnostic gauge uses two arrow keys (A) and (B) for
scrolling through the engine parameter list and viewing the menu list. An enter key (E) is used for selecting
highlighted items. The (D) key is an escape option to leave a menu without making a change. The red (G) and
amber (F) lights are used to signal active trouble codes received by the diagnostic gauge.
NOTE:
• Red indicator light (G) indicates a serious condition. Correct problem before restarting.
• Amber indicator light (F) indicates an abnormal condition. It is not necessary to shutdown engine
immediately but problem should be corrected as soon as possible.
Main Menu Navigation
NOTE: The display gauge must be powered to navigate the diagnostic gauge screens. This is achieved by
starting the engine or maintaining upward pressure on switch #2 from Figure #3-1. If engine start up is desired
see: Starting the Engine. All the engine values illustrated in this example, on the diagnostic gauge, indicate the
engine is running.
Starting at the default six-up engine display, press the “Menu” (C) key. (Figure 3-6)
The six items of the “Main Menu” will be displayed.
Pressing the “Arrow” (A&B) keys will scroll through the menu selections. (Figure 3-8)