7
English
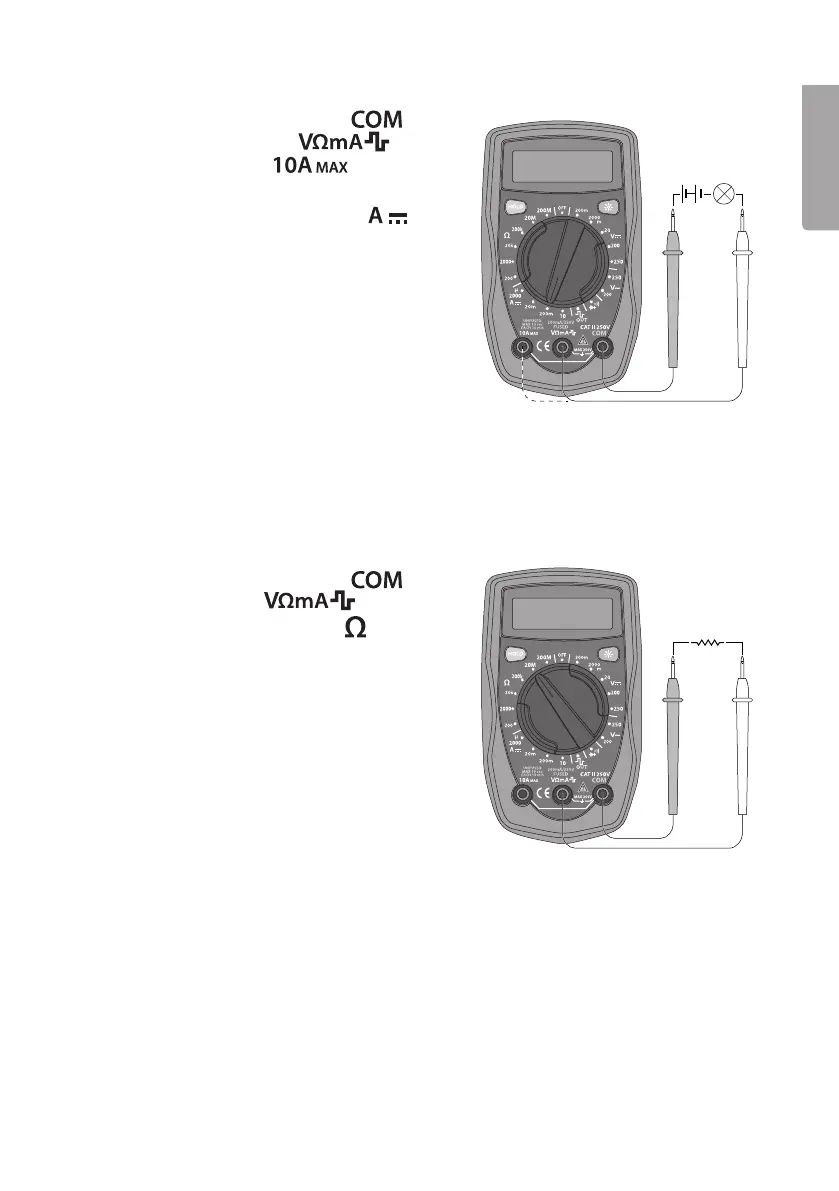
DC current measurement
1. Connect theblack test lead to
and thered test lead to
(for 0–200 mA) or to (for therange
200 mA – 10 A).
2. Setthemultifunction selector to
.
3. Connect thetest leads in series with
thecurrent source to be measured.
Readthevalue.
Warning!
Do not connect theleads in parallel with
thevoltage source when measuring current!
If in doubt about thecorrect range, start with
thehighest and work downwards.
When measuring high currents, themeter should only be connected briefly (less than
10 seconds for currents over 5 A). Thisis to prevent theshunt in theinstrument from
overheating.
The interval between two readings must be greater than 15 minutes.
Resistance measurement
1. Connect theblack test lead to and
thered test lead to .
2. Setthemultifunction selector to
and
therequired range for resistance measurement.
3. Connect thetest leads across thecircuit to
be tested. Readthevalue.
Warning: Ensurethat thecircuit to be tested is
not “live” before taking any measurements.
In order to avoid therisk of personal injury, never
measure components with avoltage higher than
60 V DC or 30 V AC.
The test leads can add 0.1–0.2 Ω to theactual resistance measured. Toobtain accurate
readings of low-resistance components, short-circuit theinput sockets beforehand,
record theshort-circuited reading and use it to remove thelead resistance error from
thereading on thedisplay.
If theshort-circuited reading is higher than 0.5 Ω, check whether any connection/test
lead is loose or damaged.
For high-resistance measurement (>1 MΩ), it is normal for thereading to take several
seconds to stabilize.
For maximum accuracy, leads that are of thehighest possible quality and as short as
possible should beused.