5
English
S E T
C /F
-
A A 1 . 5V
+
-
A A 1 . 5V
+
1 2
4
6
1
2
1
S E T
C / F
-
A A 1 . 5V
+
-
A A 1 . 5 V
+
1
1
1
2
1
S E T
C / F
-
A A 1 . 5V
+
-
A A 1 . 5 V
+
1
1
1
1
2
1
S E T
C / F
-
A A 1 . 5V
+
-
A A 1 . 5 V
+
1
1
1
%
1
1
2. Installation
Installing thetransmitter (sensor)
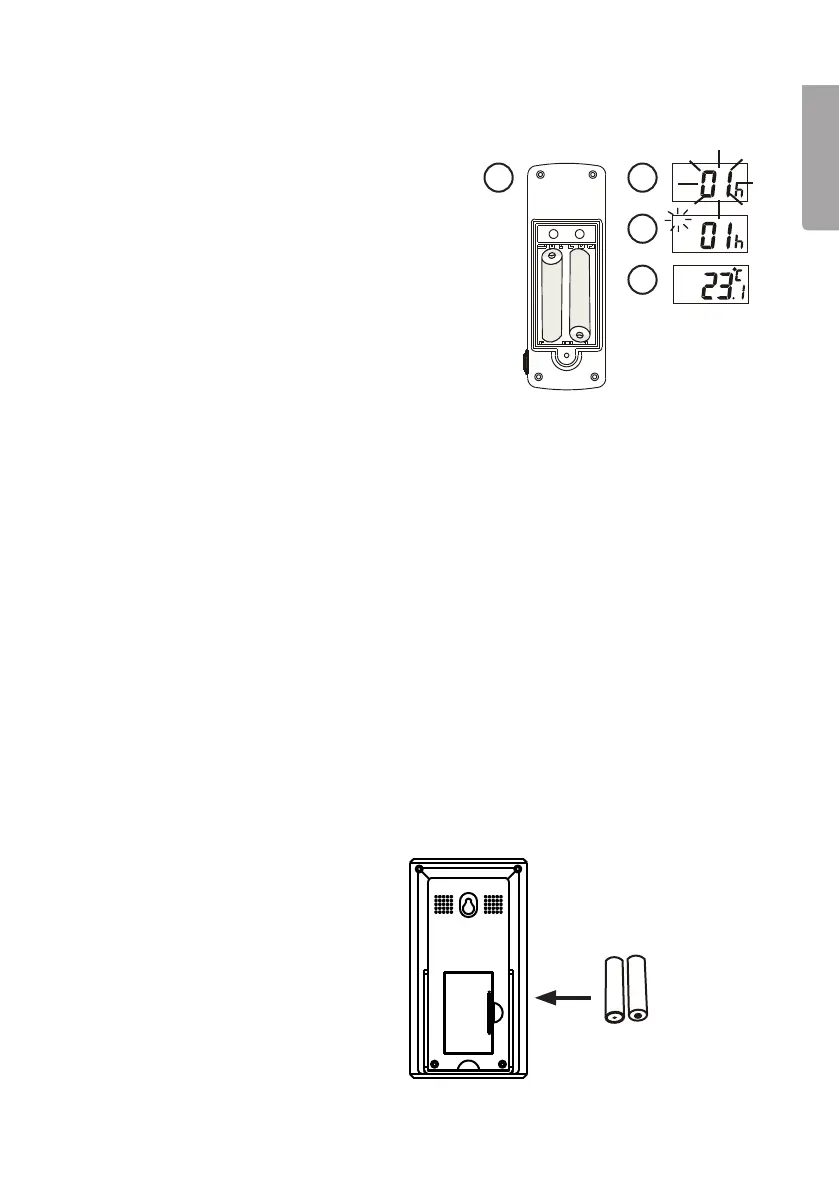
1. Removethebattery cover and insert 2 x AA/
LR6 batteries into thebattery compartment.
2. Thehouse code digit “01h” will flash for
8seconds.
3. Whilstthedigit is flashing, choose ahouse
code (01–15) using [C/F]. Makesure that all
thesensors in your system have thesame
house code.
4. Push[SET] to confirm thehouse code.
Theset channel will flash for 8 seconds.
5. Selectachannel (1–4) by pushing [C/F].
Confirmthechannel by pushing [SET] or
by not pushing any button for 10 seconds.
Ifyou only have one sensor, we recommend
that you choose channel 1.
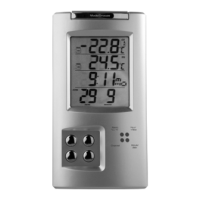
6. Thetemperature is now shown on thedisplay.
7. Alternatebetween Celsius and Fahrenheit by pushing [C/F].
8. Screwthebattery cover back securely.
9. Connecttheexternal temperature sensor.
• When thetransmitter (sensor) is installed it will send data in one-minute intervals.
• Choose another house code if your thermometer is receiving interference from
other nearby radio equipment.
• Default factory setting: house code = 01, channel = 1.
The sensor can be placed outside, it is waterproof. However, we recommend that
thesensor is placed out of therain, snow or sun, to prolong its lifespan.
If it is very cold outside, thecapacity of thebattery will be less than it would be if it were
placed indoors; furthermore thedisplay can blackout or thedigits can slow down.
Positioning thereceiver
Remove thebattery cover and
insert 2 x AA/LR6 batteries into
thebattery compartment.