12
4. Aim sensor at centre of selected belt span. Tap or
pluck the belt. The meter will beep once to indicate
that a measurement was taken.
5. Display window will show frequency result.
6. Press to toggle to newton.
7. Press to toggle to pounds.
Note: Pressing the same key a second time will return display to the hertz value.
8. Re-adjust belt tension and repeat measurement until target tension results
are attained.
MEM 1
MEM 2
MEM 3
To recall stored span and mass data simply press , or .
Depending upon where you stored the data for this specifi c drive.
N
Hz
lbs
N
Hz
lbs
N
Hz
lbs
DOWN
(Lbs)
UP
(Hz/N)
or
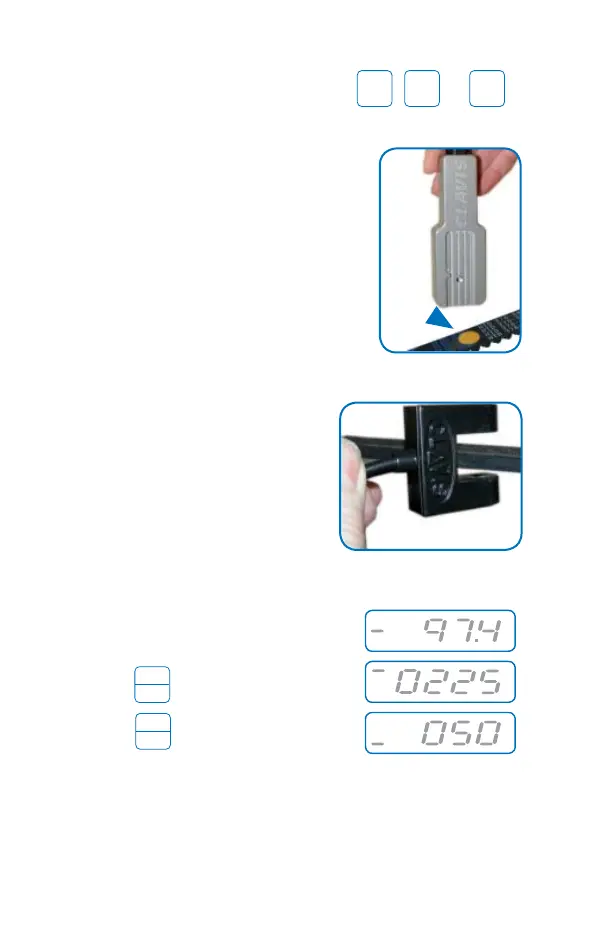
Place sensor across the selected belt span at
the mid-span position. Make sure that the jaws
of the sensor do not touch the belt.
Position the sensor so that the sensing
elements are located mid-width of the belt.
(Acoustic sensors are available from IDS for
all widths of belts). Tap or pluck the belt. The
meter will beep once to indicate that a meas-
urement was taken.
Gap 10
to 50
mm