Prior to entering a potentially contaminated area, the following inspection must be performed.
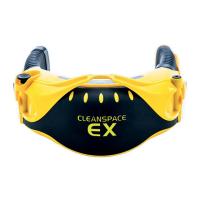
STEP 1 – INSPECT THE CLEANSPACE RESPIRATOR
•
Visually inspect all the CleanSpace Respirator components, (Power Unit, mask, harness, filter adaptor, and filter). If any
components are missing or damaged, replace them only with approved CleanSpace Respirator parts before proceeding.
Check the top and bottom case of the Power Unit, and the Filter Adaptor (if fitted) for cracks or other damage. Do not use
the CleanSpace Respirator if there is any damage.
•
Remove the filter and inspect it carefully. The seal must be clean, and free from damage of any kind. If necessary, the seal
and housing can be cleaned with a cloth dampened with water. (The filter media must not be exposed to water). Inspect
the surfaces behind the filter carefully for any sign that dust has leaked past a damaged seal. If dust is found, replace the
filter. The filter media must not be cracked or show any sign of damage. Inspect the filter carefully for any sign that it has
sustained an impact or been scratched. If any sign of impact or scratching is found, discard the filter. If the filter inspection
is satisfactory fit the filter and check that it is secure (refer to Section 12 Changing the Filter).
WARNING: NEVER CLEAN THE FILTER WITH COMPRESSED AIR OR A BRUSH. HEPA FILTERS ARE EASILY DAMAGED BY THE USE
OF COMPRESSED AIR OR BY BRUSHING.
Misuse of the CleanSpace Respirator by cleaning the filter may result in overexposure to contaminants and lead to sickness
or death.
•
Inspect that the battery has enough charge to complete the work period by pressing the Power Button. The Battery
Indicator Light(s) will illuminate to indicate the approximate charge. Refer to Section 7 Controls and Indicators. A full
charge is recommended.
•
Inspect both bellows for cuts or holes. Check that the bellows have not become distorted as this may obstruct the air
supply.
•
Inspect the mask to ensure that there are no cracks, tears, or dirt. The mask should not be warped.
•
Inspect the exhalation valve for damage or dirt. If dirt is present, remove the exhalation valve cover. Remove any
contaminants that could affect the seal of the valve. Check that the valve seat is clean. Reinstall the exhalation valve
cover. If the valve is damaged, replace the exhalation valve.
•
Inspect the harness for damage.
STEP 2 – RECALIBRATE THE POWER UNIT
The CleanSpace Respirator contains a system that detects and corrects for changes in atmospheric pressure. This system
requires recalibration whenever a change in temperature of more than 20°C is experienced.
Recalibration procedure:
1. With no mask attached, place the Power Unit on a flat surface with the keypad facing up.
2. With the Power Unit in standby mode (one or more Battery Indicator Light(s) illuminated), press and hold both the Power
Button and the FLOW TEST Button.
3. When both the blue and red indicator lights illuminate, release both buttons.
4. Do not move the Power until the red and blue indicator lights extinguish; approximately(10 – 15 seconds).
5. Recalibration is complete.
The CleanSpace Respirator automatically recalibrates the system any time it is left undisturbed in Standby Mode for more
than 20 seconds.
STEP 3 – TEST FLOW RATE ON THE POWER UNIT
The Flow Test verifies that the machine is able to deliver the Manufacturer’s Minimum Design Flow of 120 litres/minute.
1. Fit the yellow Flow Test Cap to the LEFT bellow. Note: the Power Unit depicted below has the Filter Adaptor fitted. The
Flow Test procedure is the same regardless of filter configuration.
 Loading...