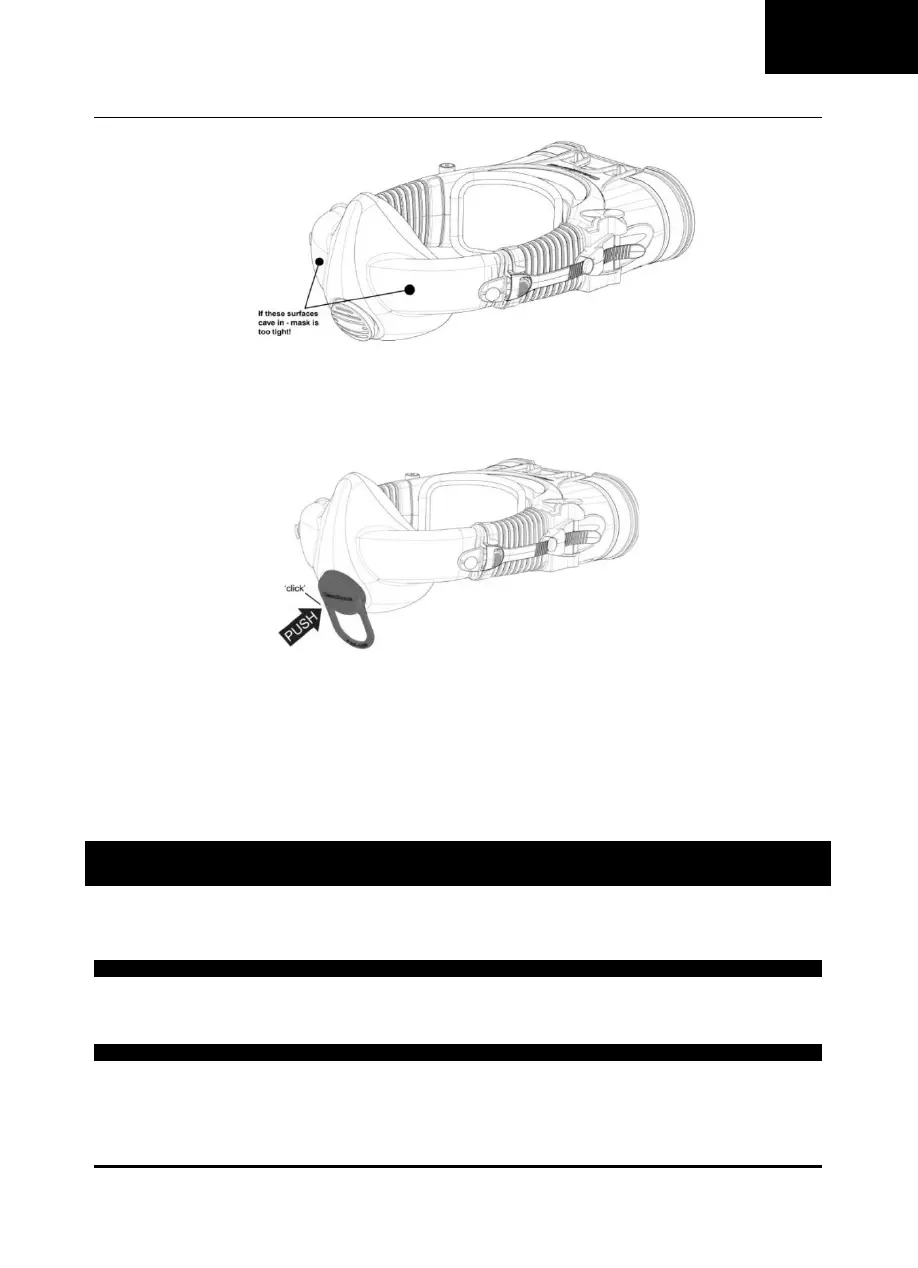
STEP 5 – CHECK MASK SEAL
A fit check must be conducted every time you wear the CleanSpace Respirator. Locate the red Seal Check Cap (PAF-1009). Fit
the Seal Check Cap over mask exhalation cap. The Seal Check Cap should snap into place. See figure below.
•
Ensure the Seal Check Cap is security fitted. No air should be escaping from the exhalation valve.
•
Breathe normally.
•
Check for leaks by f
eel
ing
around the edges of the mas
k
. Exhale firmly to raise the air pressure in the mask.
If still unsure whether a leak is present, wetting fingers may make it easier to detect.
•
If necessary, tighten the mask. To tighten the mask, place one hand against the back of the Power Unit, and the other on
the mask. Push the Power Unit and the mask towards each other. You will hear a series of clicks as the bellows tighten.
•
Ensure the bellows are adjusted symmetrically.
Do not overtighten the bellows! If the front of the mask starts to cave in, the fit is too tight, leaks may appear. Press the Adjust
Buttons to loosen.
After adjusting, check for leaks again
Tilt head up, down, left, and right, checking for leaks in each position. Adjust if necessary.
Once no leaks are detected, the mask seal check is complete.
IF A SATISFACTORY FIT CANNOT BE ACHIEVED, DO NOT ENTER THE CONTAMINATED ZONE
Remove the Seal Check Cap by gently twisting the handle so that one side of the cap comes loose from the exhalation valve.
Be careful not to dislodge the exhalation valve cover. See figure on the following page.
NEVER LEAVE THE SEAL CHECK CAP IN PLAE FOR MORE THAN TWO (2) MINUTES!