User manual / Bedienungsanleitung
Page / Seite 16 © clearaudio electronic GmbH, 2021-09
5.6 Adjustment of the antiskating
In order to proceed the next adjustment, the previously removed antiskating screw needs to be
re-inserted.
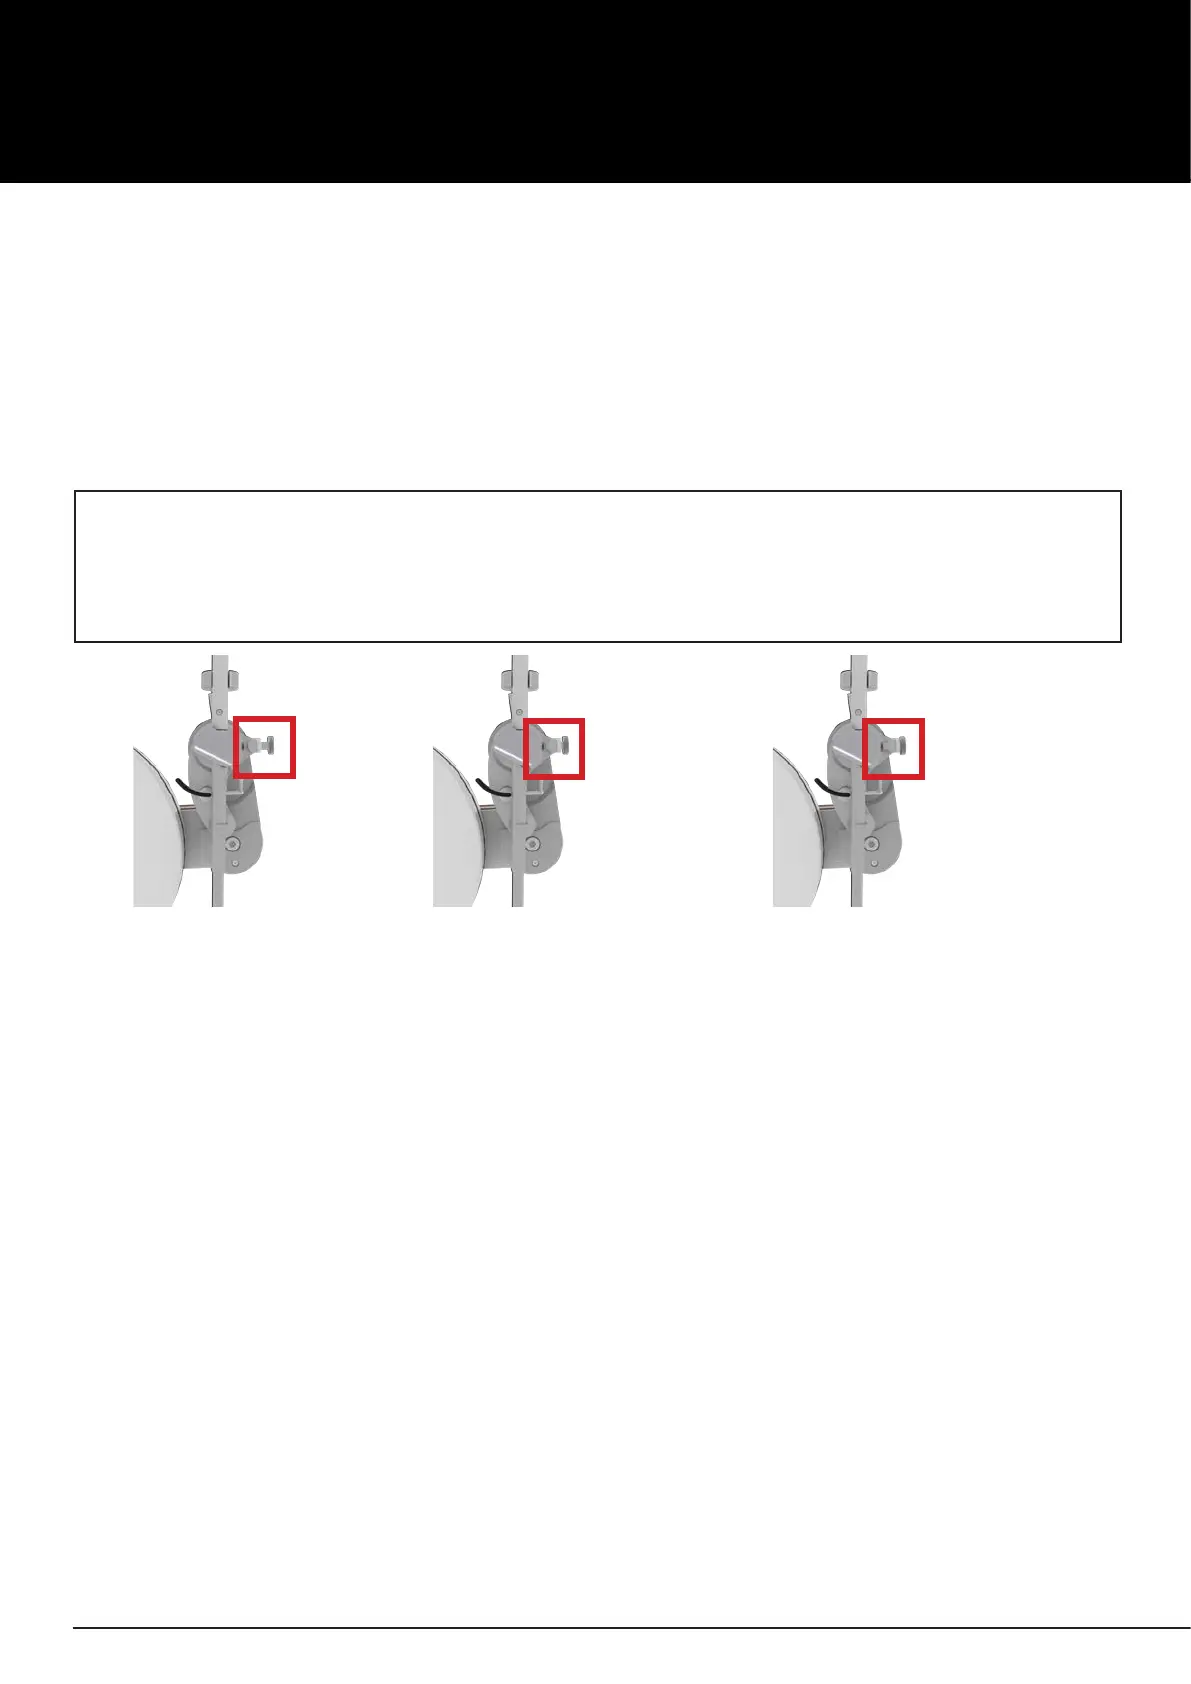
Now you can adjust the antiskating by adjusting the screw (red box Pic. 18).
This adjustment depends on the tracking force of your cartridge:
Adjustment of the antiskating: tracking force Position of the antiskating screw
Minimal antiskating > 1.0 - 1.5g > see picture 1
Middle antiskating > 1.5 - 2.0g > see picture 2
Maximum antiskating > 2.0g and higher > see picture 3
Picture 1 Picture 2 Picture 3
(minimal antiskating) (Middle antiskating) (maximum antiskating)
(Screw completly inserted)
Pic. 18: Antiskating adjustment
The tonearm adjustment is now complete.
Before connecting the tonearm to your phono pre-amplier, we recommend to re-check all settings
again and correct them if necessary.
We hope you enjoy your new
Universal
tonearm.
Your Clearaudio team