Disassembly
2 - 12 Removing and Installing a Processor
2.Disassembly
Removing and Installing a Processor
Processor Removal Procedure
1. Turn off the computer, remove the battery (page 2 - 5) and the component bay cover (page 2 - 6).
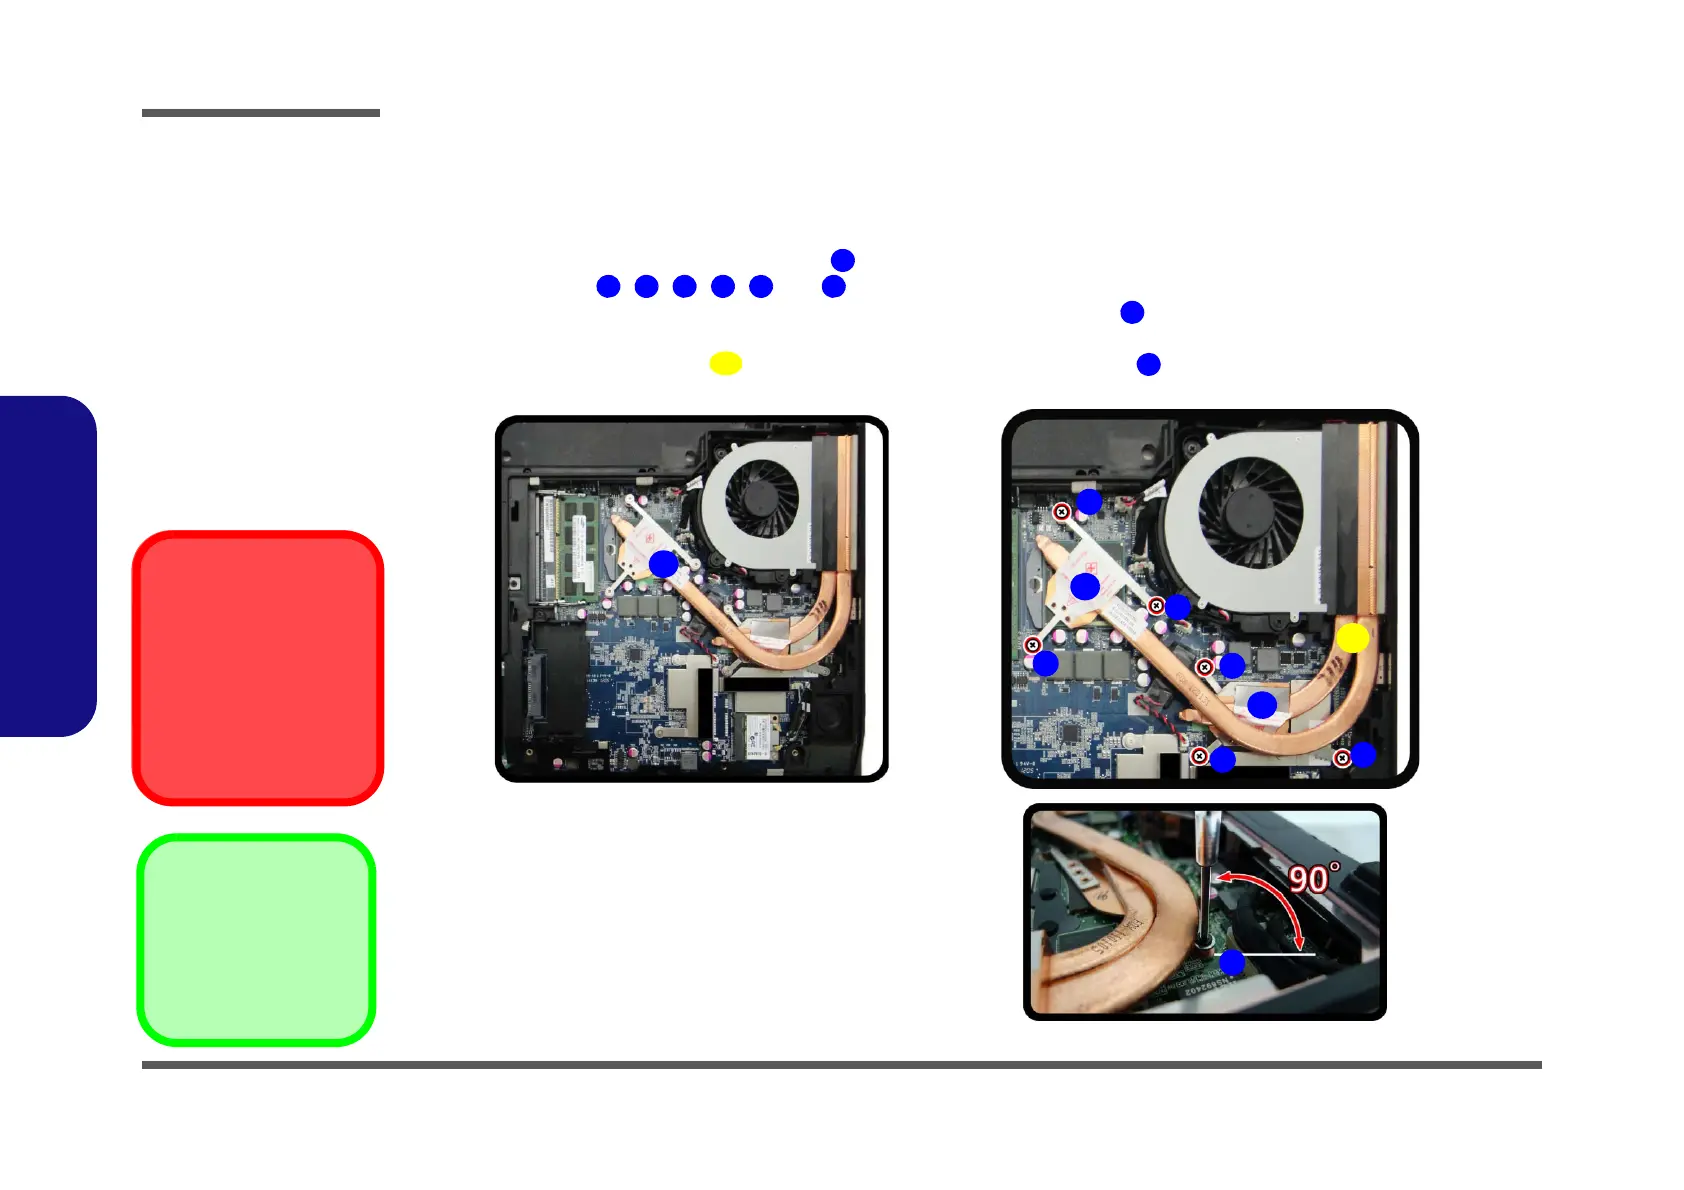
2. The CPU heat sink will be visible at point (Figure 8a) on the mainboard.
3. Remove screws
, , , , and , the reverse order indicated on the label. *Note: Make sure that the
size of the screwdriver is below 4mm. when removing or tighting screw , and its position should be at a 90
degree angle from the mainboard (Figure 8b).wo tab
4. Carefully lift up the heat sink off the computer by pulling the two tabs .
h
Figure 8
Processor Removal
a. Remove the cover and
Iocate the heat sink.
b. Remove the screws in
the order indicated.
Caution
The heat sink, and CPU
area in general, contains
parts which are subject to
high temperatures. Allow
the area time to cool be-
fore removing these parts.