clime con.fi
8
Lämmittäjänkatu 4 A, 00880 Helsinki, FINLAND · Tel. +358 (0)20 198 6600
© Climecon
A
A
C
C
C
C
D
A
A
A
A A
A
B
B
B
B
C
C
C
C
D
E
AR
E
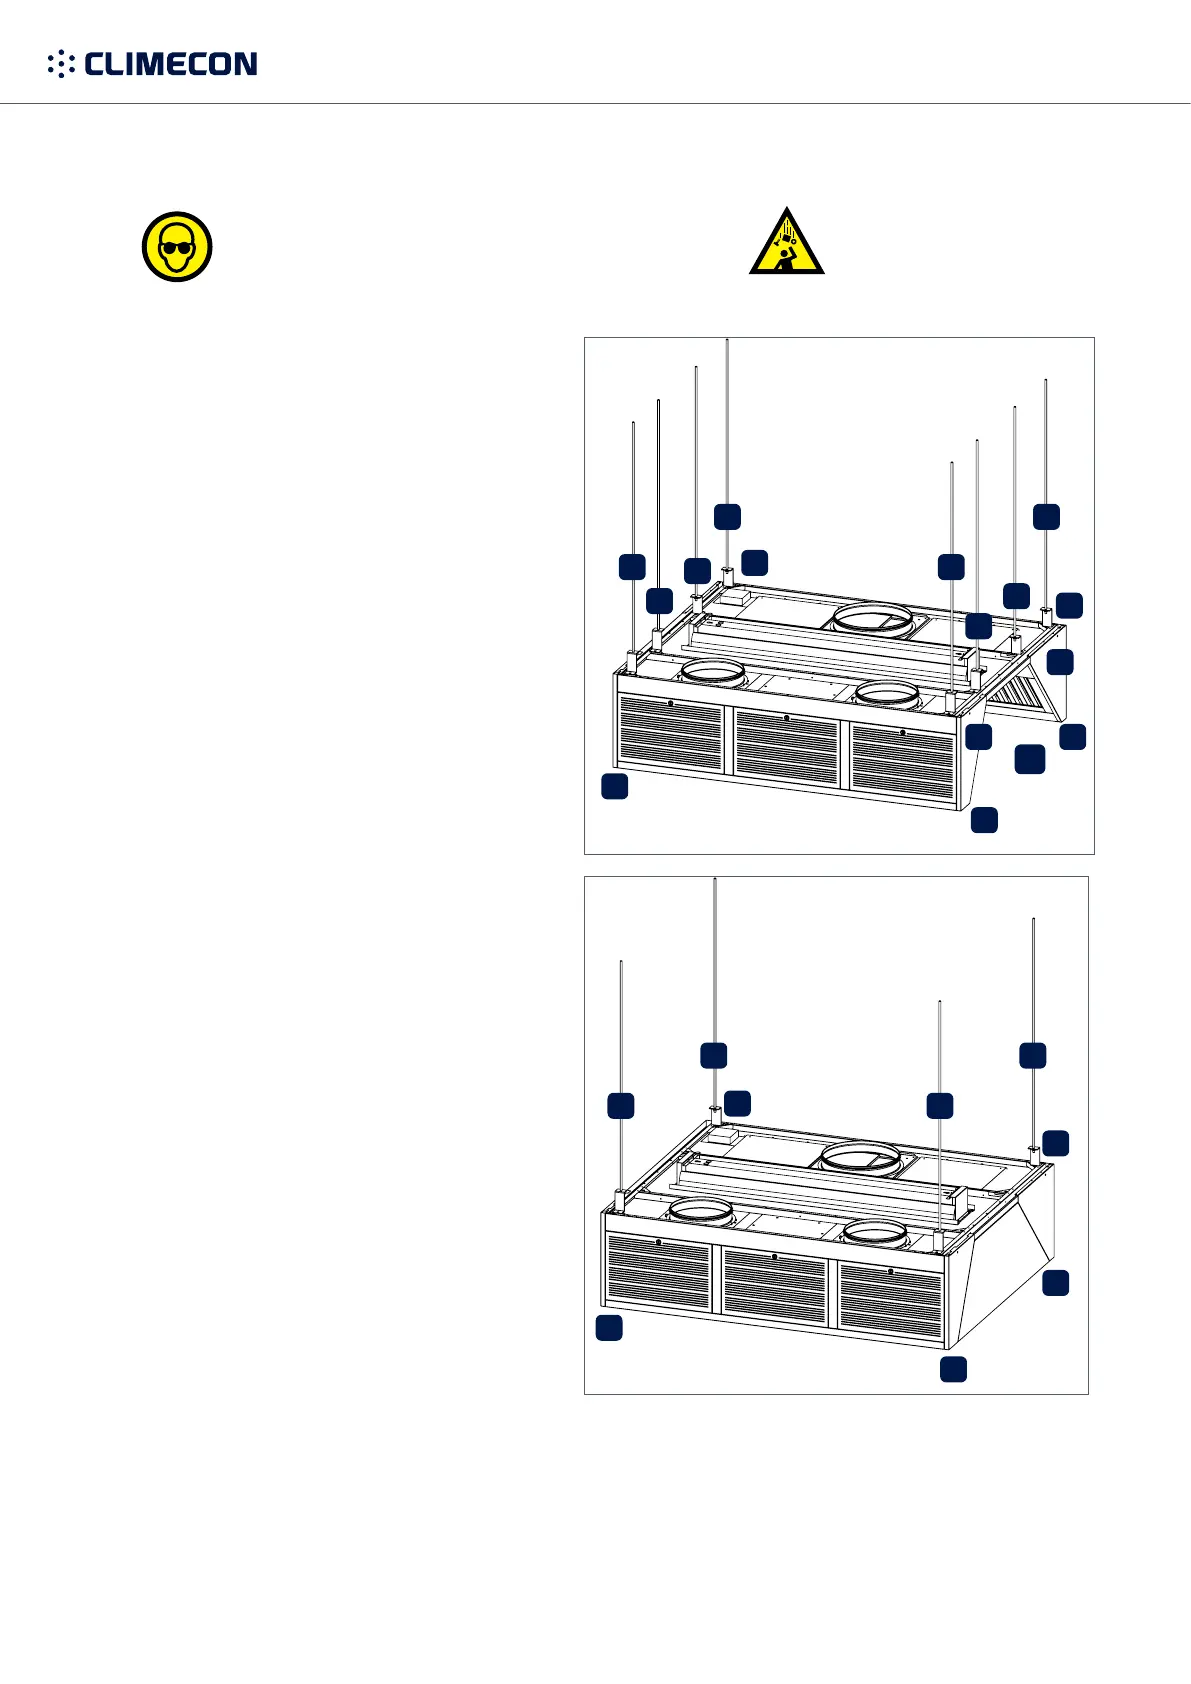
3.1 Installing the hood
1. Mount the threaded rods (A) to the ceiling
at the correct points. NOTE! The threaded
rods are not included in the delivery!
If the hood is open on the side (AR), the
hood also needs to be mounted from the
middle of its open side (B).
2.
3.
threaded rod and the hood.
4. Check that the hood is vertical.
5. Remove any possible transport supports.
6. Connect side-by-side hoods to each other
by the holes in the hood’s top edge (E),
using an M6 bolt and nut.
7. If the unit in question has several hoods,
mass, such as 3MTM.
Hybrid glue/sealant mass 760 UV
5. Installation instructions for CleanMaster® hoods
DANGER
OF FALLING DURING
PROTECTIVE GOGGLES AND GLOVES MUST BE WORN
DURING INSTALLATION AND MAINTENANCE!
 Loading...